78 of 271
X/Y Home Adjustment
Setting X/Y home requires the use of the X/Y Home Fixture (PN: 30873). The use of this xture is strongly
recommended as it provides for consistent accuracy in the home settings.
Home Adjustment Procedures:
1. Turn the machine ON.
2. Engage the emergency stop by pushing the e-stop button in.
•
CAUTION!! Use extreme care not to drop metallic objects, tools, or other conductive material
on the Main PCB when you have the base cover removed. If you drop such objects on the Main
PCB, it can severely damage the electronics which will be very expensive to repair.
3. Remove the base cover.
4. Remove the EMI cover by carefully removing the screw.
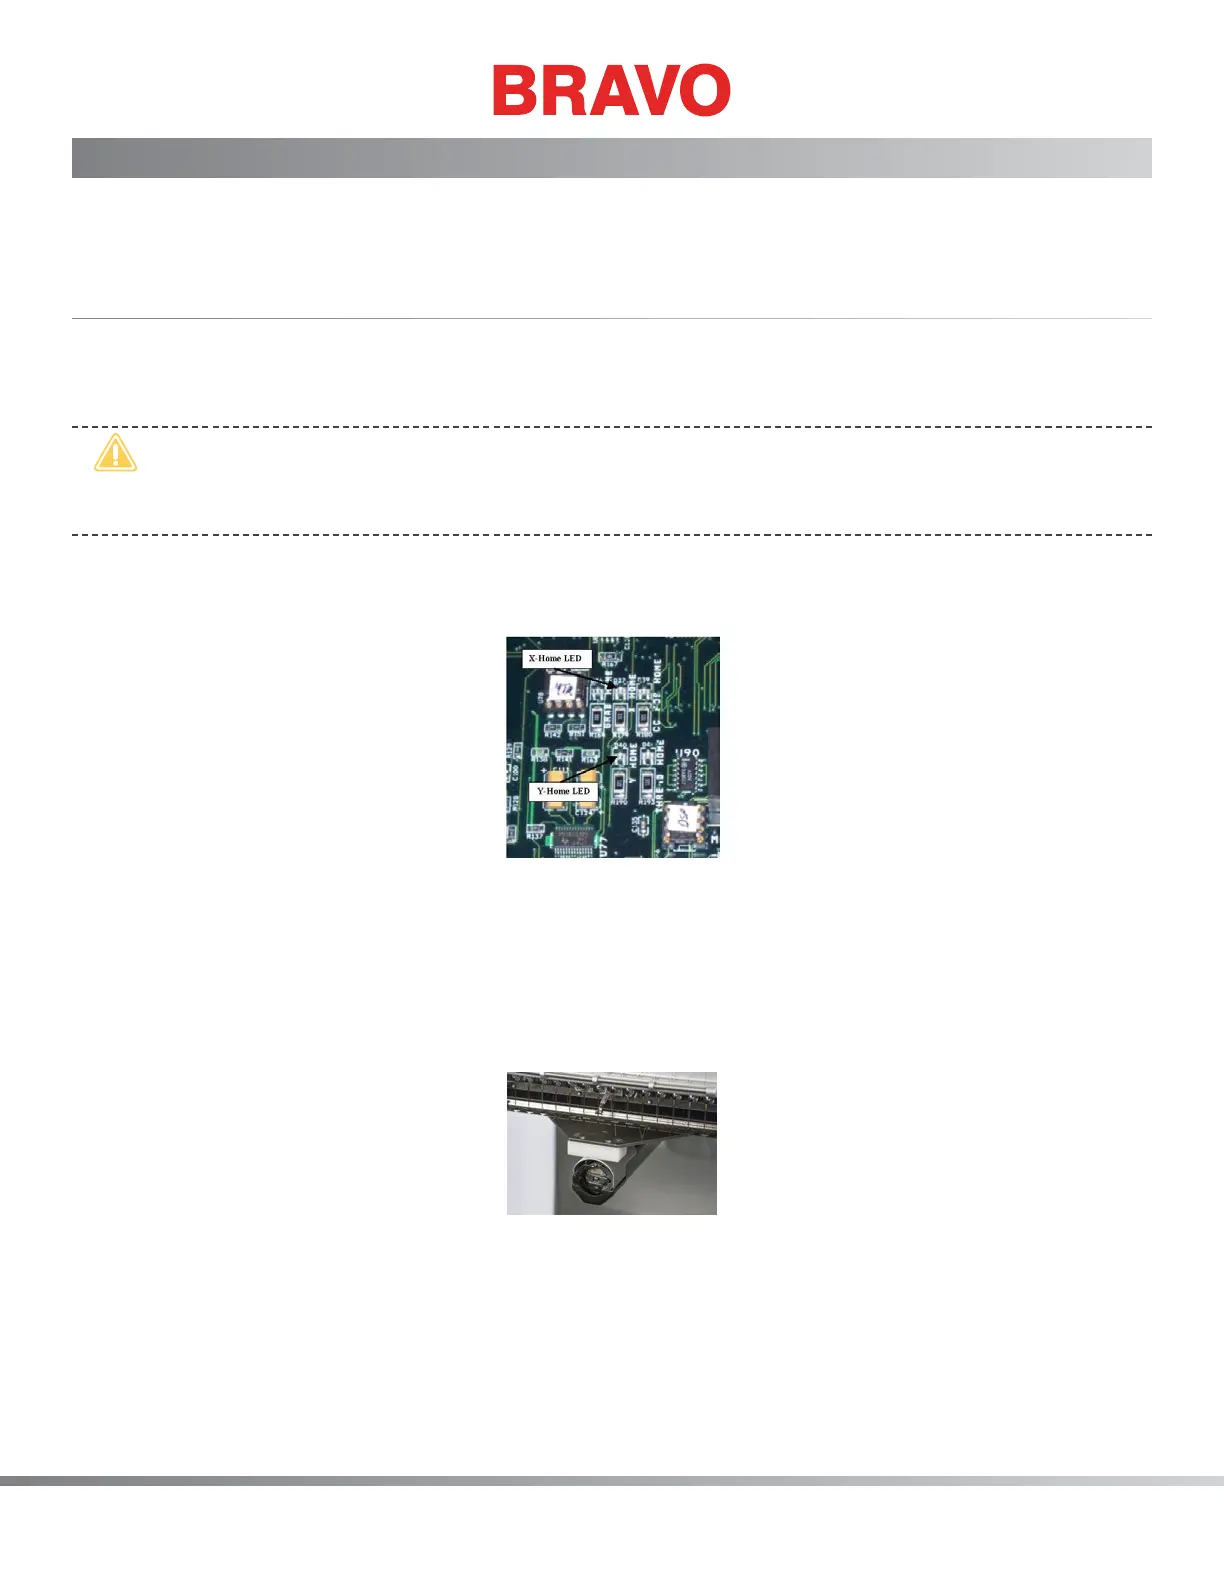
Figure 1 - X- and Y-Home LEDs
5. Being careful not to touch the main PCB while it is powered up, locate the X and Y-Home LEDs (at
locations D37 and D40 respectively). You will need to observe whether these LEDs are on or off
while setting home. Home for these LEDs is set correctly right at the point where these LEDs are
brightly illuminated (not dim or off).
6. Remove the left arm cover.
Figure 2 - X/Y-Home Fixture in Needle Plate Hole
7. Install the X/Y-home xture onto the x-carriage at the third screw hole from both ends so that the
xture is centered on the x-carriage.
8. Align the xture pin over the needle plate hole and push the front of the xture down until the
pin on the bottom of the xture front block is rmly seated in the needle plate hole as shown in
Figure 2 above.