2-38 Microtek User's Guide for Windows
• Set the SCSI ID
• Install interface card and connect scanner
• Use a terminator
Installation
Setting the SCSI ID
A SCSI ID is a number assigned to each SCSI device in your daisy
chain to differentiate the devices from one another.
The SCSI ID for Microtek scanners is set at default to 6. You won't
need to change the SCSI ID on your scanner unless another SCSI
device on your system (such as a tape drive or CD-ROM drive) is
using the same number.
If you are connecting the scanner to the MS-PNR card that was
supplied with your scanner, you don't need to change the SCSI ID;
simply go to the next section. The SCSI ID needs to be changed
only in the following situations:
• If you are installing two Microtek scanners using the MS-PNR
card. In this case, the SCSI ID of one of the scanners must be
changed to avoid duplication.
• If you are installing a third-party ASPI card with other SCSI
devices already connected to the ASPI card. In this case,
change the SCSI ID of your Microtek scanner.
CAUTION
6
+
_
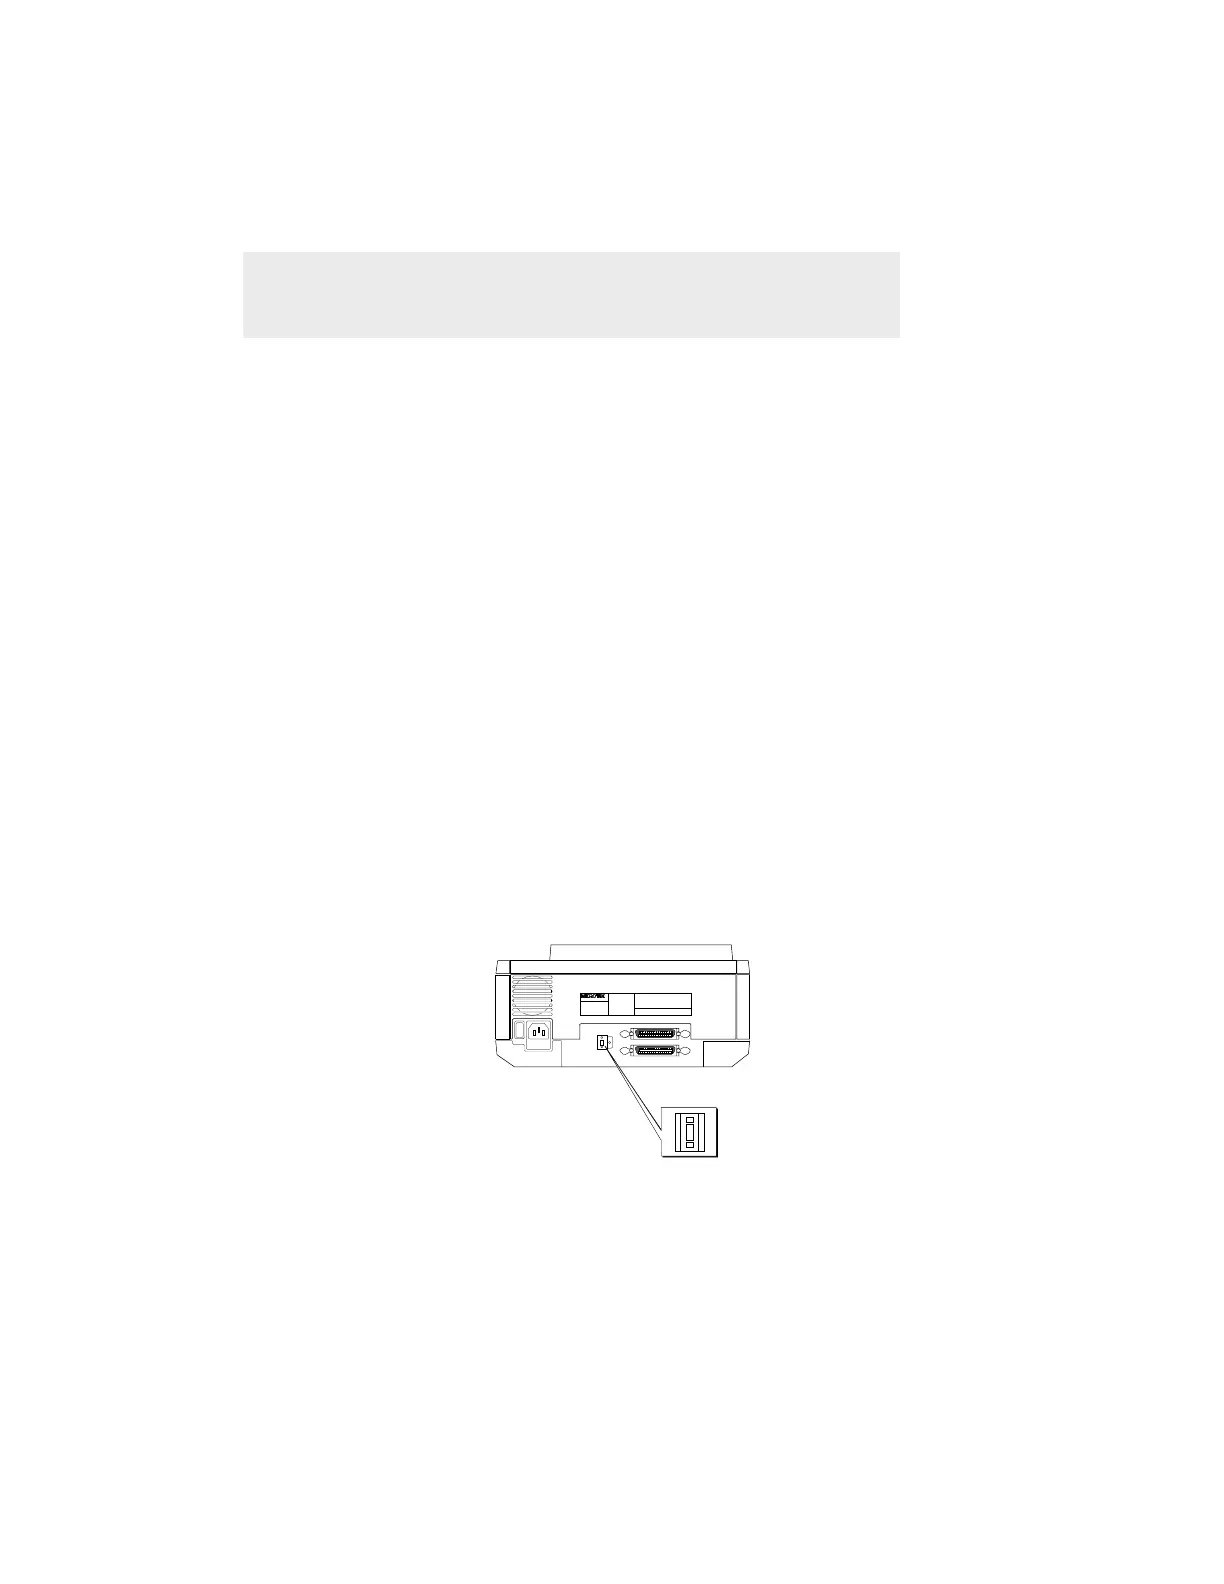
To set the SCSI ID number:
Locate the SCSI ID selector, which is on the back panel. To change
the SCSI ID, press the push-button selector. See additional notes at
the end of this section.