4-5Sample Scanning
Scanning a single-bit image (line art or halftone)
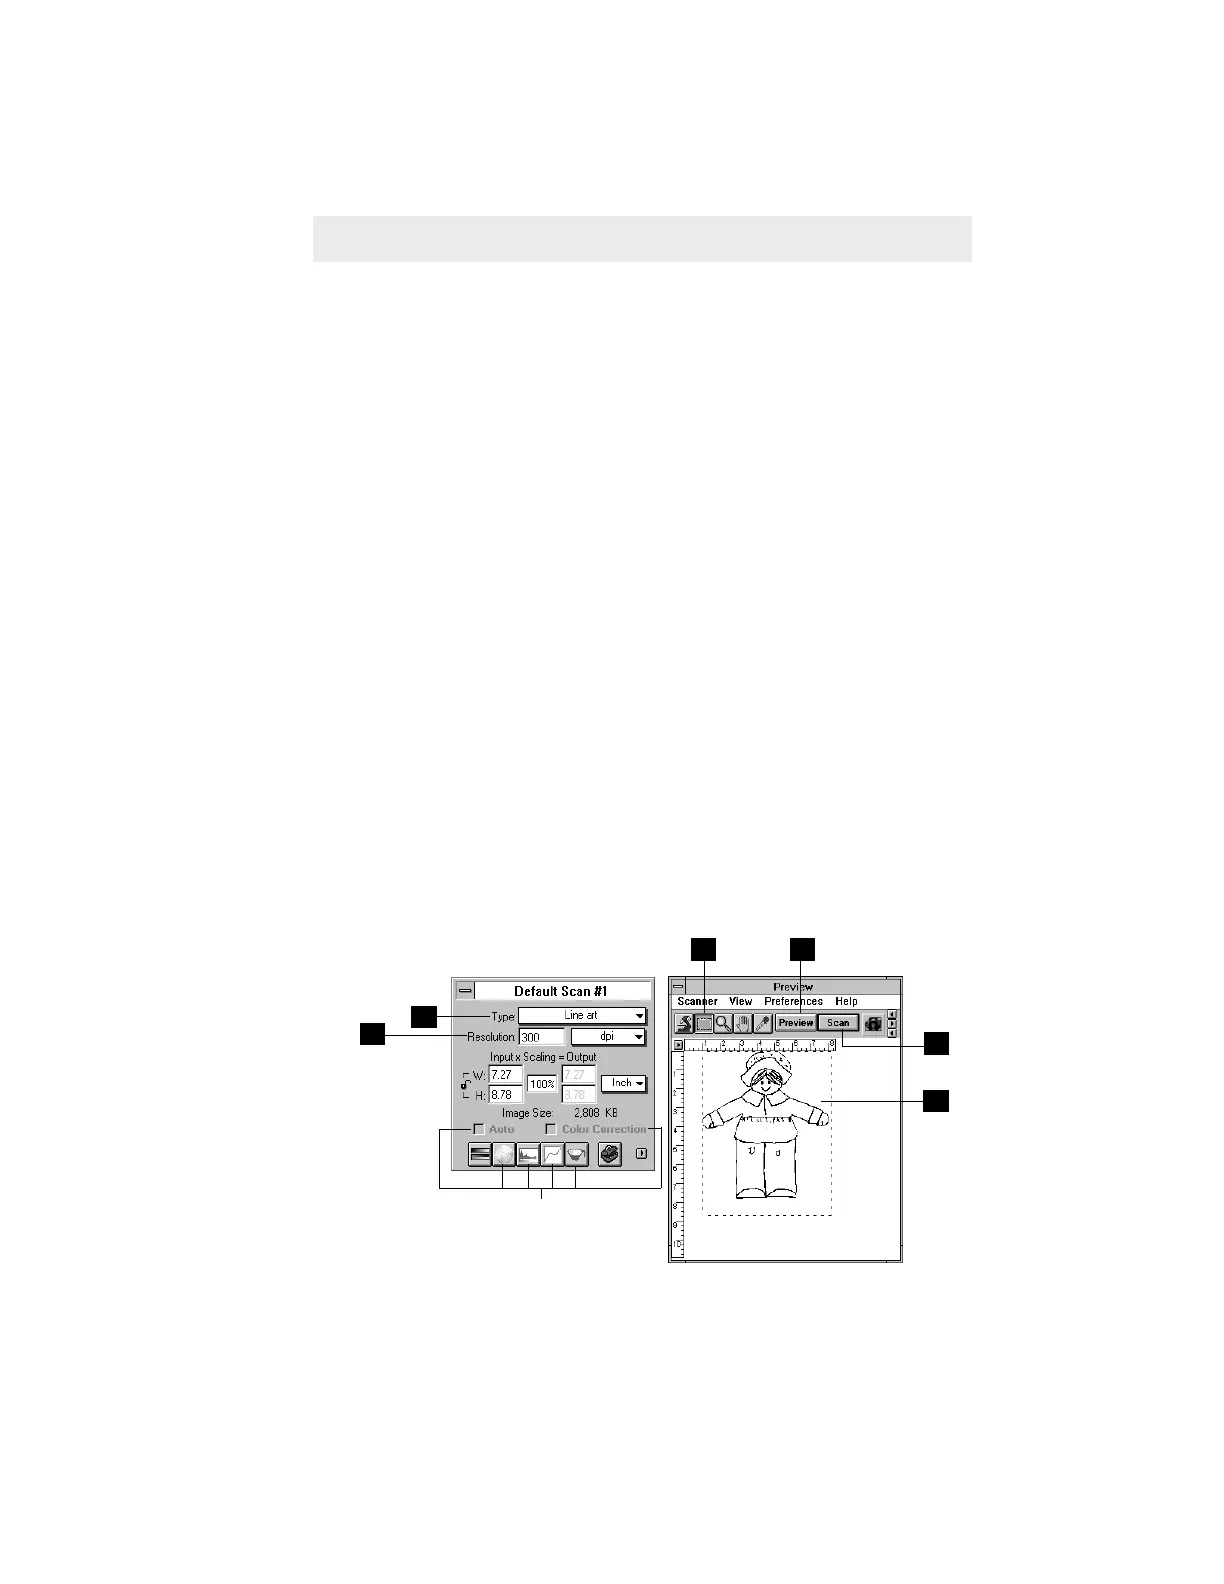
1 Go to the Settings window, and from the Type drop-down menu, make
your selection.
• Choose Line Art if you're scanning purely black or white images with no
shades of gray, such as pen-and-ink drawings, logos, and sketches. Line
art also applies if you're scanning an image with just one color (like a
mechanical drawing or blueprint).
• Choose Halftone to scan the image as a halftone, and select the halftone
pattern from the submenu that appears. A halftone image is like one you
see in newspapers — there is only black and white, but the eye is fooled
into seeing gray because of the way dots in the image are arranged.
2 Click on the Preview button in the Preview window. In moments, a
preliminary view of the image will appear in the preview area.
3 Click on the Scan Frame tool. With the pointer now a crossbar, move to the
image and define the scan frame (by holding down the mouse and dragging
it to draw a box). The scan frame will be enclosed by dotted lines and will
be the actual area that is scanned when you click on the Scan button.
4 At the Settings window, set the resolution. For now, select 300 dpi. But for
optimal results, select a resolution that matches the resolution of your
output device.
5 To scan the image, click on the Scan button in the Preview window. The
image will be scanned and delivered to Adobe Photoshop or your image-
editing software, where it can be saved as a file.
Features grayed out in
line art mode
1
4
5
3
3
2