4-6 Microtek User's Guide for Windows
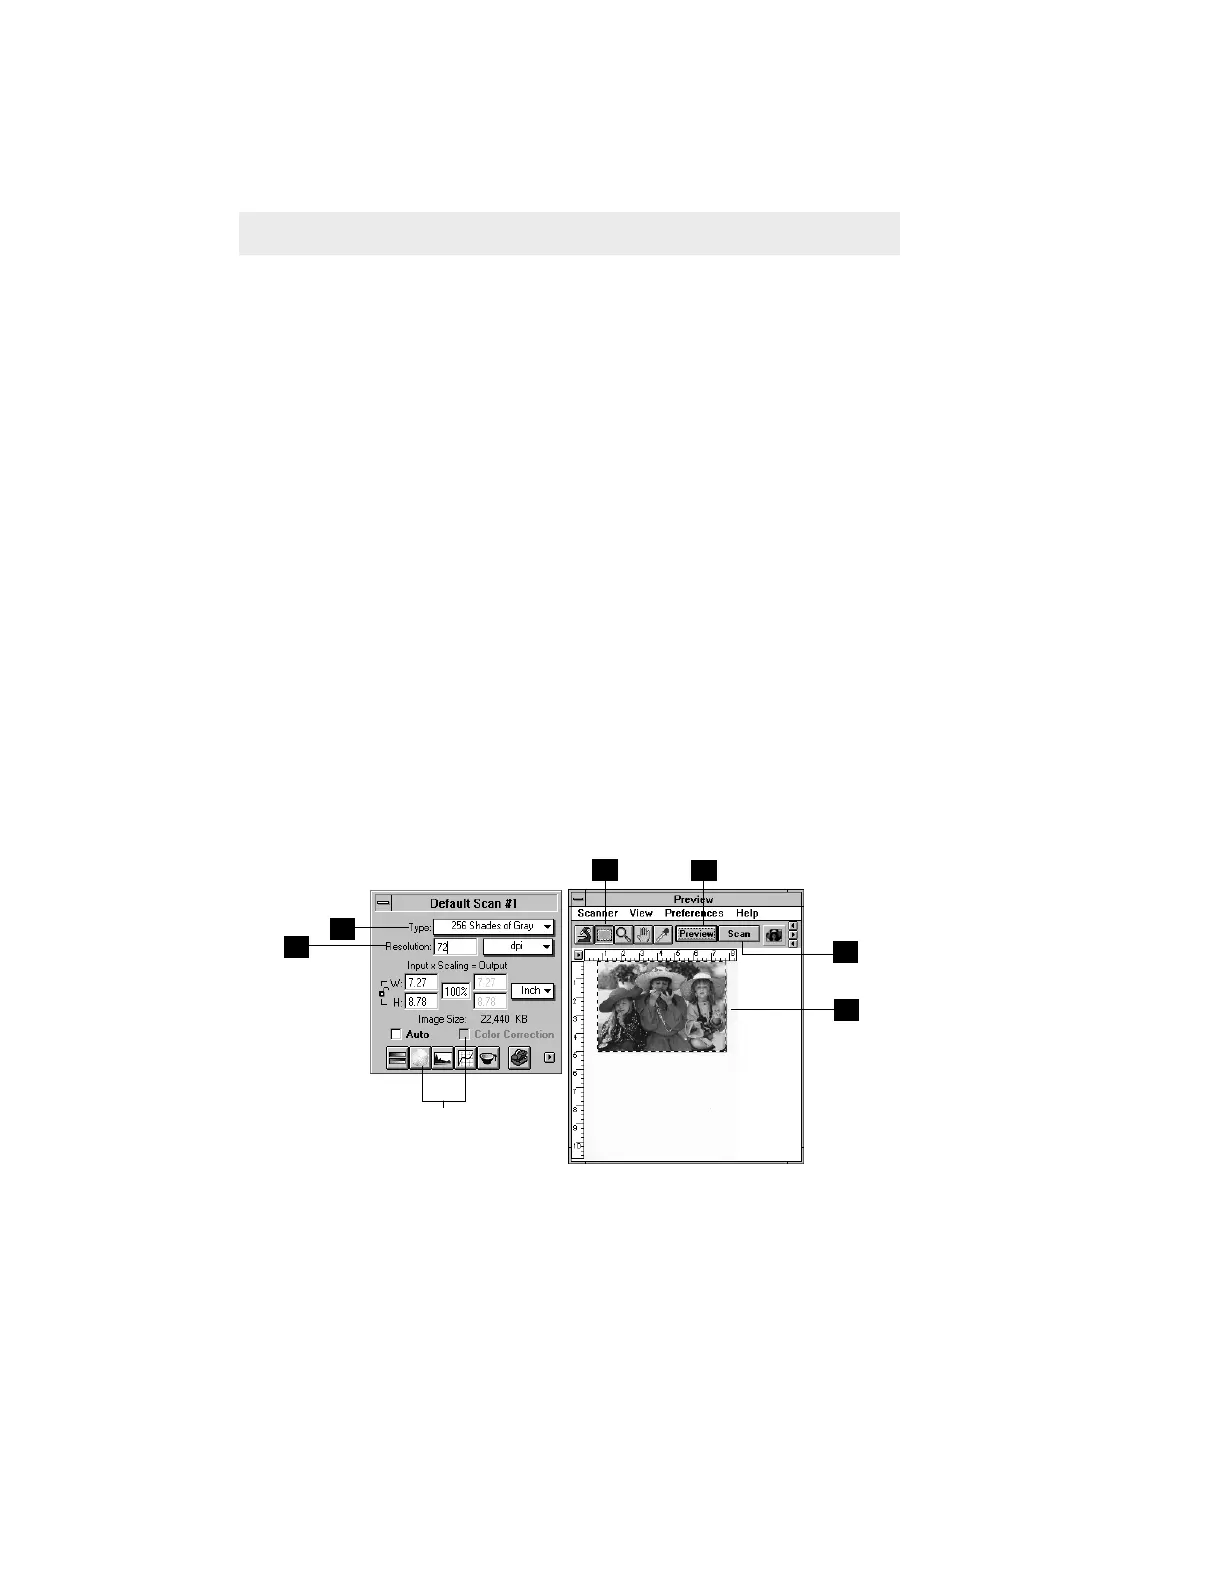
1 Go to the Settings window, and from the Type drop-down menu, choose
256 shades of gray.
2 Click on the Preview button in the Preview window. In a few moments, a
preliminary view of the image will appear in the preview area.
3 Click on the Scan Frame tool. With the pointer now a crossbar, move to the
image and define the scan frame (by holding down the mouse and dragging
it to draw a box). The scan frame will be enclosed by dotted lines and will
be the actual area that is scanned when you click on the Scan button.
4 At the Settings window, set the resolution. Take note of the following:
• Do not select a resolution setting which is the same as that of your
printer, unless you have a dye-sublimation printer. For now, set resolu-
tion at 72 or 75 dpi.
• For laser printers, as well as inkjet and bubblejet color printers, 75 to 100
dpi is enough.
• For outputting to an typesetting machine at 1200 or 2400 dpi, set
resolution at 300 dpi.
5 To scan the image, click on the Scan button in the Preview window. The
image will be scanned and delivered to Adobe Photoshop or your image-
editing software, where it can be saved as a file.
Scanning a grayscale image
Tints tool and Color
Correction feature grayed
out in grayscale mode
3
4
5
2
3
1