PRELIMINARY
miniDSP Ltd, Hong Kong / www.minidsp.com / Features and specifications subject to change without prior notice 13
2 HARDWARE OVERVIEW
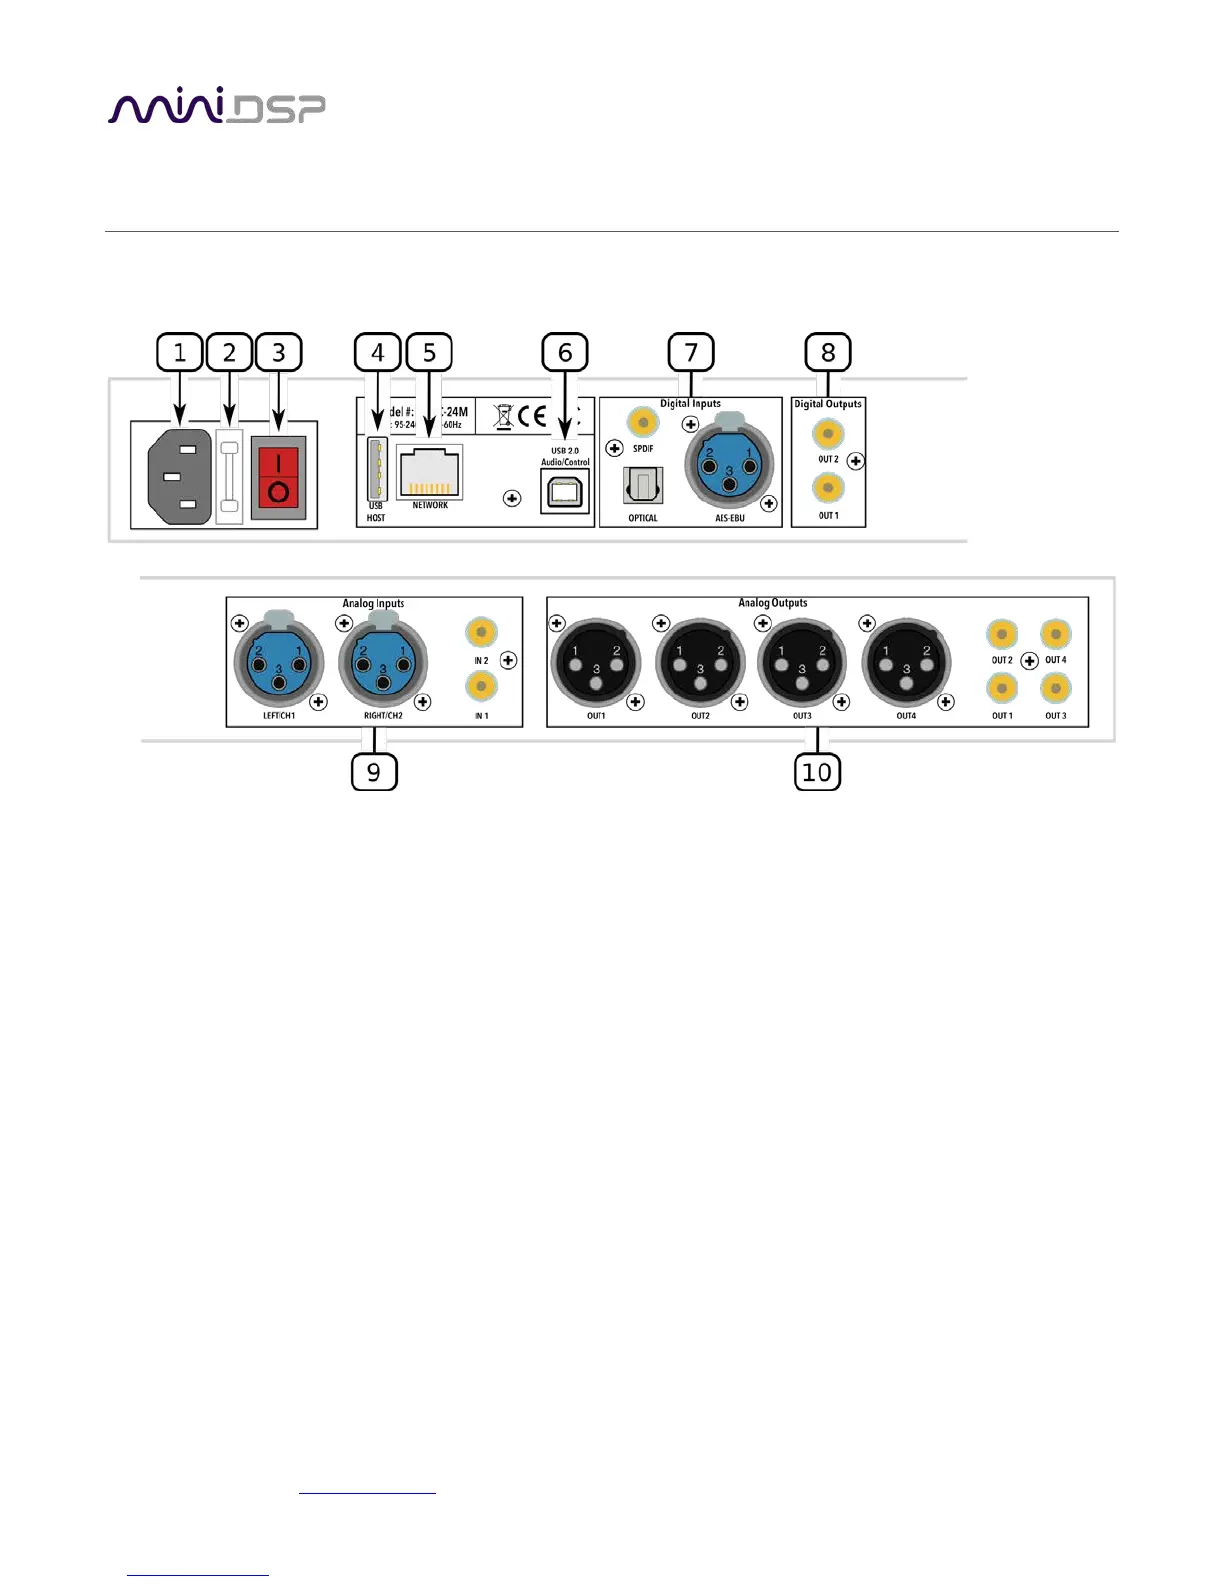
2.1 REAR PANEL CONNECTIONS – SHD
1. Power inlet. Connect a standard IEC C13 cable here.
2. Fuse holder. If the fuse needs replacing, remove the power cable. Then use a small flat-bladed screwdriver
to lever out the fuse and fuse holder. Replace the fuse with a 250V rated [TBD] A fuse and push the fuse
holder firmly back in.
3. Power switch.
4. Host port for USB music sticks.
5. Ethernet port for network music streaming.
6. USB port for control and audio streaming. Connect to an available USB port on your computer.
7. Digital inputs. Connect digital sources here using optical (TOSLINK SPDIF), coax (RCA SPDIF), or AES/EBU
(XLR) connections. Sample rates from 32 up to 216 kHz are supported. The three digital inputs can be
separately selected with the front panel encoder or the remote control.
8. Digital outputs. If you prefer to use your own DAC or DACs, connect them here using RCA SPDIF. Each DAC
must be capable of running at 24-bit 96 kHz.
9. Analog inputs. Connect one or two analog sources here, using balanced XLR or unbalanced RCA
connections. The two analog inputs can be separately selected with the front panel encoder or the remote
control. See Specifications for maximum input voltages.
10. Analog outputs. Connect power amplifiers here using balanced XLR or unbalanced RCA connections. See
Specifications for maximum output voltages.