PRELIMINARY
miniDSP Ltd, Hong Kong / www.minidsp.com / Features and specifications subject to change without prior notice 38
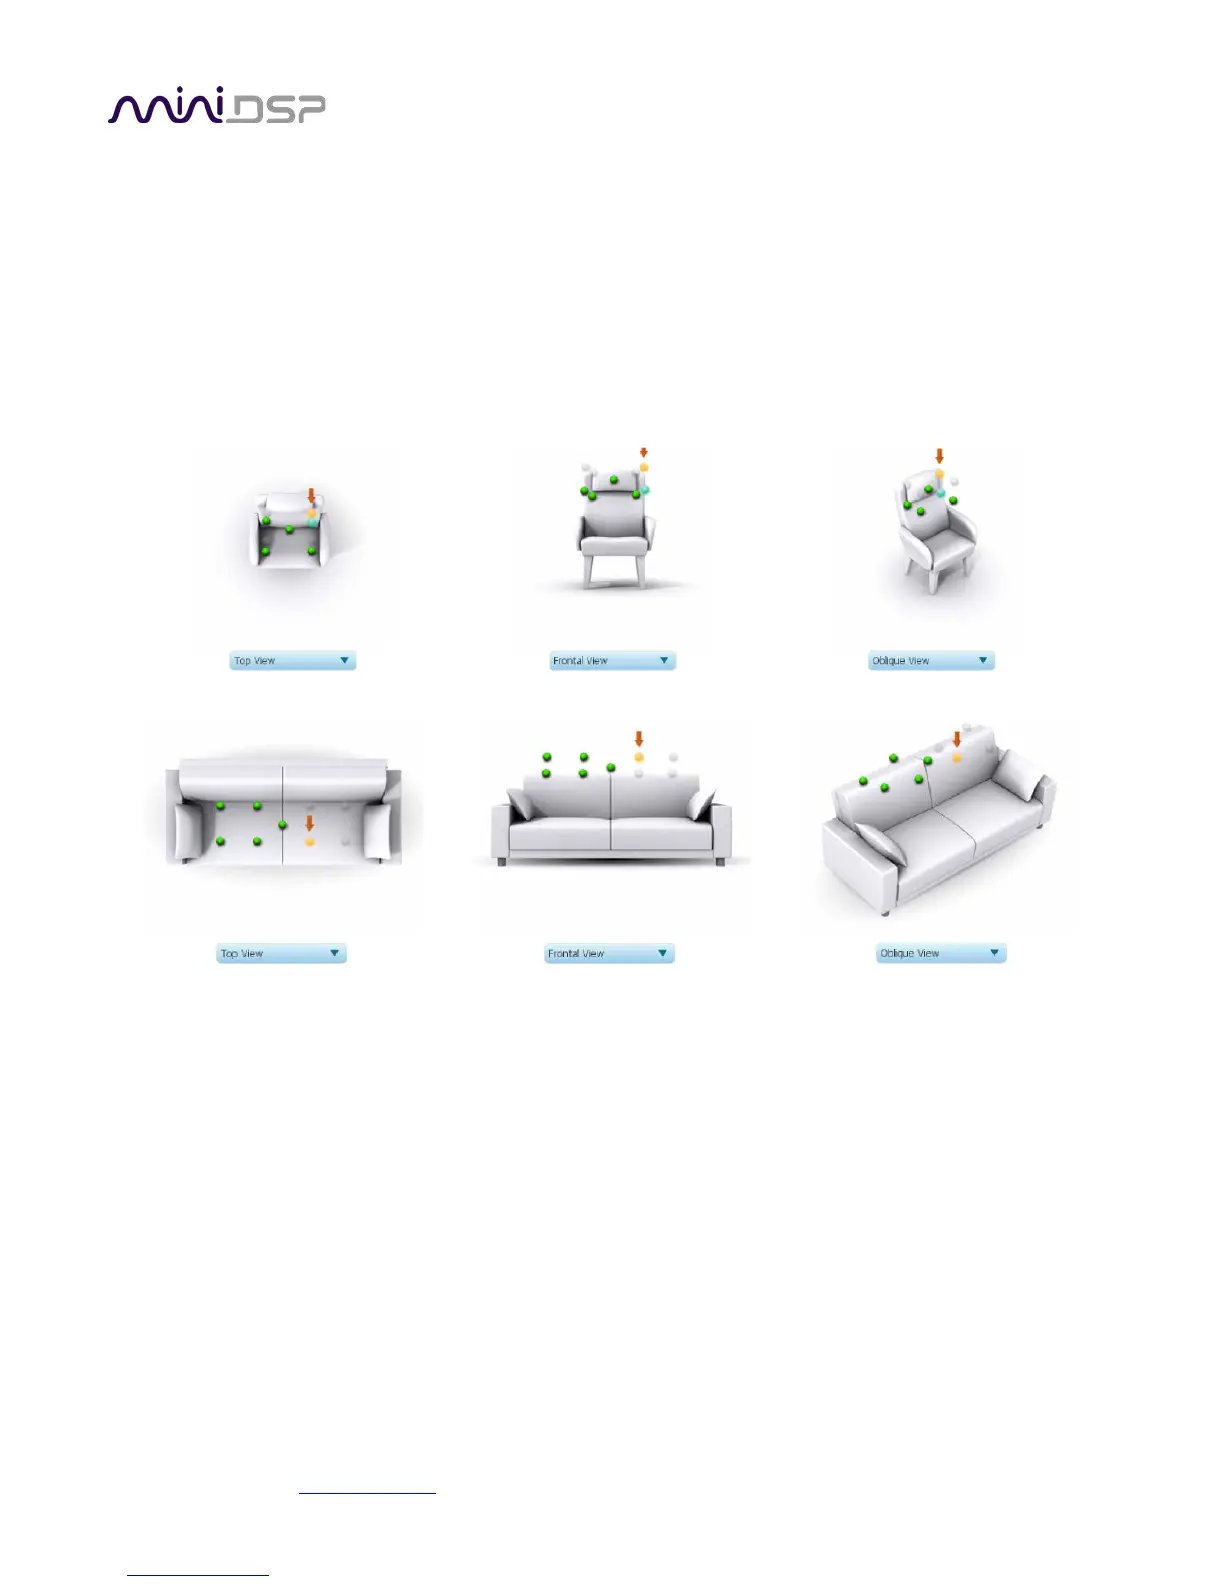
6.4.1 Listening environment
DLCT presents two different listening environments as a visual guide to positioning the microphone for each
measurement: Chair, for a single listening seat, and Sofa, for multiple listening seats. Select a listening
environment by clicking on the chosen icon.
The pictorial representation of the selected listening environment has a set of dots marking the microphone
locations. Completed measurements are green, while the next measurement to be done is yellow and has a red
arrow marker pointing to it. A drop-down menu underneath selects three different views, which should be used
to help you place the microphone in the correct location.
While the visual guide indicates a suitable set of microphone locations, these locations can be varied to suit
individual circumstances. It is, however, imperative that the first measurement is taken in the center of the
listening area, as this measurement is used to set the levels and delays of each channel. The subsequent eight
measurements should be well spread out over the entire listening area so that Dirac Live can acquire a good set
of measurements that capture the acoustic behavior of the room. Placing all microphone locations too close to
each other may result in “over-correction” that will sound dry and dull.
For example, if using the Chair listening area, spread the microphone positions over a circle with a diameter of
at least a meter (three feet) and vary the microphone height from the central position by at least 30 cm (one
foot) up and down. If using the Sofa listening environment, spread the measurement locations over the full
listening area and vary the height up and down by at least 30 cm (one foot).
A different set of locations other than those indicated by the visual guide and the above guidelines can be used
if necessary. The important thing is to ensure that the measurement locations are spread out over the whole
listening area and that the microphone is moved a sufficient distance vertically as well as horizontally.