PRELIMINARY
miniDSP Ltd, Hong Kong / www.minidsp.com / Features and specifications subject to change without prior notice 39
In some cases, such as when the listening area is very close to the loudspeakers or the loudspeakers have a very
narrow dispersion pattern, the size and in particular the height of the measurement area can be reduced, to
avoid discrepancies caused by varying output response from the speakers themselves.
6.4.2 Executing measurements
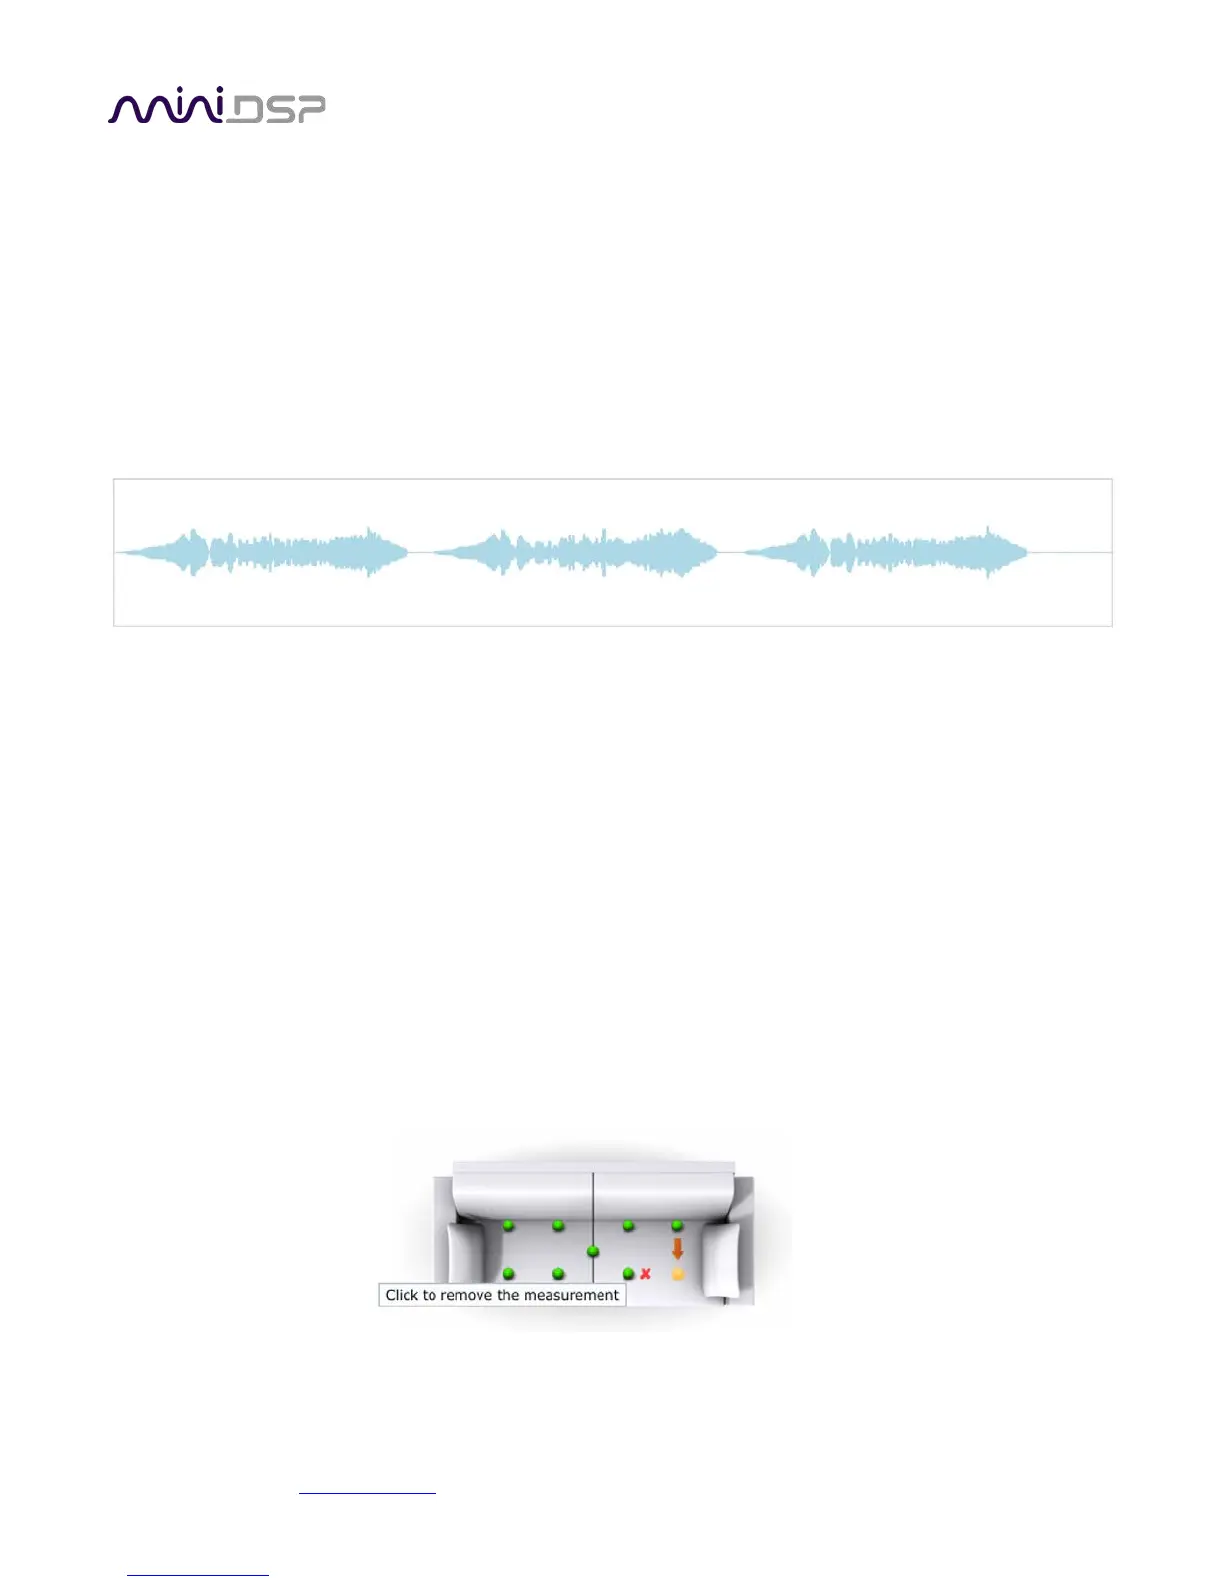
With the microphone in place at the central location and pointed between the two speakers, click on the Start
button. The processor will generate a test signal, audible as a frequency sweep through the left speaker, then
the right, and then the left again. While the measurement proceeds, the time-domain graph of the captured
audio signal is displayed at the bottom of the measurement tab. (This graph is related to the magnitude
response but is not the same display. Its purpose is to verify that the recorded signal level is in a suitable range.)
At the completion of the measurement, the status bar will update with a progress indicator as the program
performs calculations on the measurement. If the measurement was successfully captured, the red arrow
marker will advance to the next location to be measured. If the program indicates that the measurement was
not successful, you will need to take corrective action. The most common error is related to signal level:
• The measurement signal is too low to ensure a clean capture.
• The measurement signal is too high, and the audio signal has exceeded the maximum level (clipping). This is
shown in red on the signal graph.
In either of the above cases, go back to the Output & Levels tab and adjust Output volume or Input gain. Then
re-run the measurement. (You do not need to redo the measurements you have already successfully
completed.)
6.4.3 Viewing and redoing measurements
Click on the green dot for any completed measurement to display its measured time-domain graph.
After clicking on a green dot, a small red “X” will appear next it. Click on the “X” to delete the measurement. The
status bar will indicate that the program is recalculating parameters.
To redo a measurement, delete it, move the microphone to the appropriate location, and click on Start. Note: if
more than one measurement is deleted, the marker will move to the lowest-numbered one.
6.4.4 Completing the measurements