PRELIMINARY
miniDSP Ltd, Hong Kong / www.minidsp.com / Features and specifications subject to change without prior notice 40
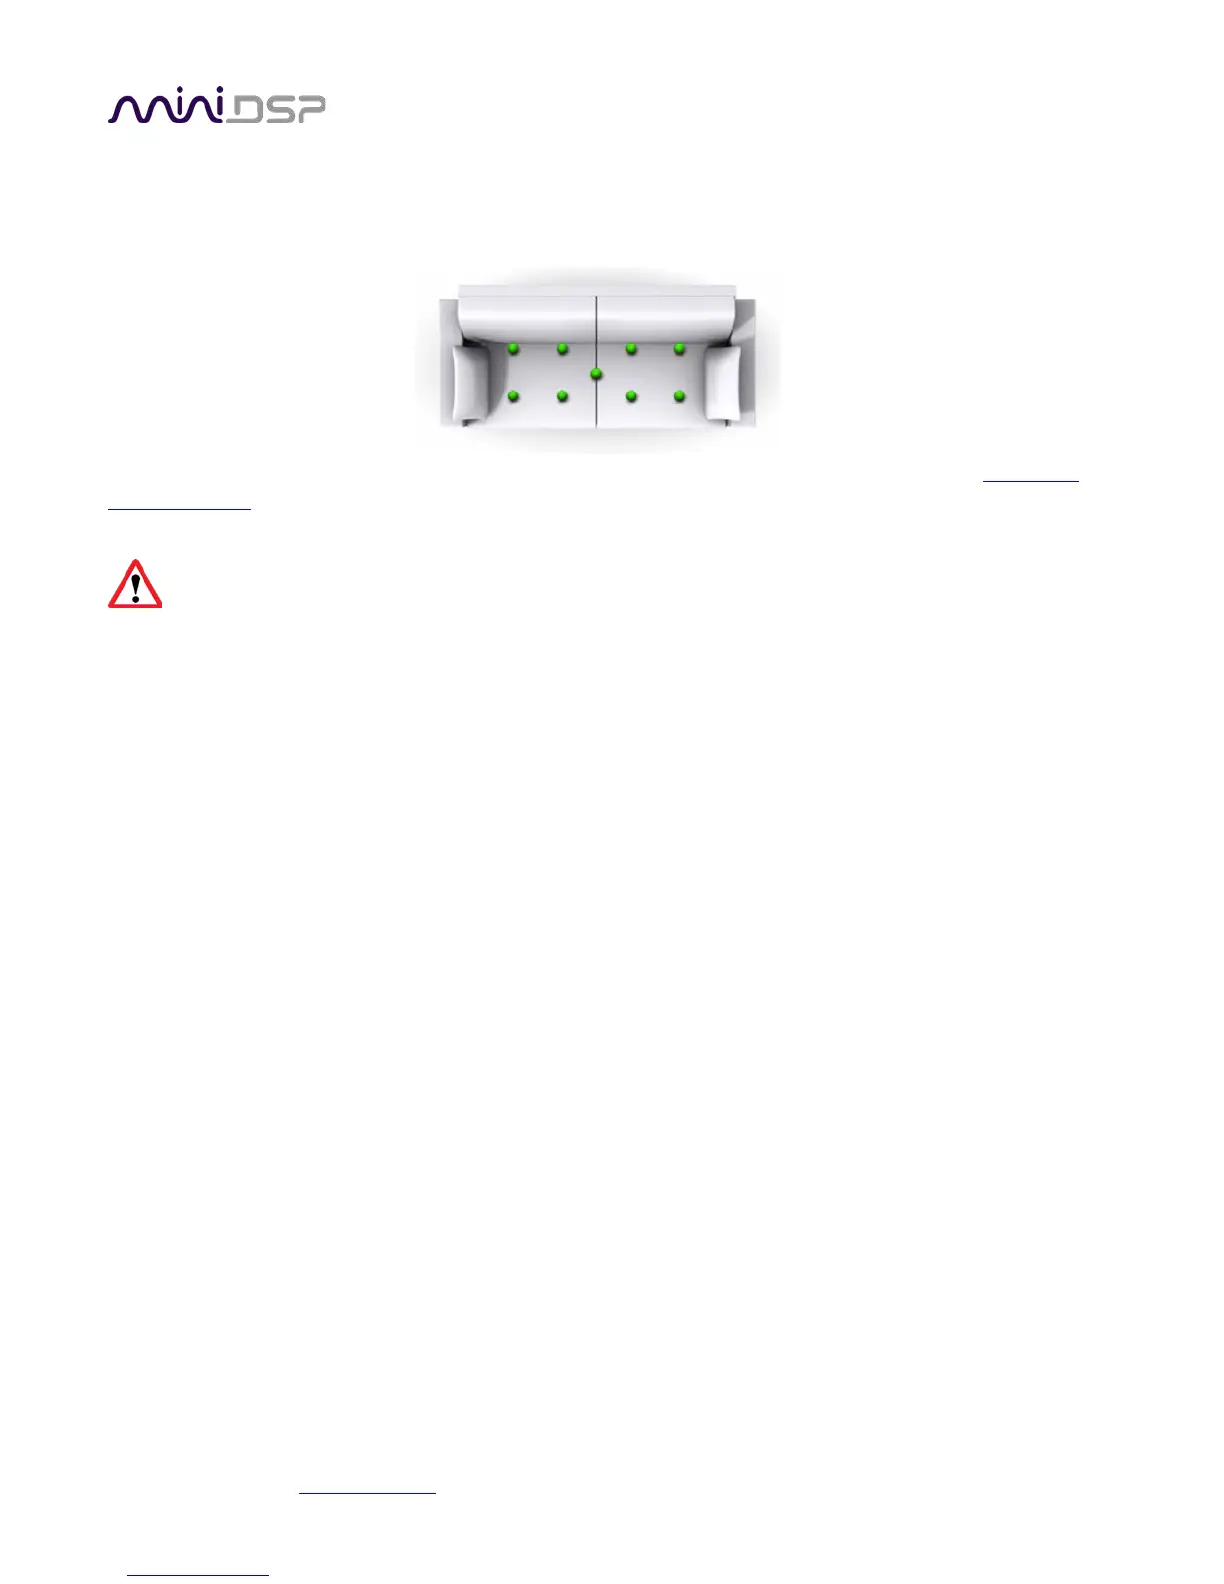
After each successful measurement, the location marker (red arrow) will advance to the next location. Move the
microphone to that location, using the three views (top, front, oblique) as a guide to positioning it in the correct
location. Then click on Start again. Repeat this process until all nine locations have been successfully measured.
Note that it is good practice to save the project periodically while performing measurements (see
Saving and
loading projects). Once all nine measurements have been completed, you can advance to the Filter Design tab
by clicking on the Proceed button or directly on the Filter Design tab at the left.
It is important that all nine measurements are completed, to ensure best results from the optimization
algorithm. Being patient and thorough will pay audible dividends!
6.5 SAVING AND LOADING PROJECTS
Each set of measurements and the associated configuration settings are a single project. The project should be
saved at regular intervals. This is done by clicking on the Save button. The default location for project files is
My Documents\MiniDSP\Projects (Windows) or Documents/MiniDSP/Projects (Mac).
A project can be reloaded at any time by clicking on the Load button. This enables you to generate new
correction filters for different target curves at a later date, or to redo any of the measurements. (Note: if you
wish to change from the Chair to the Sofa listening environment, or vice versa, you will need to start a new
project.)