PRELIMINARY
miniDSP Ltd, Hong Kong / www.minidsp.com / Features and specifications subject to change without prior notice 19
4 PLAYING AUDIO / QUICK-START GUIDE
Each SHD Series processor comes delivered ready-to-go for basic configurations. You can start playing audio
straightaway, then move onto Dirac Live calibration and subwoofer integration.
4.1 BASIC CONNECTIONS AND AUDIO – SHD
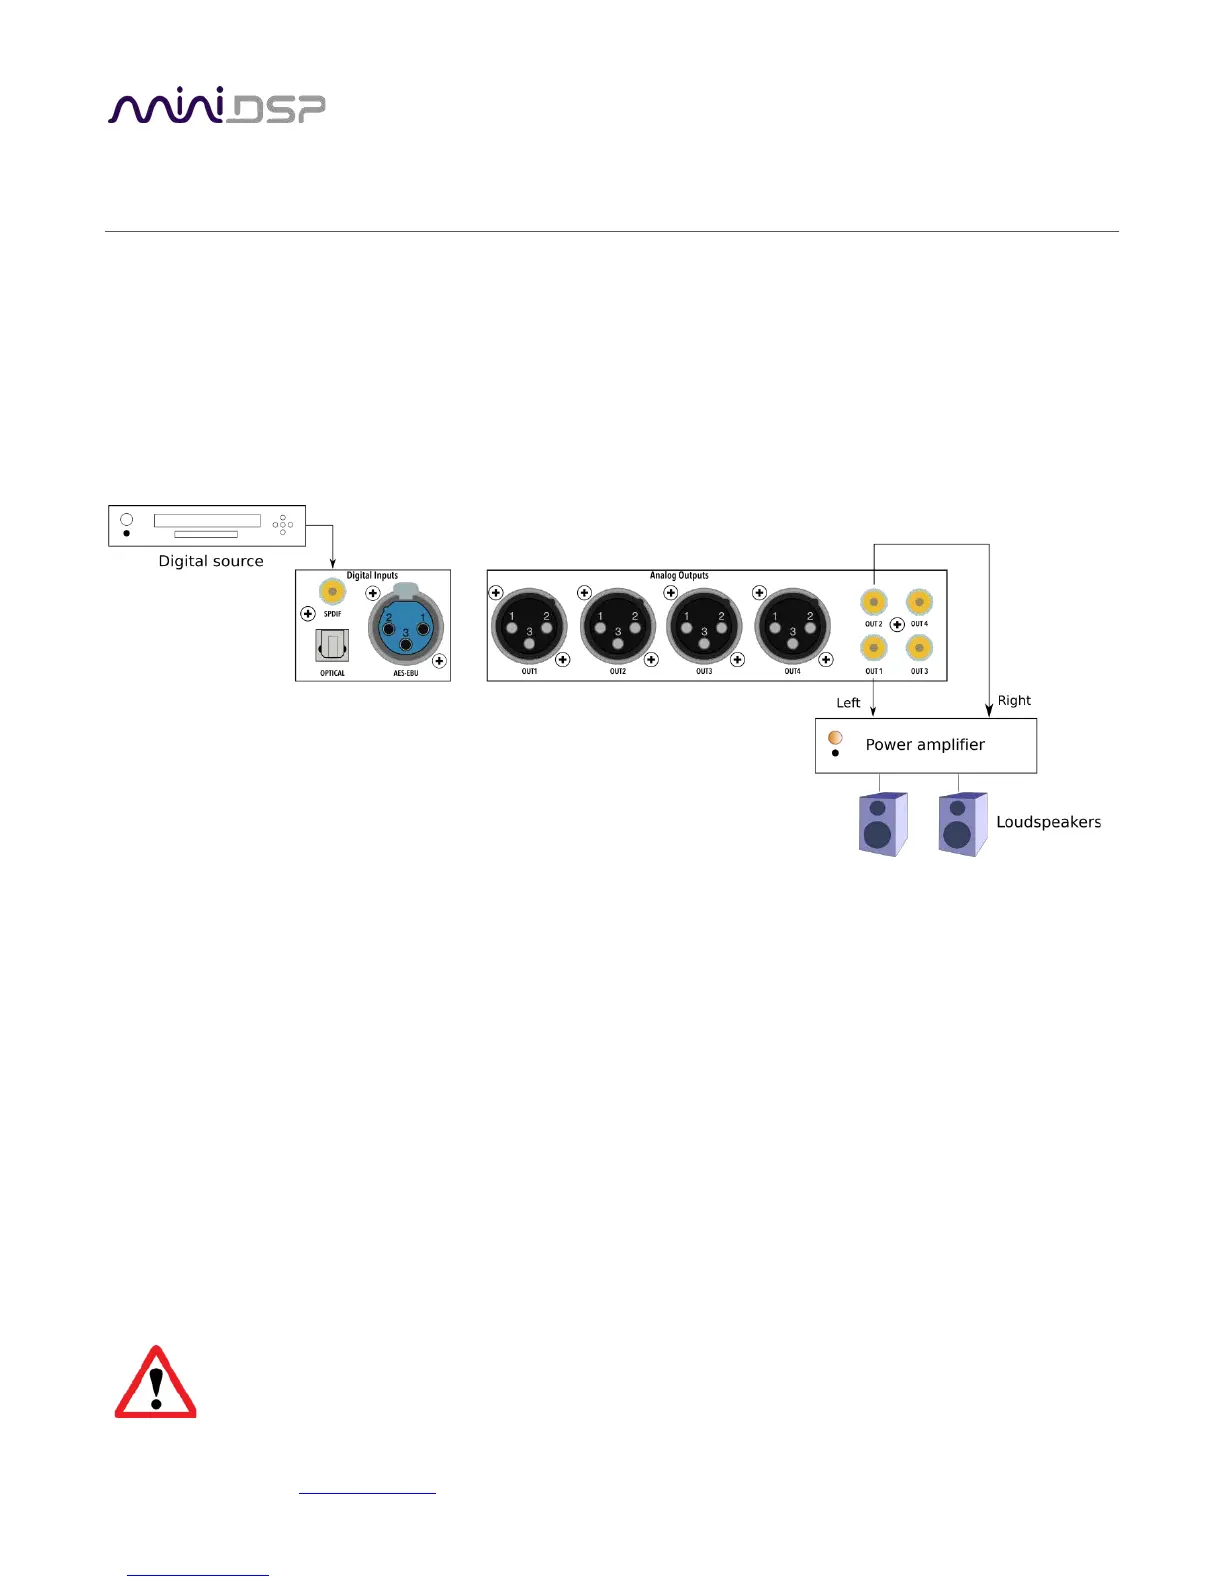
The diagram below illustrates a typical example of a simple connection to use to get started with the SHD.
Depending on the specific equipment that you have, you may use a different input, or use the balanced outputs
instead of the RCA outputs.
1. Connect an audio source to the rear panel.
2. Connect either the analog balanced (XLR) or unbalanced (RCA) outputs to a power amplifier. (Or, connect
digital output for channels 1 and 2 to a DAC, then to a power amplifier – see the description on previous
page for the SHD Studio for an example.)
3. Leave the power amplifier turned off for now. Connect the supplied power cable to the IEC socket on the
rear panel.
4. Power on the source equipment.
5. Switch power on using the switch at the rear panel. Wait a few seconds until the display shows the volume
level. Use the knob or included remote control to turn volume down to −60 dB.
6. Use the remote control or front panel encoder to select the source that you want to play audio from.
7. Turn on the power amplifier.
8. Start playing audio on the source.
9. Gradually turn up the volume using the knob or the remote control.
Turn off the power to the SHD Series processor before making or changing audio connections.