21
2 Basic Operations
No. 99MAM029A
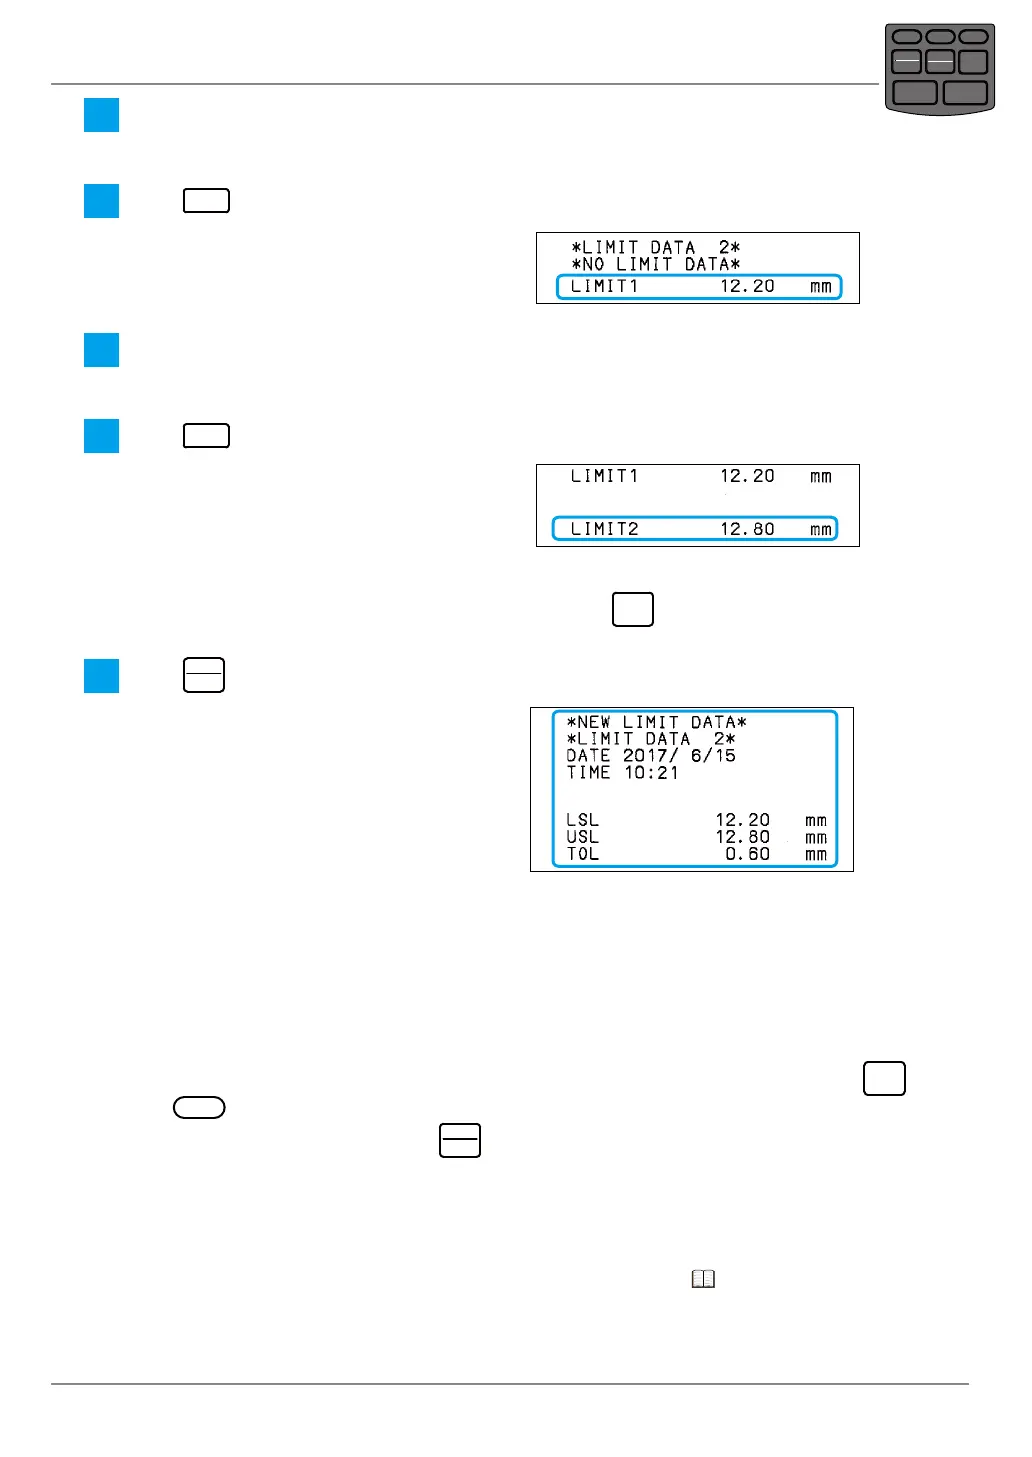
3
Display the value to be set as a lower specication limit or upper specication limit
with the measuring instrument with Digimatic output.
4
Press
DATA
to input the data.
» First limit data is printed.
5
Display the permissible value to be set as a lower specication limit or upper specication
limit with the measuring instrument with Digimatic output.
6
Press
DATA
to input the data.
» Second limit data is printed.
Tips
When redoing the previous data input, cancel it by pressing
CANCEL
and redo the input.
7
Press
TOL.
REC/STOP
to exit the limit input mode.
» The set limit data is printed.
When setting the limit data 3, 4 or 5 continuously, repeat the same operation as those
done for limit data 2.
Tips
• After completing limit data 5 setting, it returns to limit data 1 setting again.
• The same value can not be set for LIMIT1 and LIMIT2. If the same values are input to LIMIT1 and
LIMIT2, the tolerance setting is not completed and the buzzer sounds two beeps. Pressing
CANCEL
or
CLEAR
, redo the input.
• When switching the limit data, press
STAT.
OUT LOG
in the limit input mode.
• Limit data remains stored even after the power is turned off.
• Immediately after the power is turned on, the limit data used at the previous time of power off is
selected.
• If no limit data is required (if limit tolerance judgment is not required), either select a limit number
to which no limit data has been input, or delete the limit data (refer to
"2.3.3 Deletion of Upper/
Lower Specication Limit Value (Limit Data)" on page 23)
POWER
TOL.
REC/STOP
PRINTER
CLEAR
STAT.
OUT LOG
CANCEL
DATA
FEED

 Loading...