Repeat steps 4 to 5 to specify all the destinations.
6
You can also specify e-mail addresses, FTP servers, user boxes, and the shared box as •
destinations.
To confirm a specified destination, press [Location]. For details on confirming destinations, •
refer to “Confirming Specified Destinations”. (See page 5-17.)
Press <Start>.
7
If you selected a destination from the list of shortcuts, this step is not required.•
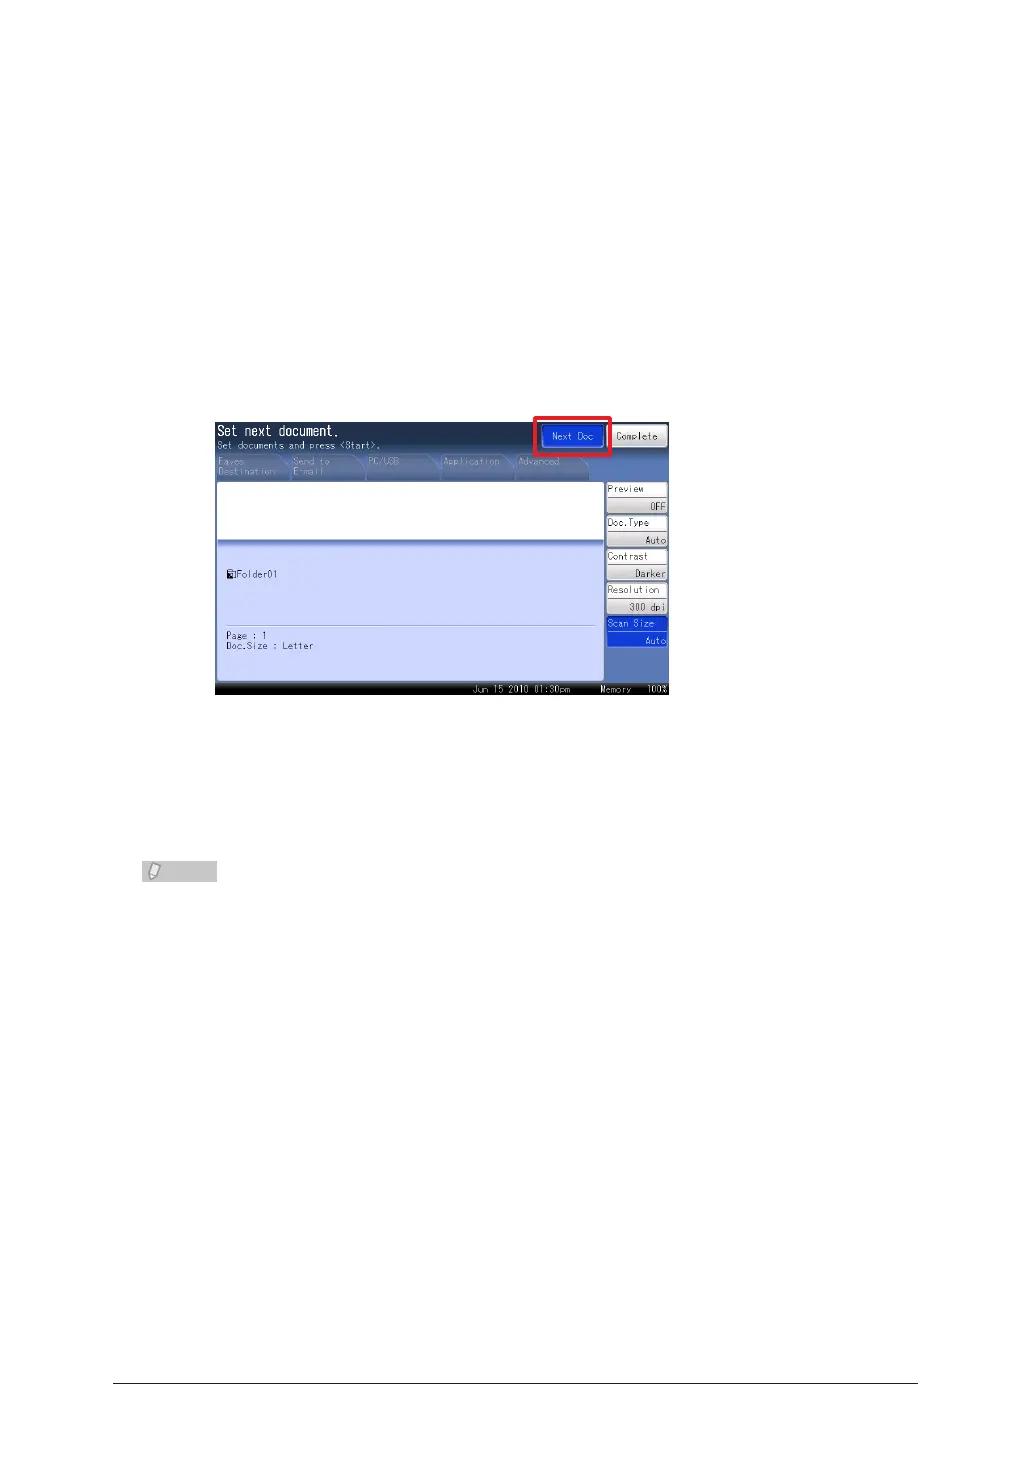
If you loaded the document in the ADF, this concludes the procedure.•
If you loaded the document on the document glass, load the next document, and
8
press [Next Doc].
To finish scanning, press [Complete].
Repeat step 8 to scan all the documents.
9
To finish scanning, press [Complete].
You can register often-used destinations in the [Faves Destination] tab. • (See page
7-31.)
For details on registering shortcuts, refer to “• Registering / Editing Folder Shortcuts”
(see page 7-15) or “Registering Shortcuts” in Chapter 3 of the OfficeBridge Guide.
You can press [Add/Edit] on the screen in step 3 to register/edit, or delete shortcuts. •
For details on registration, refer to “Registering from an Operation Screen”. (See
page 7-20.)
You can press [Register] on the screen in step 5 to register the selected shared folder •
in the shortcuts. For details on registration, refer to “Registering a Browsed Folder”.
(See page 7-19.)

 Loading...