10-8
10.3 Booting GTWIN
Booting GTWIN
Click on the Windows
button and then select “Program”, “NaiS Terminal”, and “GTWIN” on
the displayed Windows menu, in that order.
Selecting the working menu
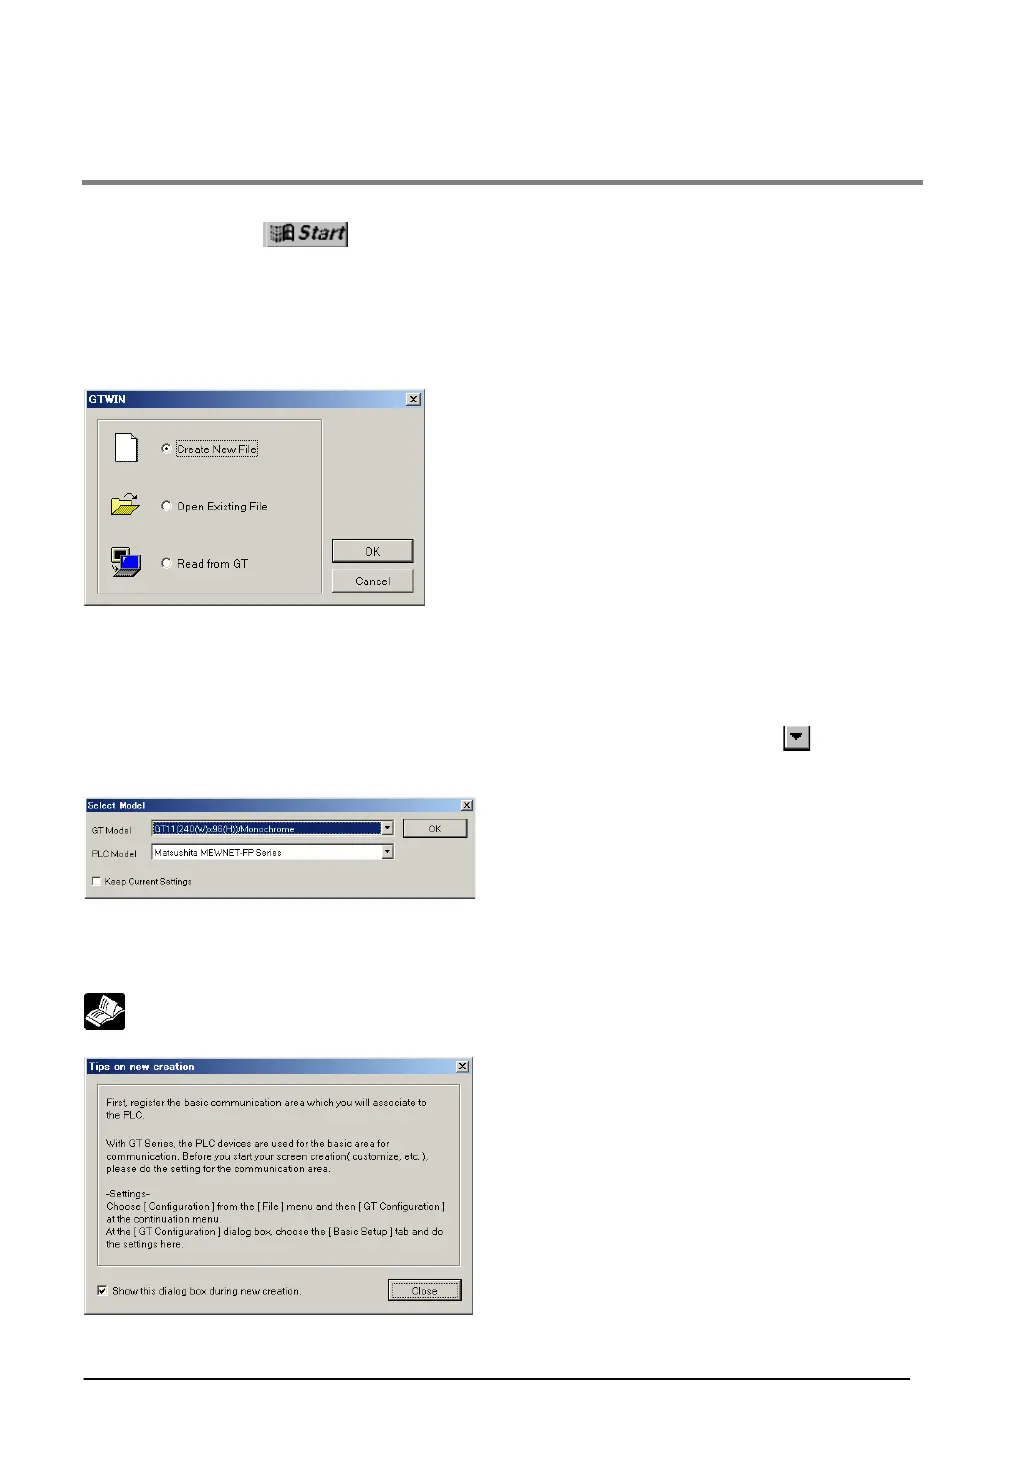
When GTWIN is booted, a startup menu like that shown below is displayed on the screen. Turn on one
of the three radio buttons and click on [OK].
Create New File
Select this to create new screen data.
Open Existing File
Select this to read and edit screen data saved to a disk.
An Open File dialog box is displayed on the screen. Select
a file to edit.
Read From GT
Select this to read and edit screen data saved to the GT
main unit.
Selecting the model
If “Create New File” or “Read From GT” is selected from the startup menu, a dialog box like that shown
below is displayed, where the model can be selected. Click on the pull-down list button [
] to the right
of the display window, and select the model of PLC or GT being used. Then click on [OK].
Entering Settings for the Basic Communication Area to PLC
Before creating a screen, always enter the settings for the basic communication area to the PLC.
Reference: <3.2 Setting the Basic Communication Area Between the GT and PLC>
 Loading...