Manage Device Security
267
S350 Series 8-Port Gigabit Ethernet Smart Managed Pro Switch Models GS308T and GS310TP
Note: An implicit deny all rule is included at the end of an ACL list. This means
that if an ACL is applied to a packet and if none of the explicit rules match,
then the final implicit deny all rule applies and the packet is dropped.
Add a Rule for an Extended IP ACL
To add a rule for an extended IP ACL:
1. Connect your computer to the same network as the switch.
You can use a WiFi or wired connection to connect your computer to the network, or
connect directly to a switch that is of
f-network using an Ethernet cable.
2. Launch a web browser.
3. In the address field of your web browser
, enter the IP address of the switch.
If you do not know the IP address of the switch, see Change the Default IP Address of the
Switch on page 11.
Your web browser might display a security message, which you can ignore. For more
information, see Access the Local Browser Interface on page 19.
The login window opens.
4. Enter the switch’
s password in the Password field.
The default password is password.
The System Information page displays.
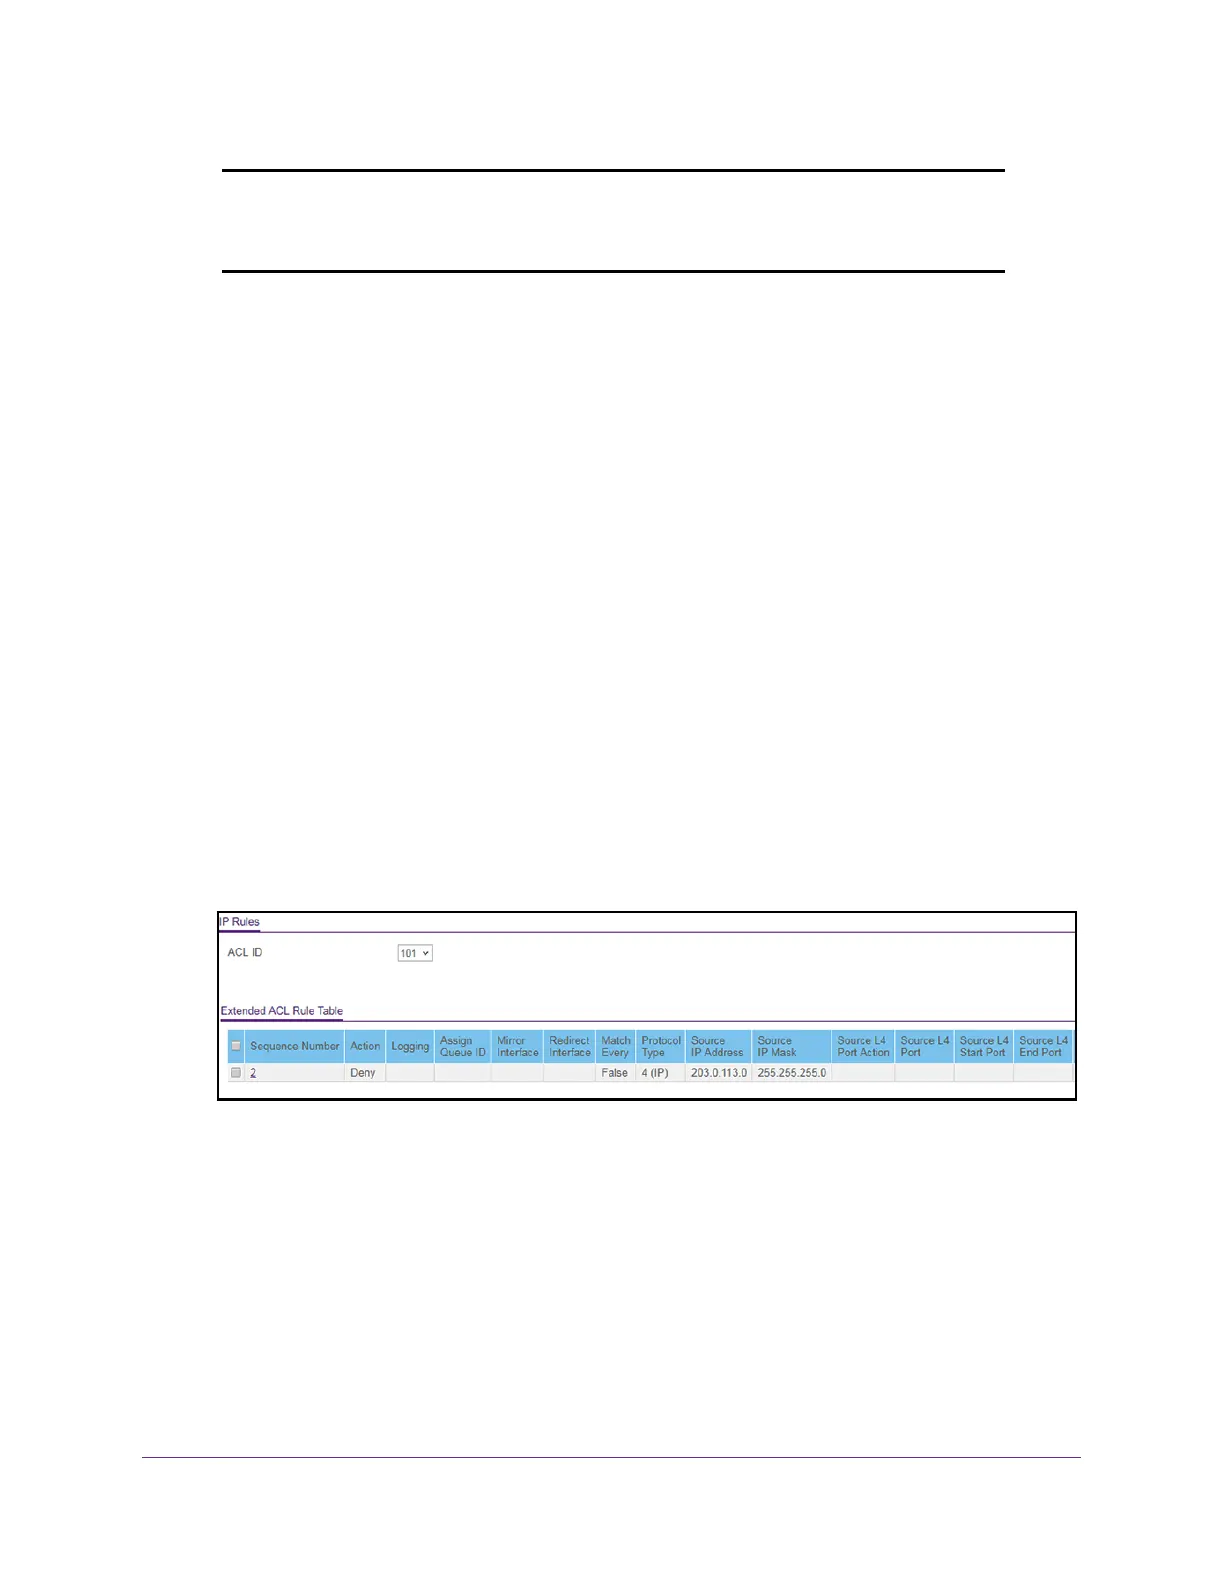
5. Select Security >
ACL > Advanced > IP Extended Rules.
The previous figure does not show all columns on the page.
If no rules exists, the Extended ACL Rule Table shows the message No rules have been
configured for this
ACL. If one or more rules exist for the ACL, the rules display in the
Extended ACL Rule Table.
6. From the ACL ID menu, select the IP
ACL for which you want to add a rule.
For extended IP ACLs, this must be an ID in the range from 101 to 199 or a name.
7. Click the Add button.