ACCESS GATEWAY
System Administration 129
2.
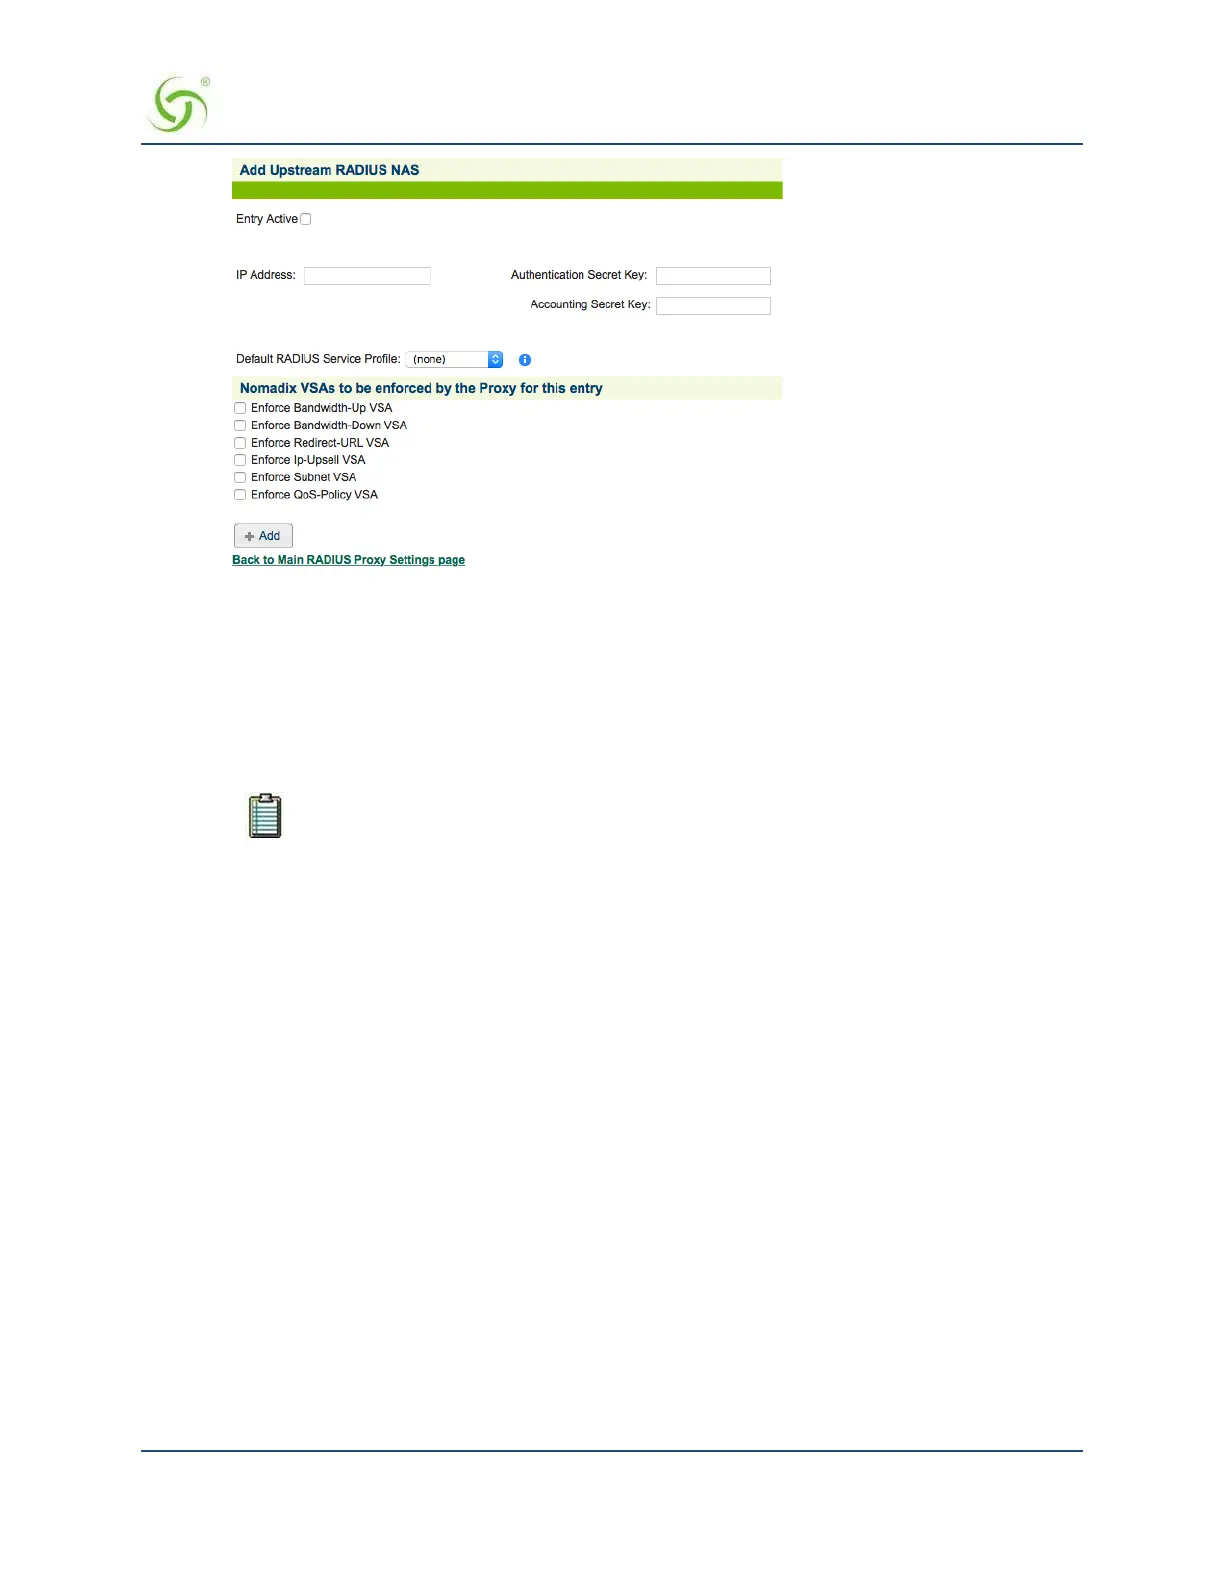
To make this entry the “active” NAS entry, click on the Entry Active check box.
3.
Enter an IP Address for the Upstream NAS.
4.
Enter a secret key in the Authentication Secret Key field. During the authentication process, the server
and client exchange secret keys. The secret keys must match for communication between the server and
the client to continue. The secret key is a valuable and necessary security measure.
5.
Enter a secret key in the Accounting Secret Key field.
6.
Select the Default RADIUS Service Profile from the pull-down menu (see note).
RADIUS requests originating from this Upstream NAS will be routed via the specified
profile if it cannot be routed based on realm. Leave this field blank if default routing is
not desired.
7.
Place a check in the box of the Nomadix VSAs to be enforced by the Proxy for this entry:
•
Enforce Bandwidth-Up VSA: The Radius VSA for Bandwidth-Up will be passed on to the Upstream
NAS when enabled.
Enforce Bandwidth-Down VSA: The Radius VSA for Bandwidth-Down will be passed on to
the Upstream NAS when enabled.
Enforce Redirect-URL VSA: The Radius VSA for Redirect-URL will be passed on to the Upstream
NAS when enabled.
Enforce IP-Upsell VSA: The Radius VSA for Ip-Upsell will be passed on to the Upstream
NAS when enabled.
Enforce Subnet VSA: The Radius VSA for Subnet will be passed on to the Upstream NAS when
enabled.
•
Enforce QoS-Policy VSA: The Radius VSA for QoS-Policy will be passed on to the Upstream NAS
when enabled.
8.
Click on the Add button to add this Upstream RADIUS NAS definition, then click on the Back to Main
RADIUS Proxy Settings page link to return to the RADIUS Proxy Settings screen.
The Upstream RADIUS NAS definition you just added appears in the list. You can add up to 10
definitions.