ACCESS GATEWAY
Installing the Access Gateway 59
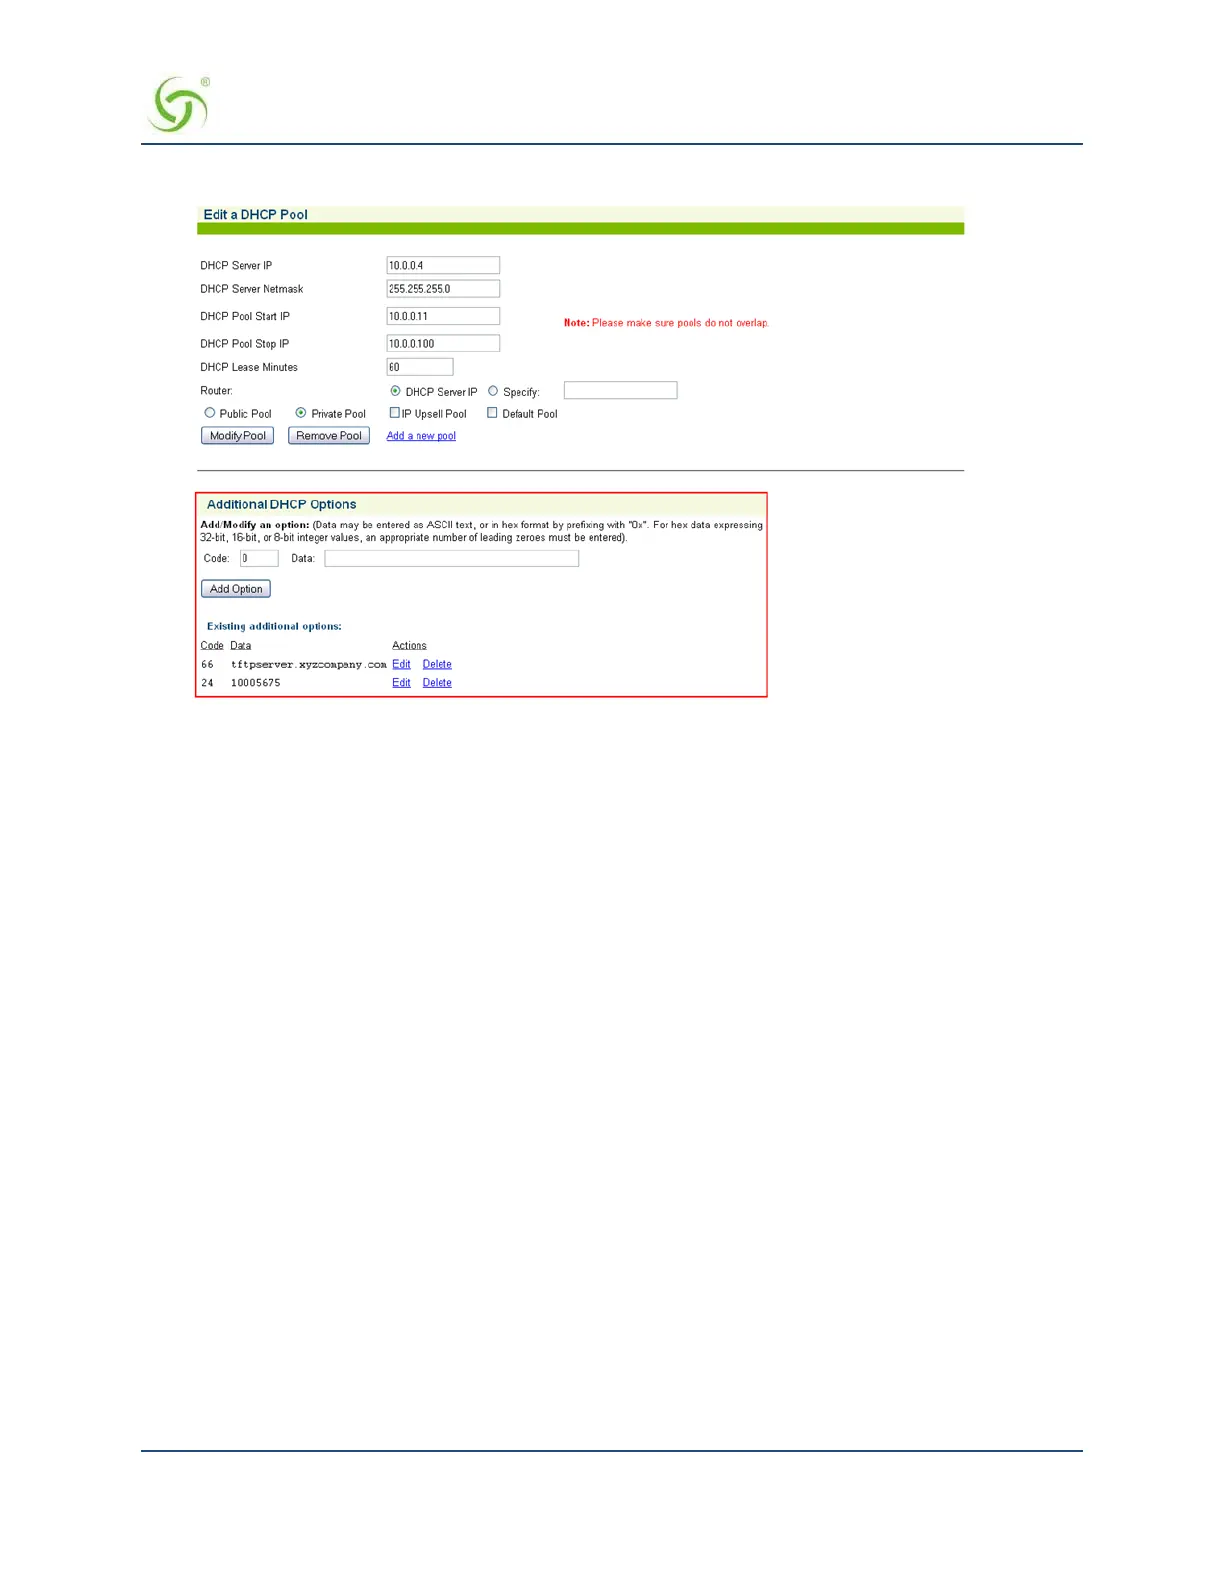
DHCP Dynamic Enable and Disable
Click Configuration->DHCP. Click the Server-IP and Enable this DHCP Pool. Note that DHCP
enable/disable is dynamic, no reboot required.
Setting the DNS Options
DNS allows subscribers to enter meaningful URLs into their browsers (instead of numeric IP addresses) by
automatically converting the URLs into the correct IP addresses.
After you have configured DNS global options in the command-line interface, you can assign a primary,
secondary, or tertiary (third) DNS server for each WAN in the Web Management Interface (WMI). See
Ethernet Ports/WAN on page 93 for WAN-specific DNS configuration.
To set the DNS global configuration options:
1.
Enter c (configuration) at the Access Gateway Menu. The Configuration menu appears.
2.
Enter dn (dnsglobal) at the Configuration menu.
3.
Enter the host name (the DNS name of the Access Gateway). The host name must not contain any
spaces.
4.
Specify the Redirection Port Mode. If floating, the DNS will use ephemeral ports for the source port of
DNS requests. If
fixed (default), the manually configured ports are used.
5.
Specify the UDP DNS Redirection Port.
6.
Enable (default) or disable DNSSEC (Domain Namer System Security Extensions).
Sample Screen Response:
Configuration>dn
Enter host name (no spaces) [AG5x00 ]:usg
Redirection Port Mode (Fixed/Floating) [fixed ]: