ACCESS GATEWAY
134 System Administration
1.
To add a RADIUS Service Profile, click on the appropriate Add button on the Realm- Based
Routing Settings screen.
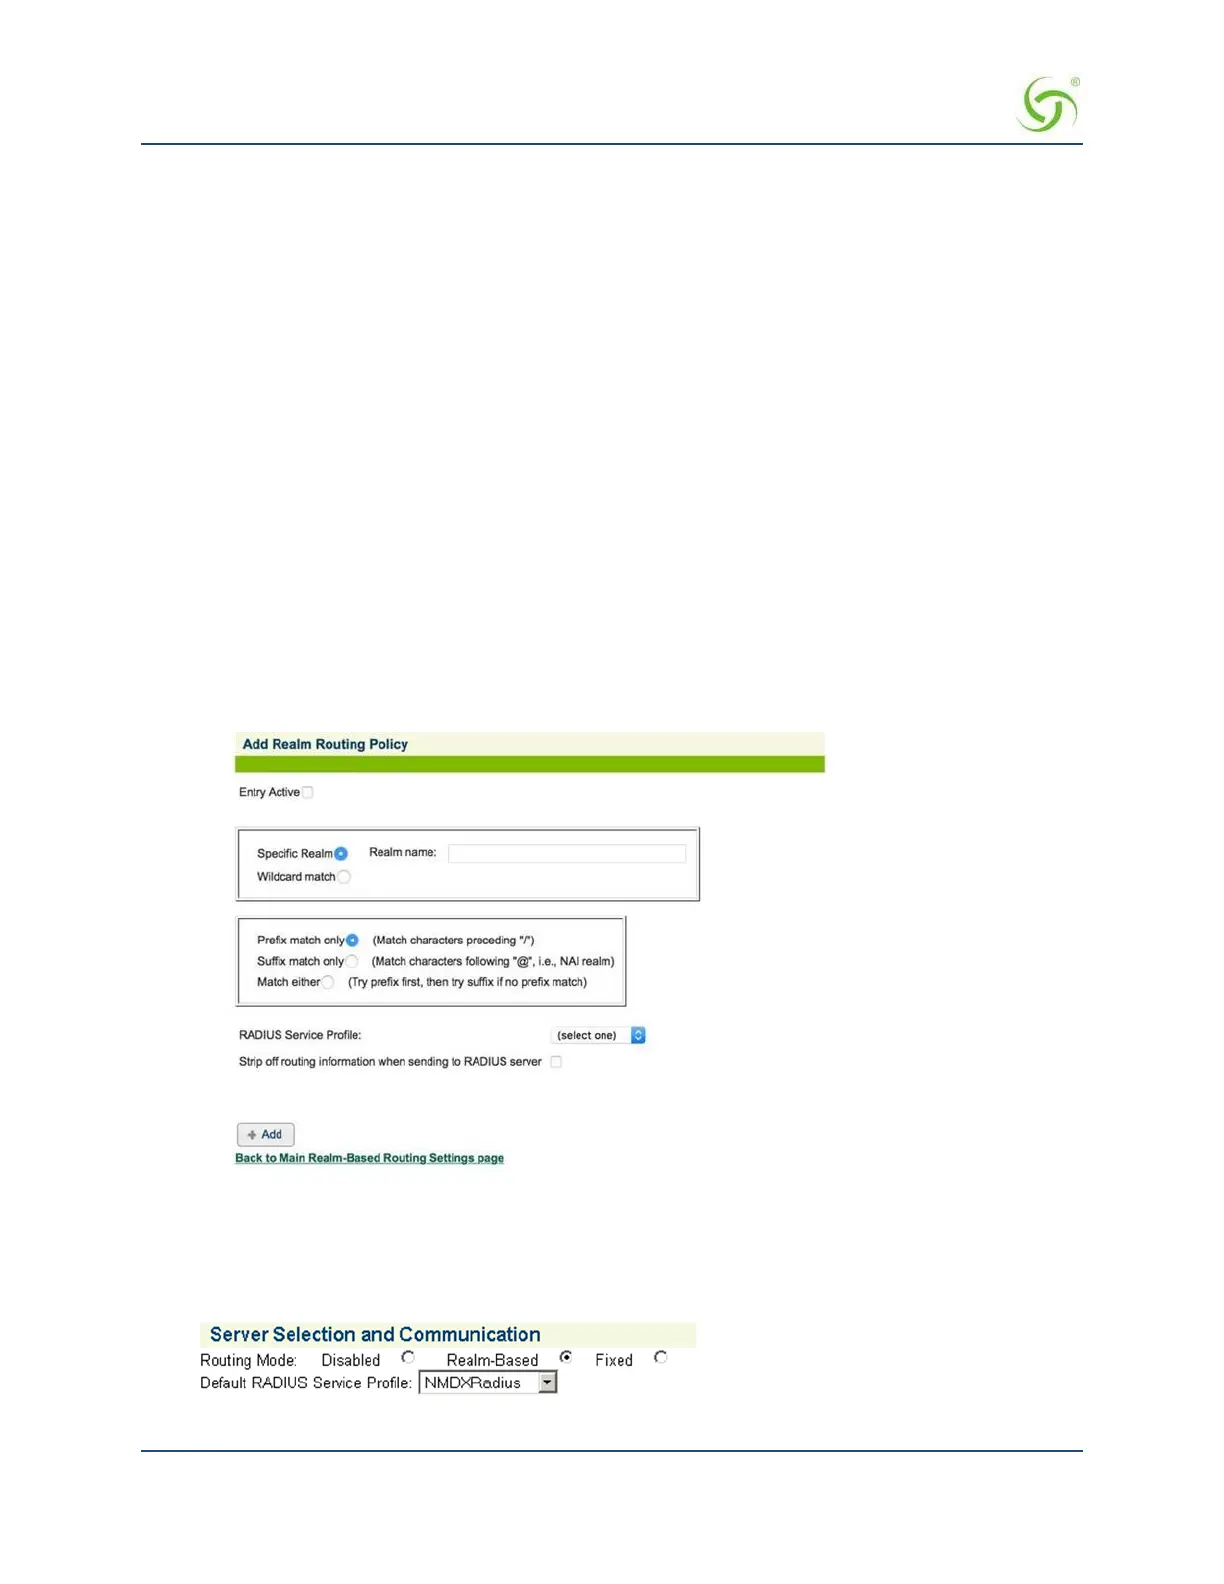
The Add Realm Routing Policy screen appears:
2.
To make this entry the “active” entry, click on the Entry Active check box.
3.
To define a specific realm, choose the Specific Realm option and enter the destination in
the
Realm
Name field. Alternatively, you can choose the Wildcard match option, then define your search options:
Prefix match only
Suffix match only
Match either
4.
Select the required RADIUS Service Profile from the pull-down menu.
5.
Click on the Strip off routing information check box if you want to remove the routing information.
6.
Click on the Add button to add this Realm Routing Policy.
7.
When you have completed the definition of your Realm Routing Policy, you can return to
the previous
screen (Realm-Based Routing Settings) by clicking on the
Back to Main Realm-Based Routing
Settings page link.
The screen below shows a realm routing policy that handles prefix-based usernames using a RADIUS
service profile. Notice that “Specific Realm” is clicked and the “Realm name” is “cisp”. Also notice that
“Prefix match only” is clicked and that the delimiter is “/”. This means that this realm routing policy
will match usernames that are of the format “cisp/ username”.
Configure RADIUS Client
The NSE RADIUS client must be setup for realm-based routing mode since realm information will be used to
determine how to handle usernames that contain realm information. The screen below shows an example of
setting the routing mode to handle realm-based usernames.