NCS Mounting and Connections Installation
NCS Manual PN 51095:B1 3/08/02 9
1. Cut off the plug end of the computer power cord.
2. Plug the socket end of the power cord into the computer.
3. Remove the screws from around the power supply of the NRT-P3.
4. Attach the PCLB-6 enclosure without the cover to the back of the NRT-P3 using these screws.
5. Install a 3/4-inch (19.05 mm) conduit and fitting in the knock-out hole of the Power Cord
Locking Bracket cover (refer to Figure 1.3).
Caution: Size the 3/4-inch (19.05 mm) conduit so the line cord can reach a junction box at the
other end of the conduit.
6. Thread the power cord through the cover and conduit.
7. Attach the PCLB-6 cover to the PCLB-6 using the mounting screws supplied. Ensure that the
PCLB-6 cover holds the power cord socket firmly in place.
8. Connect the power cord to the HSP-121B power line protector as shown in
Figure 1.4.
Note: The HSP-121B power line protector must reside in a junction box.
9. Connect 115 VAC, 50/60 Hz primary power or 230 VAC, 50/60 Hz primary power to the HSP-
121B as shown in Figure 1.4. Primary power connected to the HSP-121B (115 VAC or 230
VAC) depends upon the position of the voltage selection switch shown in Figure 1.2 and
Figure 1.3. All wiring must remain in conduit.
WARNING: Improper voltage selection can damage the NCS and void the warranty on the
back cover of this manual.
10. Turn power switch on for the circuit.
11. Replace the cover on the PCLB-6 enclosure and secure with two screws.
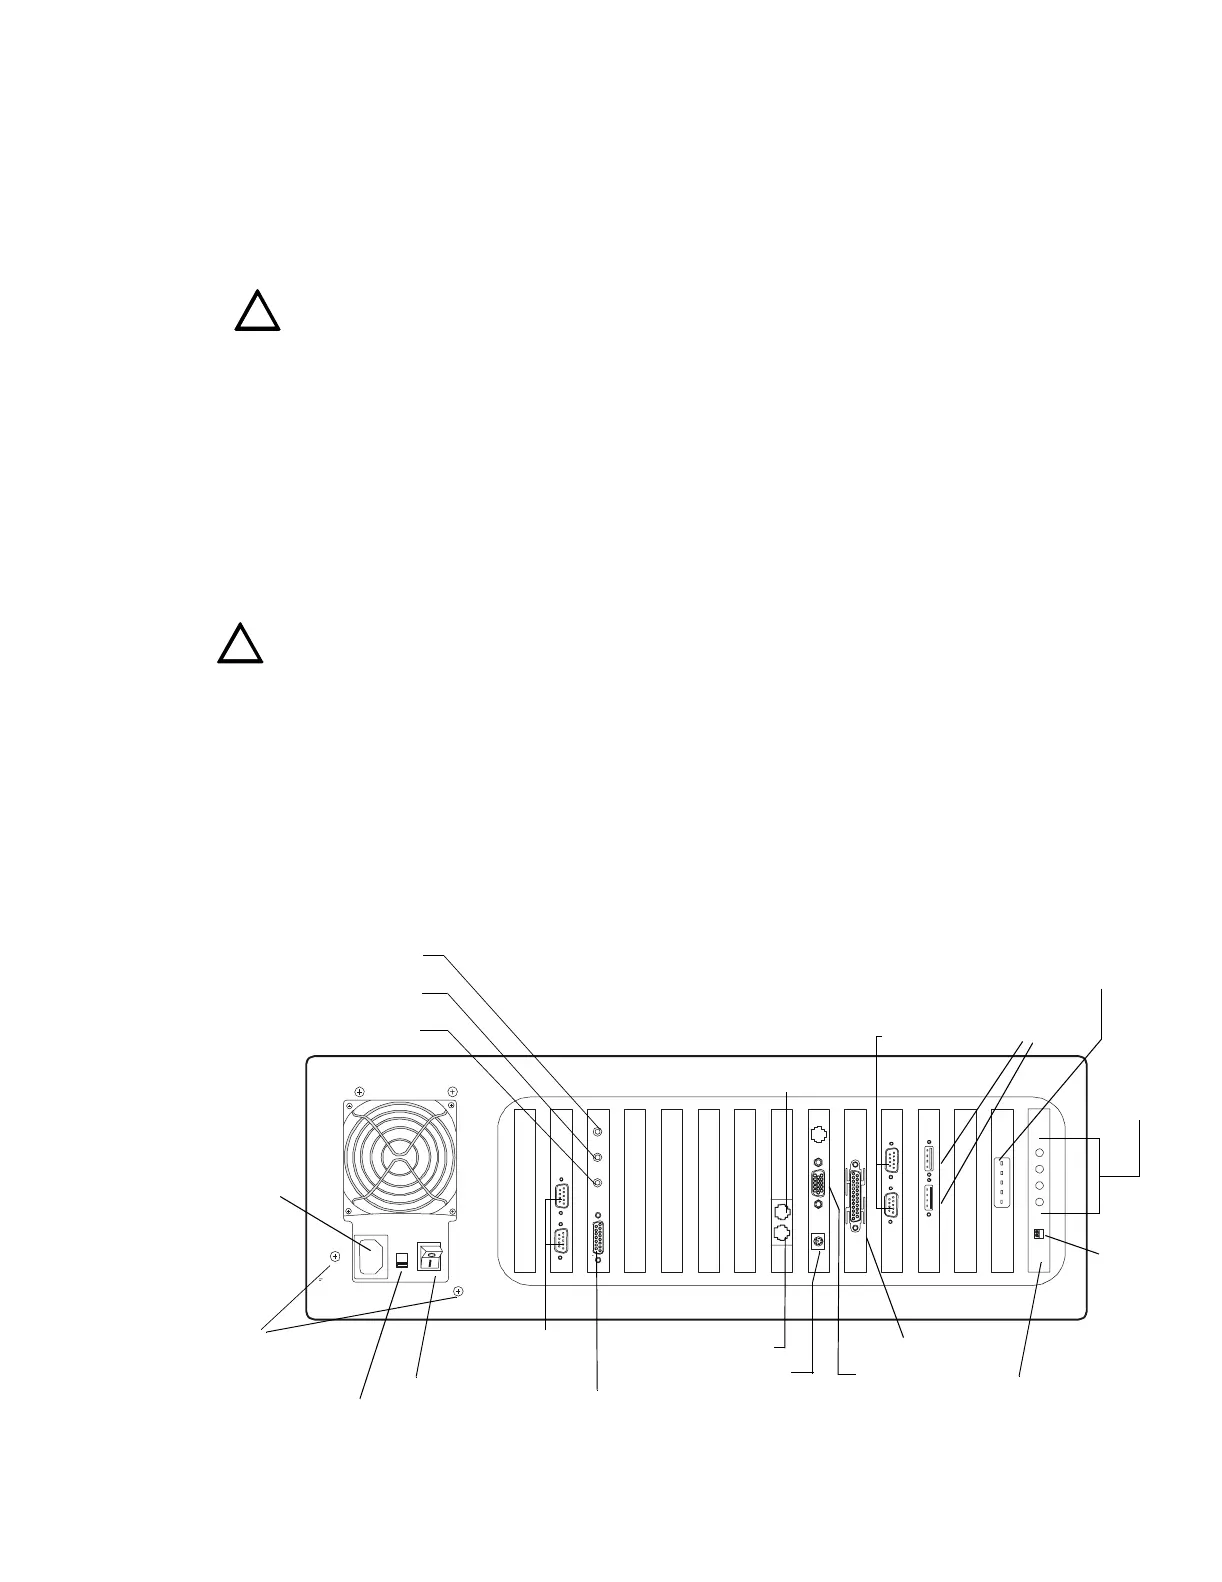
12. Connect the monitor to the display adapter video connector on the back of the computer (refer
to Figure 1.2). Connect the other end of the video cable to the monitor. The video cable is
provided with screws for secure attachment.
13. Align the keyboard cable plug to mate with the notch in the computer's jack and insert cable.
14. Connect the mouse to the mouse port at the back of the NRT-P3.
15. Refer to Figure 1.5 for monitor power application.
Figure 1.2 NRT-P3 Connections
!
!
Monitor
connection
EIA-232
COM Ports
3 and 4
Mouse/Keyboard Port
Remove these
screws and reuse
for mounting the
PCLB-6 plate
Power
Cord
Socket
Voltage
Selection
Switch
Not used
NCSonyx3bk.cdr
Noti•Fire•Net
Connections
UPS
Supervision
Cable
Connection
Power Switch
(disabled at
factory)
Not Used
Software Key
connection
EIA-232
COM Ports
1 and 2
Not Used
Not Used
Speaker Connector
Not Used
Microphone Connector
NRT-NETPC
LEDs
NRT-NETPCB Card
www.PDF-Zoo.com