41956001TH Rev.6 36 /
Oki Data CONFIDENTIAL
[OHP Sensor Replacement]
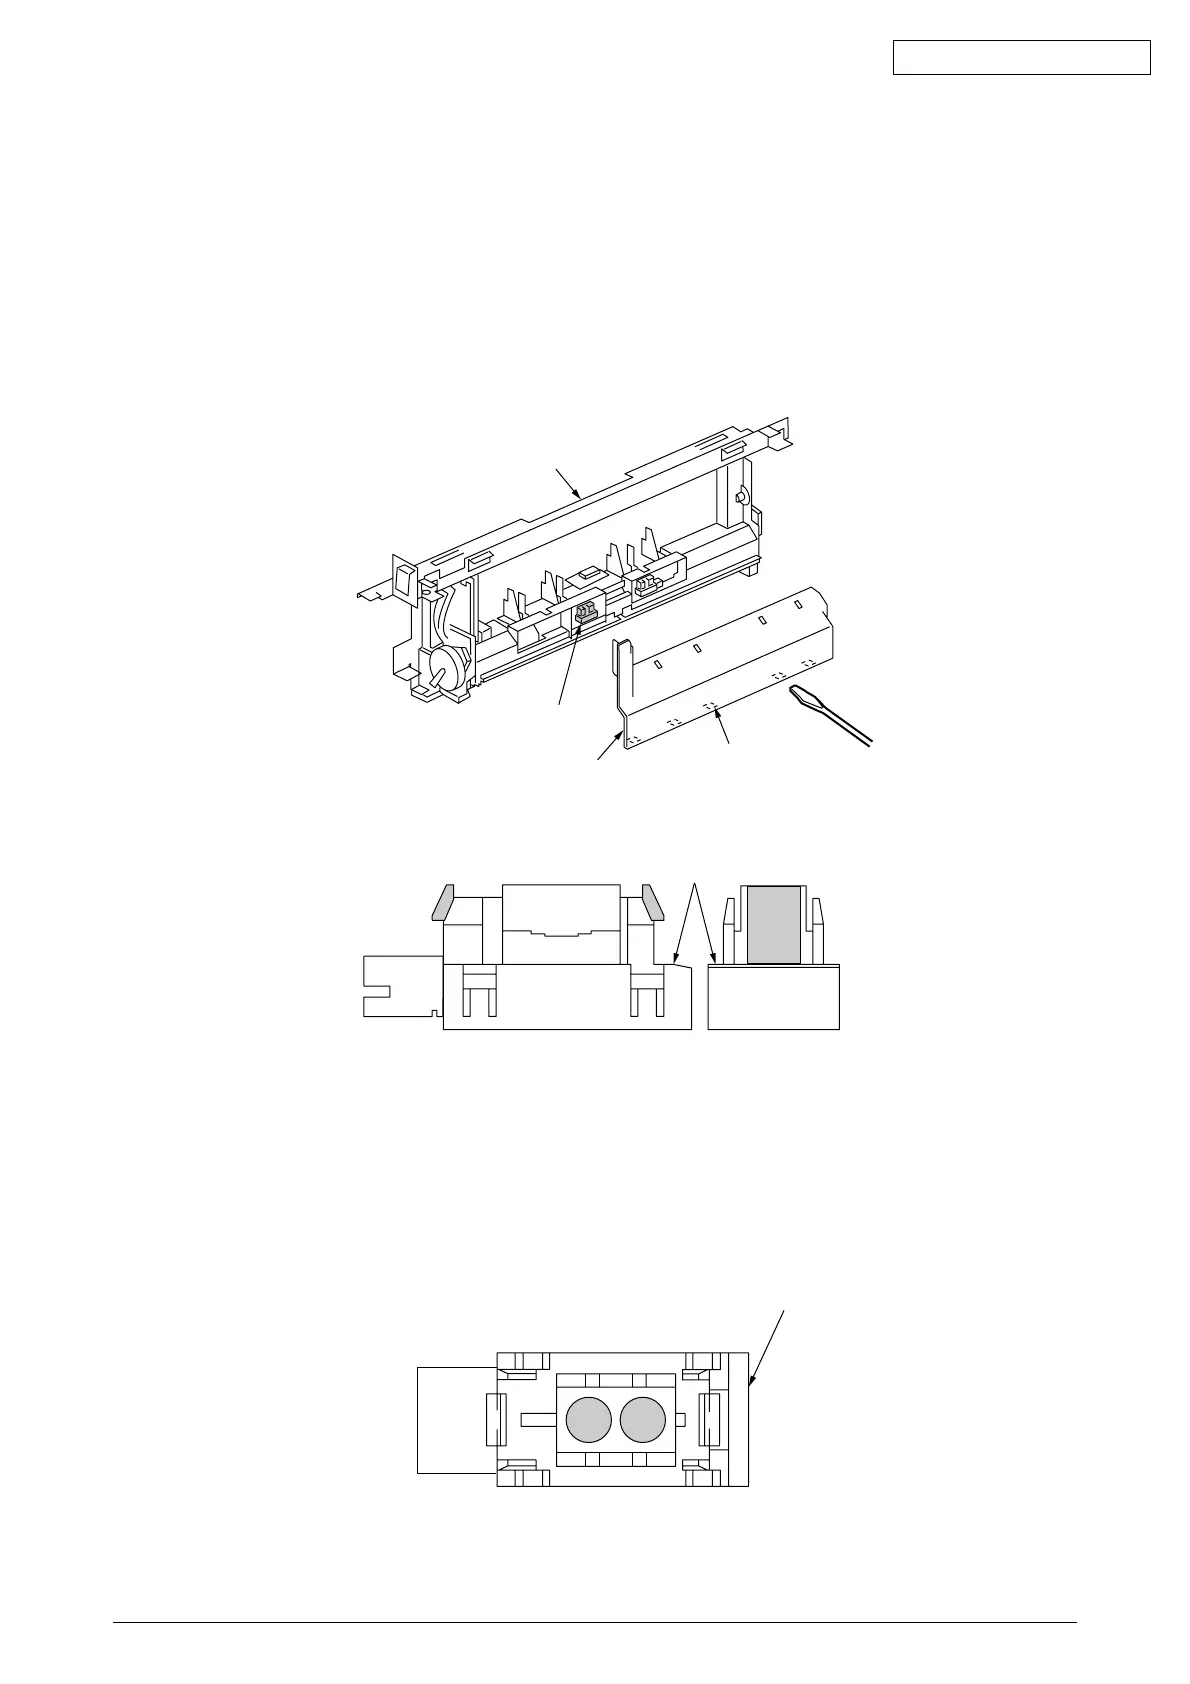
(7) Figure 2-3-13-1 shows the bottom of the multipurpose tray 4. First remove the cover 9 (figure
2-3-13-1). The cover 9 with five protrusions can be disengaged by removing them with a
screwdriver etc.
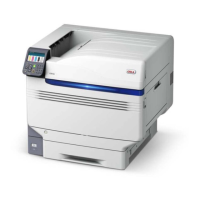
(8) Remove the OHP sensor 0 (figure 2-3-13-1). Only the sensor, which has the shape shown in
figure 2-3-13-2, can be detached by pushing those claws on its both sides which are shaded in
the figure, using a flatblade screwdriver etc. Be careful not to allow the cable attached to the
sensor to be broken.
Figure 2-3-13-1 Bottom of Multipurpose Tray
4
9
0
Protrusion (at five places)
Figure 2-3-13-2 OHP Sensor Composition
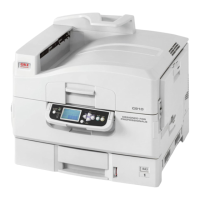
Note!
When cleaning the OHP sensor, wipe dirt such as paper powder off its sensing surface
that is as shown in figure 2-3-13-3, with a soft cloth or the tip of a brush. The shaded
areas, which are lenses, should be wiped especially carefully, taking care not to allow it
to be scratched.
Figure 2-3-13-3 Top of OHP Sensor
0
0