41956001TH Rev.6 39 /
Oki Data CONFIDENTIAL
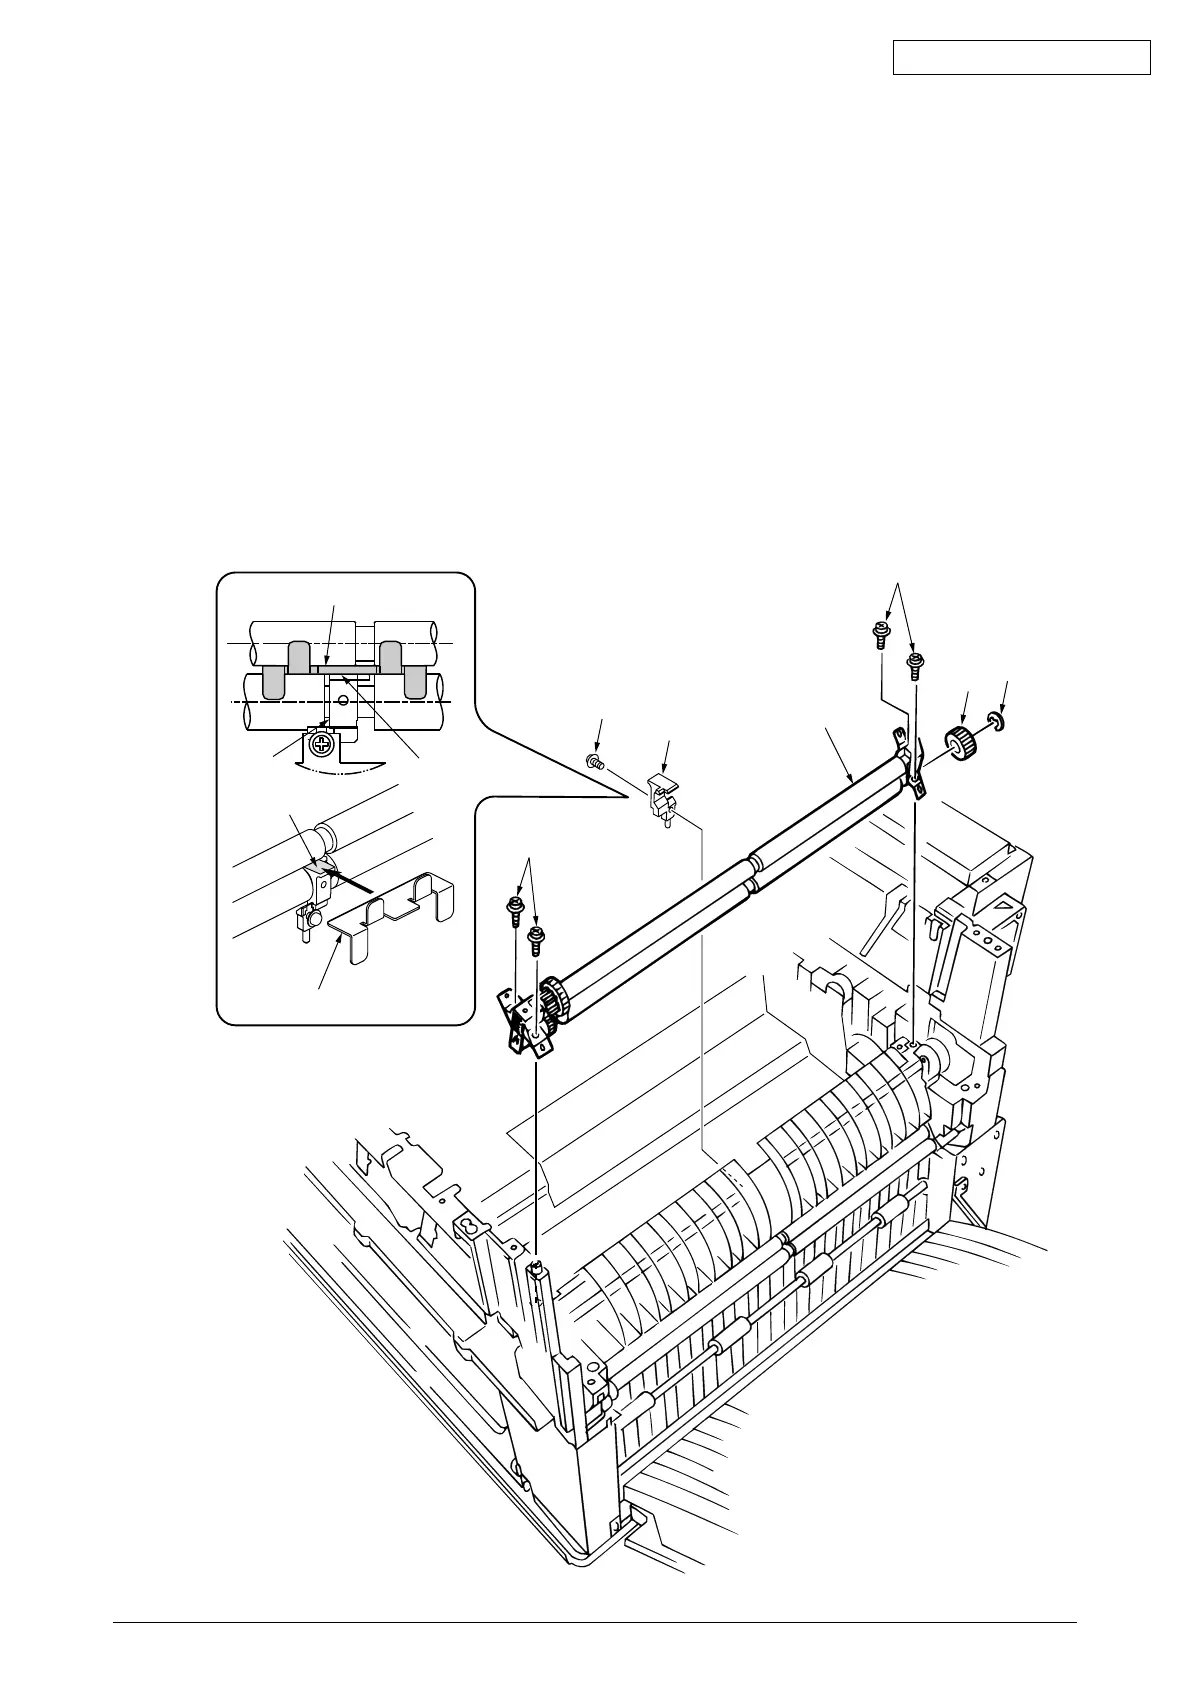
2.3.16 Registration Roller Assy (A) / Registration Drive Gear (A)
(1) Remove the Front Cover. (See Sec. 2.3.11.)
(2) Remove the Rear Cover. (See Sec. 2.3.12.)
(3) Remove the Multipurpose Tray. (See Sec. 2.3.13.)
(4) Remove the Media Thickness Sensor Assy. (See Sec. 2.3.15.)
(5) Remove the screw 1 of the Pickup Stage 2.
(6) Remove the four screws 3 to demount the registration roller Assy (A) 4and the Pickup Stage
2.
(7) Remove the E ring 5 to detach the registration gear (A) 6.
Note!
When attaching the pickup stage 1, place the stage height adjustment jig between the
pressure roller and the registration roller and, until the top surface of the pickup stage
reaches the jig, move the pickup stage toward the jig. (See Table 2-1 Maintenance Tools)
3
3
4
6
5
2
1
Stage height adjustment jig
Top surface
Top surface
Stage height adjustment jig
1
Figure 2-3-16 Registration Roller Assy (A) / Registration Drive Gear (A)