Mounting and Connecting Devices
20
ZFX-C User’s Manual
Installing the mounting fixture
The mounting fixture can be installed on all of the four mounting surfaces.
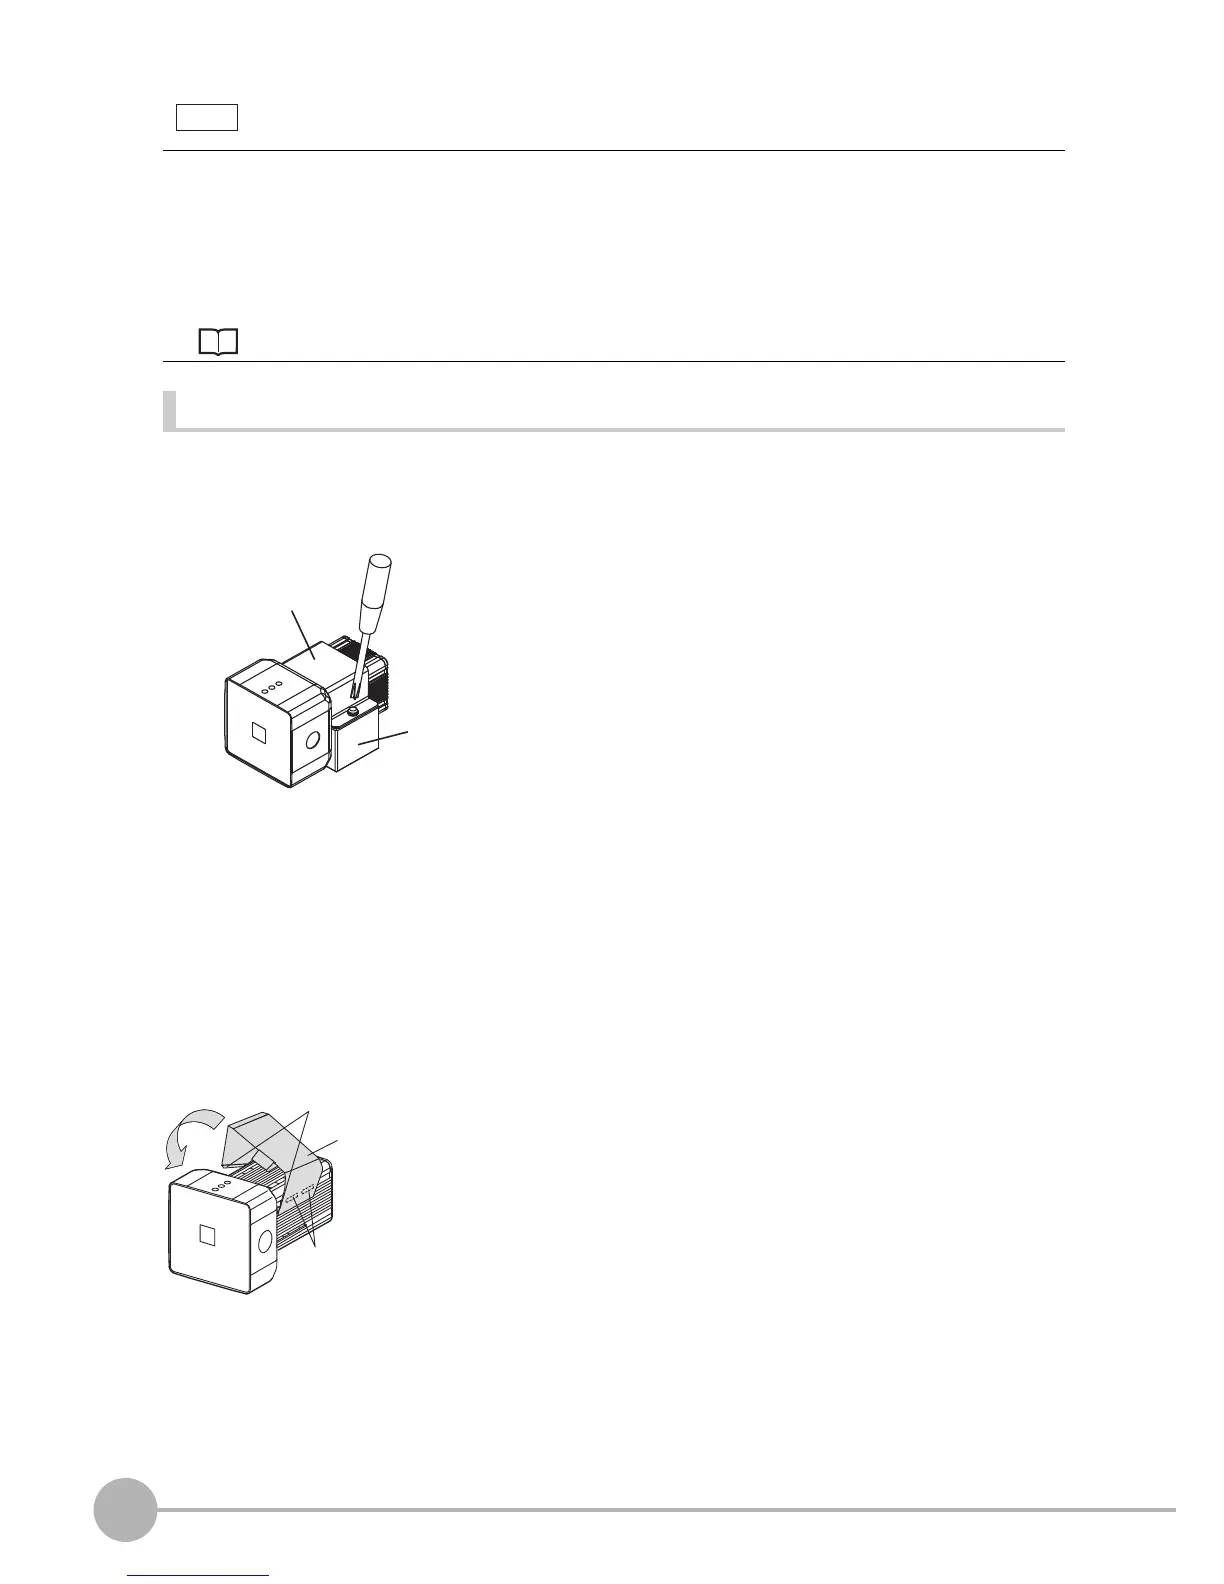
ZFX-SR10R/SR50R/SC10R/SC50R/SC90R (robot cable type)
1 Install the mounting fixture with the protrusion on its
base (black) aligned with the groove on the camera
body.
2 Install the mounting fixture on the camera body with
the bracket (silver) aligned with the base.
3 Tighten the base and the bracket with the provided
screws (M3 x 6).
Tightening torque: 0.54N
⋅ m
4 Fasten the base at the mounting position with screws.
Tightening torque
M4: 1.2 N
⋅ m
1/4"-20UNC: 2.6 N
⋅ m
Except ZFX-SR10R/SR50R/SC10R/SC50R/SC90R (normal cable type)
1 Align the two hooks on one side of the mounting fix-
ture with the two grooves on the camera body.
2 Push the other hook down until it is snapped into
place.
Make sure that the mounting fixture is firmly fixed on the
camera.
• The lens has a fixed focal point. The actual detection range and focal point vary from lens to lens, so adjust the
distance to the measurement target after replacing the lens or camera.
• The camera mounting distance listed in the following tables is an approximate value. Mount the Camera so that
the distance to the measurement target can be adjusted easily.
• If the object size and detection range are incompatible, use a combination of a camera (without lighting), standard
CCTV lens and light source.
Camera Only p.22