Mounting and Connecting Devices
28
ZFX-C User’s Manual
Connecting Devices
Connecting the Controller to the Power Supply
Use a power supply that meets the following specifications.
Use a DC power supply with countermeasures against high voltages (safe extra low-voltage circuits on the secondary
side). If the system must meet UL standards, use a UL class II power supply.
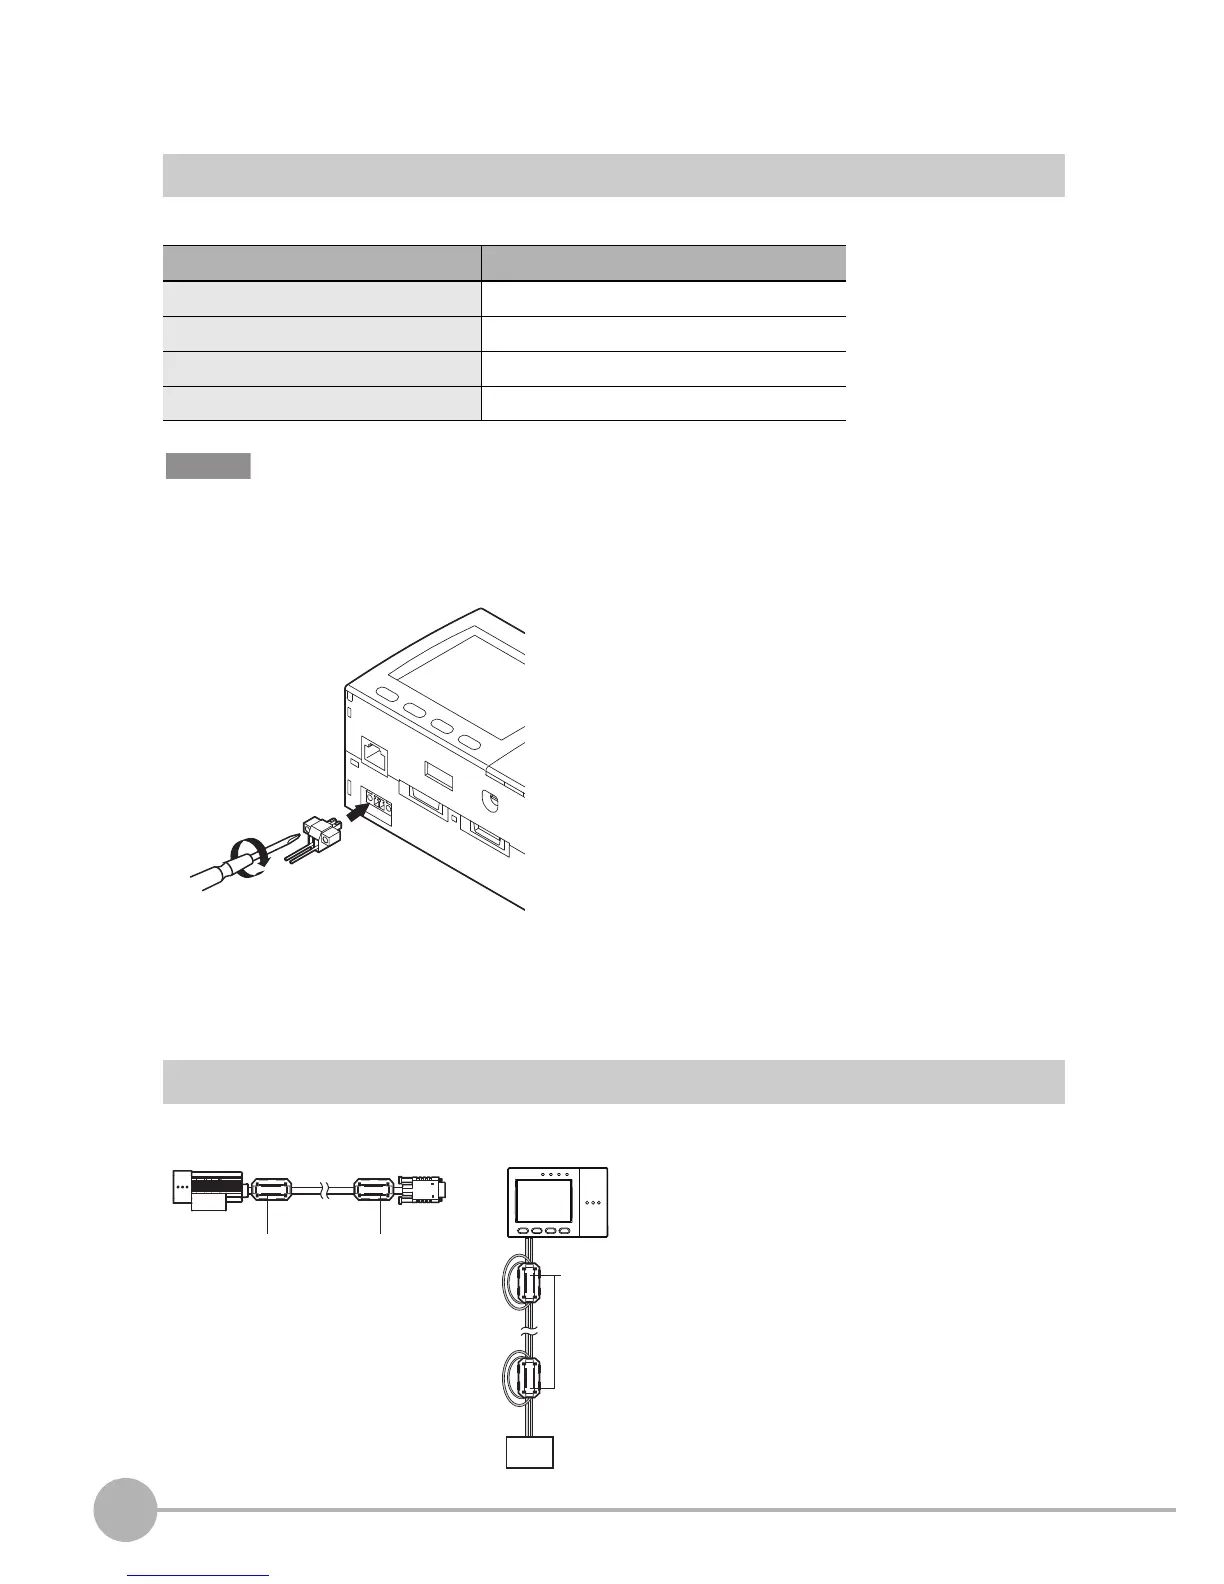
1 Loosen the two screws on the top of the Power con-
nector (male) using a flat-blade screwdriver.
2 Insert the DC power terminal (wire) into the Power
connector (male) and tighten the two screws on the
top of the Power connector to fasten the power termi-
nal with the screwdriver.
Tightening torque: 0.22 to 0.25 N•m.
3 Plug the Power connector (male) into the Controller’s
Power connector (female).
4
Tighten the two screws on the left and right of the Power
connector (male) with the screwdriver to fasten it.
Tightening torque: 0.22 to 0.25 N•m.
Attaching Ferrite Cores
Attach ferrite cores (supplied) to both ends of the camera's cable and the Controller's power cable, respectively.
Item Specification
Power supply voltage Approx. 24 VDC (21.6 to 26.4 VDC)
Output current 1.5 A min.
Recommended power supply S8VS-06024 (24 VDC, 2.5 A)
Recommended electric wire size 0.14 to 1.5 mm
2
(max. 1 m)