32
Back
Right
3. Wait for a couple of minutes and check the cooling liquid level in the chiller.
If it is below NORMAL, to fill the tank again:
a. Open the rear access door to carefully check the laser bay and bottom left access door for
any leakage.
b. Once all tubes are checked, fill the tank to a level near the top of the green NORMAL range
on the gauge with more laser-safe antifreeze or pure distilled water.
DO NOT proceed with the following actions if any leakage has been detected.
IMMEDIATELY contact the customer service.
4. Replace the fill port cap.
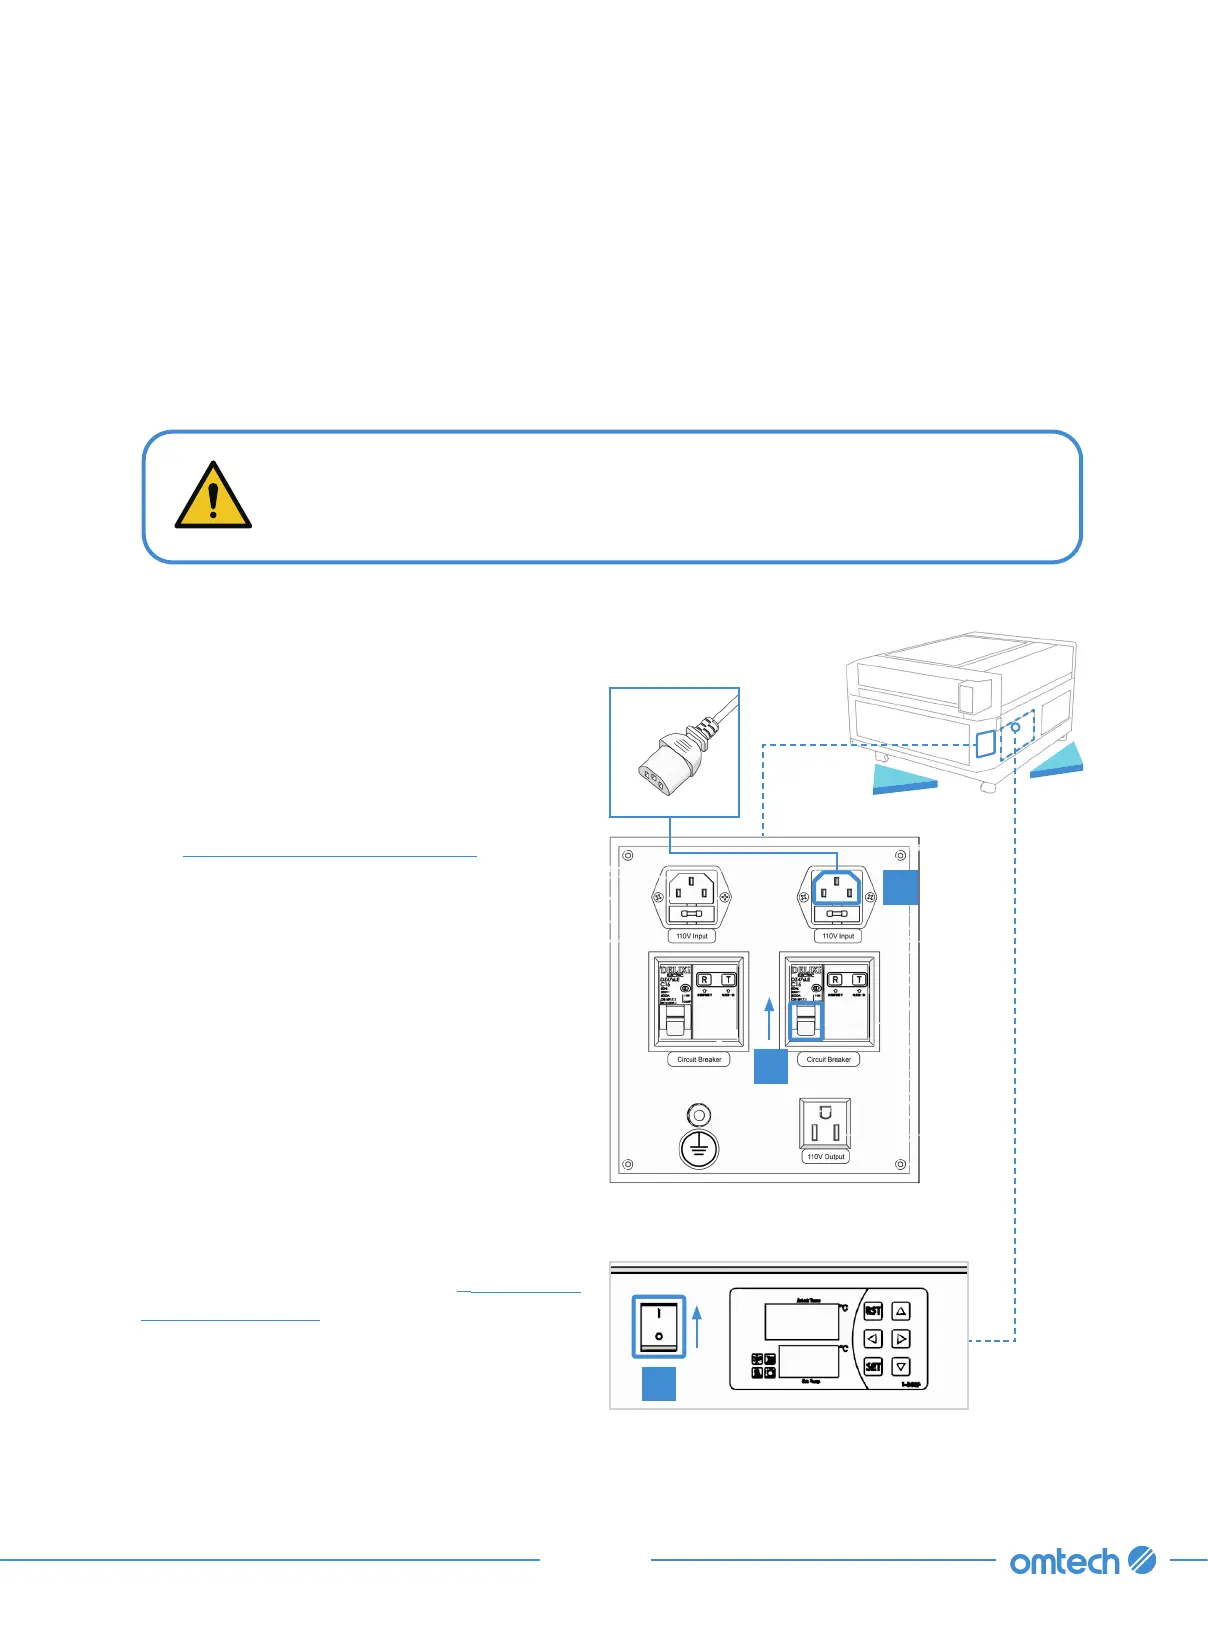
Set and Check the Water Chiller
1. Connect one of the provided power cords to
the top right power outlet at the rear of the
engraver.
You can connect the engraver’s main power
cord to the other outlet at the same time but
see
§
3.9 Main Power Connections (Page 54)
first for important considerations.
2. Flip its circuit breaker on.
3. Flip on the power switch on the chiller itself.
The control panel displays the actual
temperature and set temperature. The
default setting is to keep the chiller within
3.6
℉
(
±
2
℃
) of 77
℉
(25
℃
).
To change the target temperature:
a. Press SET, and then use
⯅
and
⯆
to
adjust the value up or down.
b. Press RST to save your changes.
For other adjustments, see
§
7.2 Water
Chiller Adjustment (Page 106).
1
2
3