59
5. Typical Operation Sequence
5.1 Operation Overview
Operate this laser engraver only in accordance with all the instructions provided
in this manual. Failure to follow the guidelines detailed here can result in property
damage and personal injury.
The engraver is operable either through:
•
The built-in control panel,
•
A USB cable connection with your computer,
•
The engraver’s in-built Wi-Fi module.
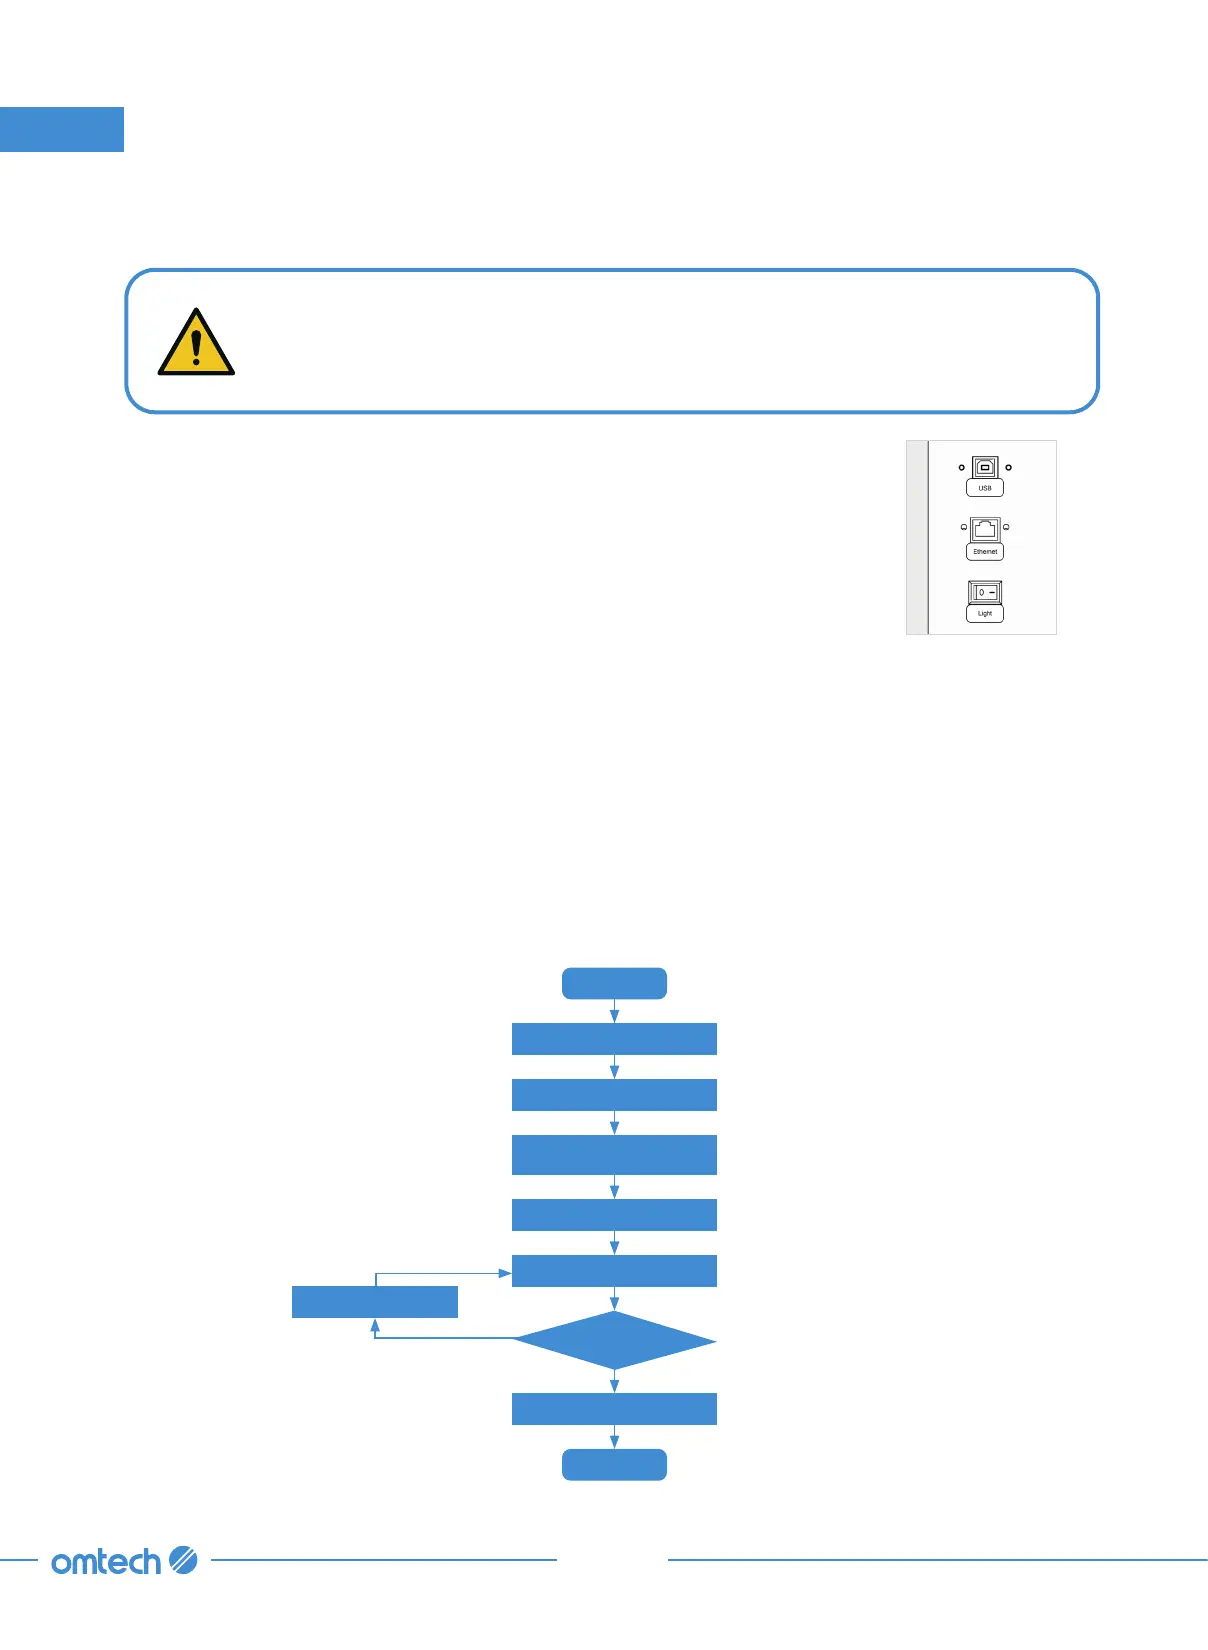
Check and power on
Start
Prepare your material
Adjust parameters
Prepare your design file
and set parameters
Focus
Engrave or cut
Power off
End
No
Is the result ok?
Yes
Most of the operations are automated. The, X+, X–, Y+, and Y– icons in the manual menu can be used
to move the laser head along the X and Y-axis guide rails and the Z+, Z– can be used to raise or lower
the workbed.
More often, you will create designs as graphic files on the control computer, load them on the
engraver, and then engrave or cut them. The software can be used to create different layers with
different power settings, speeds, and other parameters.
Once everything is perfect, press “Focus” to autofocus the laser head, press “Frame” to preview
the size of a preset frame around your engraving design, press start to begin engraving, and press
“Stop” to stop and reset the laser head back to the origin.