72
PRO 3655 does not come with a rotary attachment but is compatible with
standard four-pin models.
Cut the power to the engraver before installing the attachment.
5.5 Rotary Operation
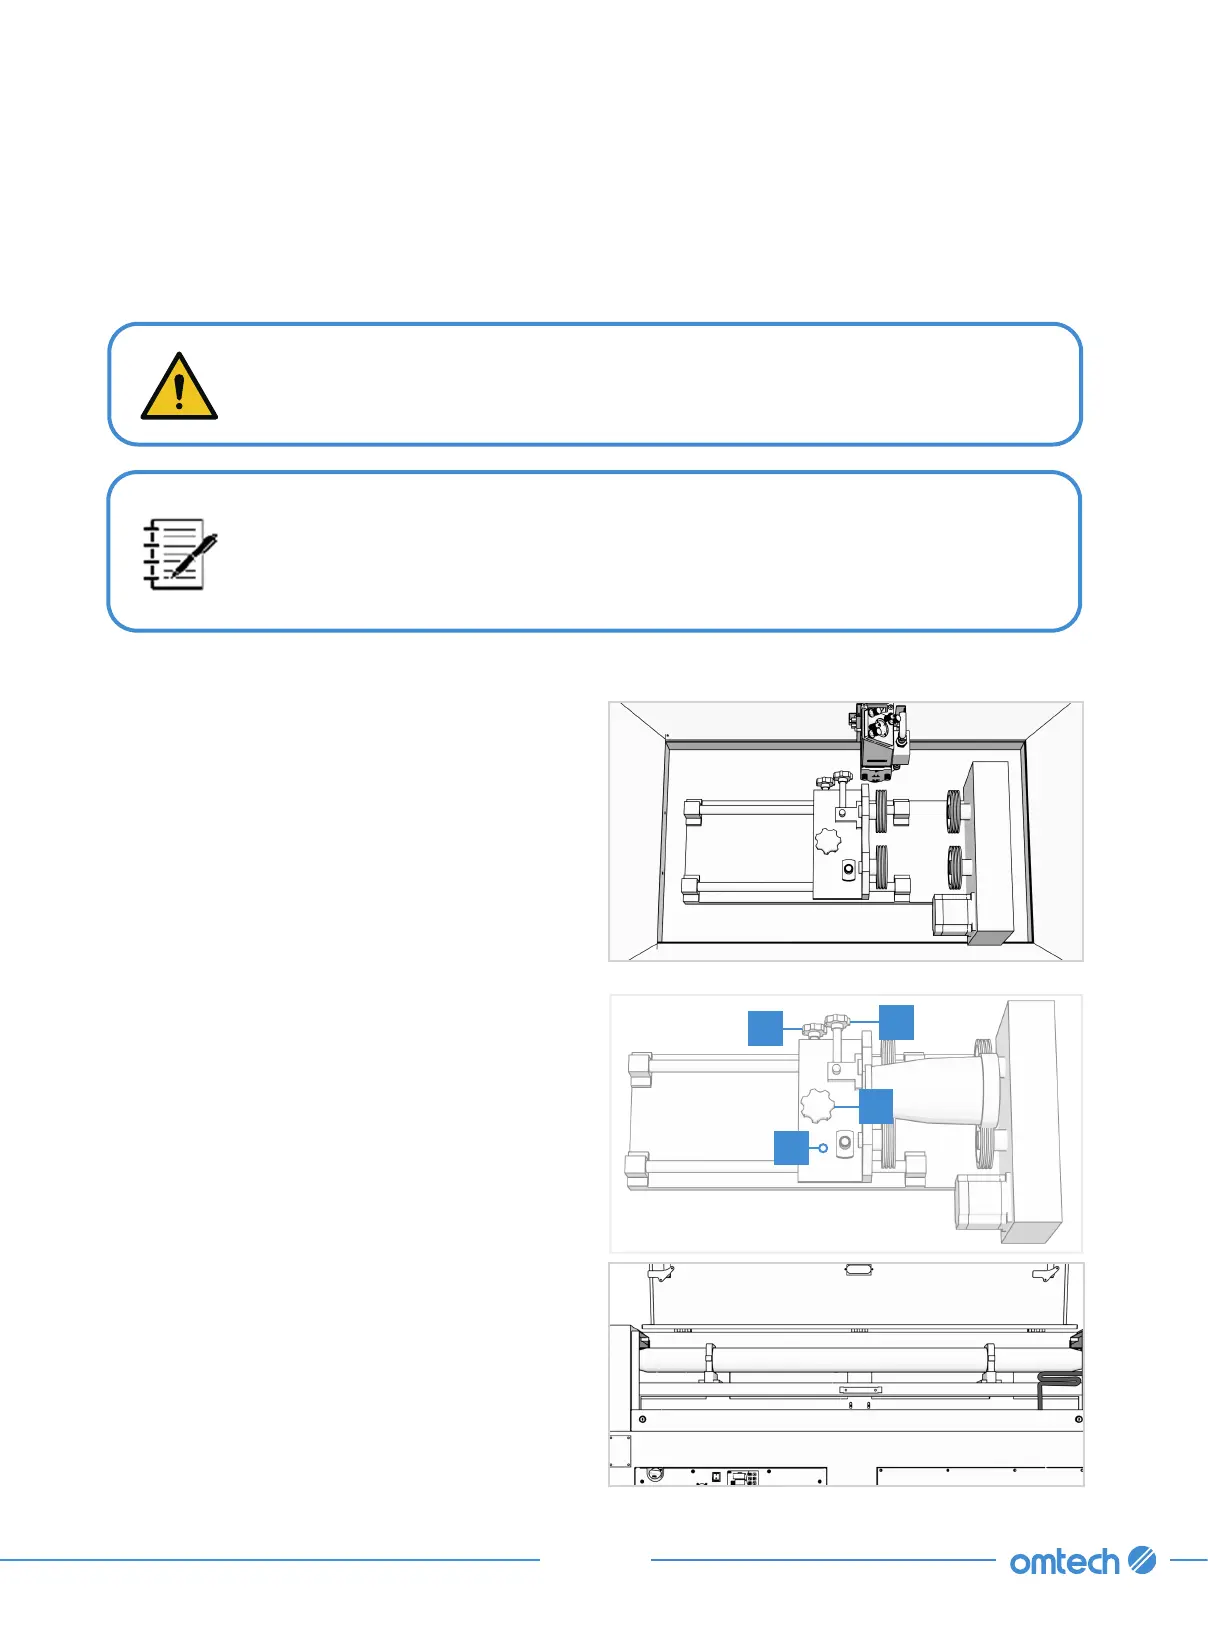
5.5.1 Installing a Rotaty Attachment
1. Remove the steel saw bed or the aluminum knife bed and the support bar of the blade.
2. Place your rotary axis in an open area.
3. Put the material and adjust the position using
its knobs.
a. Use the knob A to adjust the vertical
position, and then use the knob B to
tighten and secure it.
b. Loosen the knob A, slide the base D to
adjust the horizontal position, and then
tighten knob A to secure it.
4. Check the height of workbed is appropriate.
If necessary, lower the workbed (using and
keys) to provide room for the laser head to
pass over your axis and material.
5. Connect the rotary axis cord to the rotary
port at the back of the main bay.
B
A
C
D