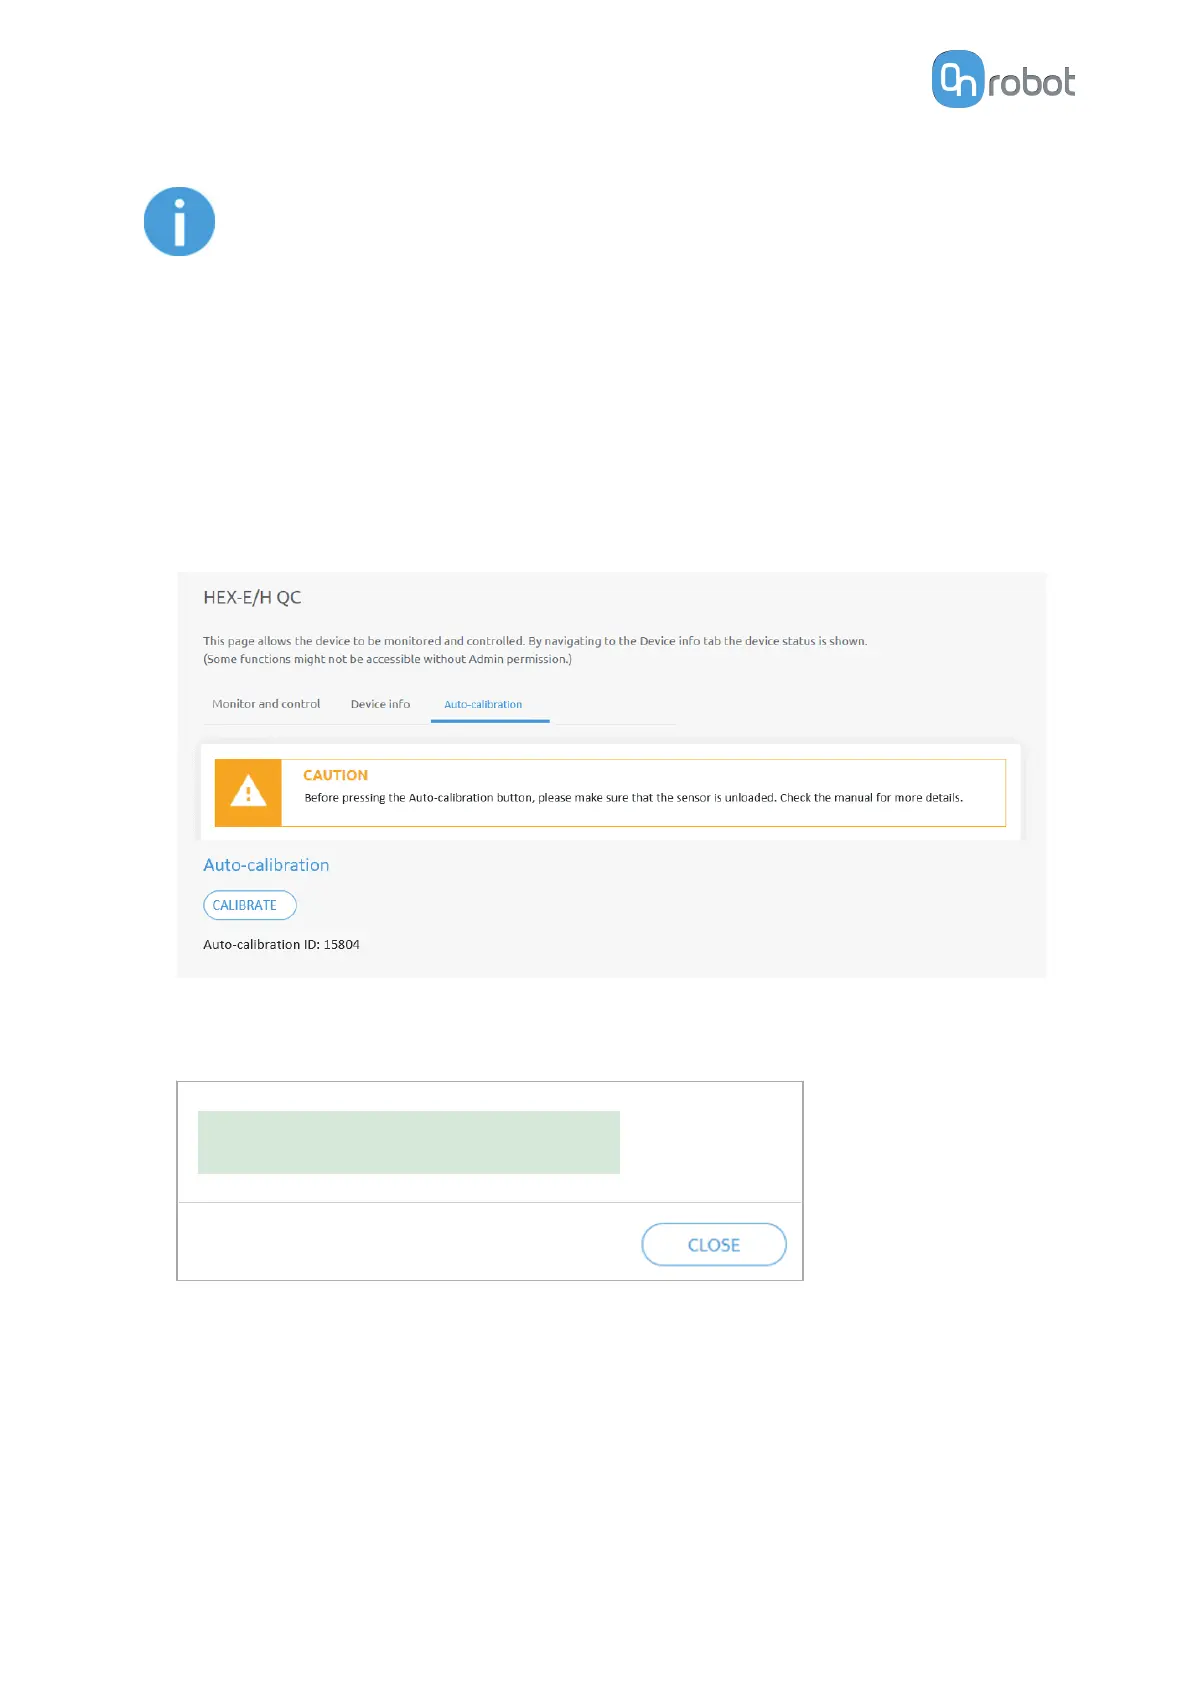
NOTE:
Make sure that the HEX is mounted on the robot during the auto-
calibration. The measured oset value can dier when the HEX is not
mounted on the robot.
2. The sensor's tool side should face upward (robot side facing downward) to get the most
accurate result.
3. Note how the tool(s) are connected to the sensor. After the calibration, the tools need to
be re-attached to the sensor the same way to prevent any disturbance in your application
(for example re-teaching waypoints)
4. Detach any tool connected to the sensor and put it aside, it must be completely unloaded
during the auto-calibration.
5. On the Auto-calibration tab, press Calibrate.
6. Confirm the process in the popup window.
7. If the auto-calibration was successful, the following message is shown:
Auto-calibration successfully performed.
If the auto-calibration was carried out but the result indicates that a recalibration at the
OnRobot factory is recommended, then the following message is shown:
ADDITIONAL SOFTWARE OPTIONS
153
 Loading...