21
[Shift type]
①Look through the optical plummet eyepiece, and rotate the eyepiece knob until the center
mark can be seen clearly.
②Rotate the focusing knob of the optical plummet and adjust the focus on the ground mark.
③Loosen the centering clamp screw and push the upper plate by finger and stay the center
mark on the ground mark.
④Tighten the centering clamp screw.
⑤Loosen the horizontal clamp screw and rotate the instrument every 90° and confirm the
Circular vial is centered correctly. If the bubble is not centered, it can be properly set using
the leveling screws.
3.4 Levelling with circular vial
Tripod is adjusted according to the following points by extending or contracting the legs so
that the bubble of the Circular vial goes to the centre of the circle.
• Shorten the leg at the side of the bubble or extend the leg opposite of the bubble to position
the bubble in the centre of the vial circle.
• All three legs are extended or contracted until the bubble is in the centre.
During this process, the foot is not placed on the tripod leg point and the position of the
tripod points do not change.
3.5 Levelling with the plate vial
[Leveling]
①Rotate instrument horizontally and make two
Leveling screws arbitrarily chosen parallel to the
display.
②Turn on the Electronic vial function by pushing the
Laser key.
Put the bubble of the Circular vial in the center of the
circle when the display shows “TILT OVER”.
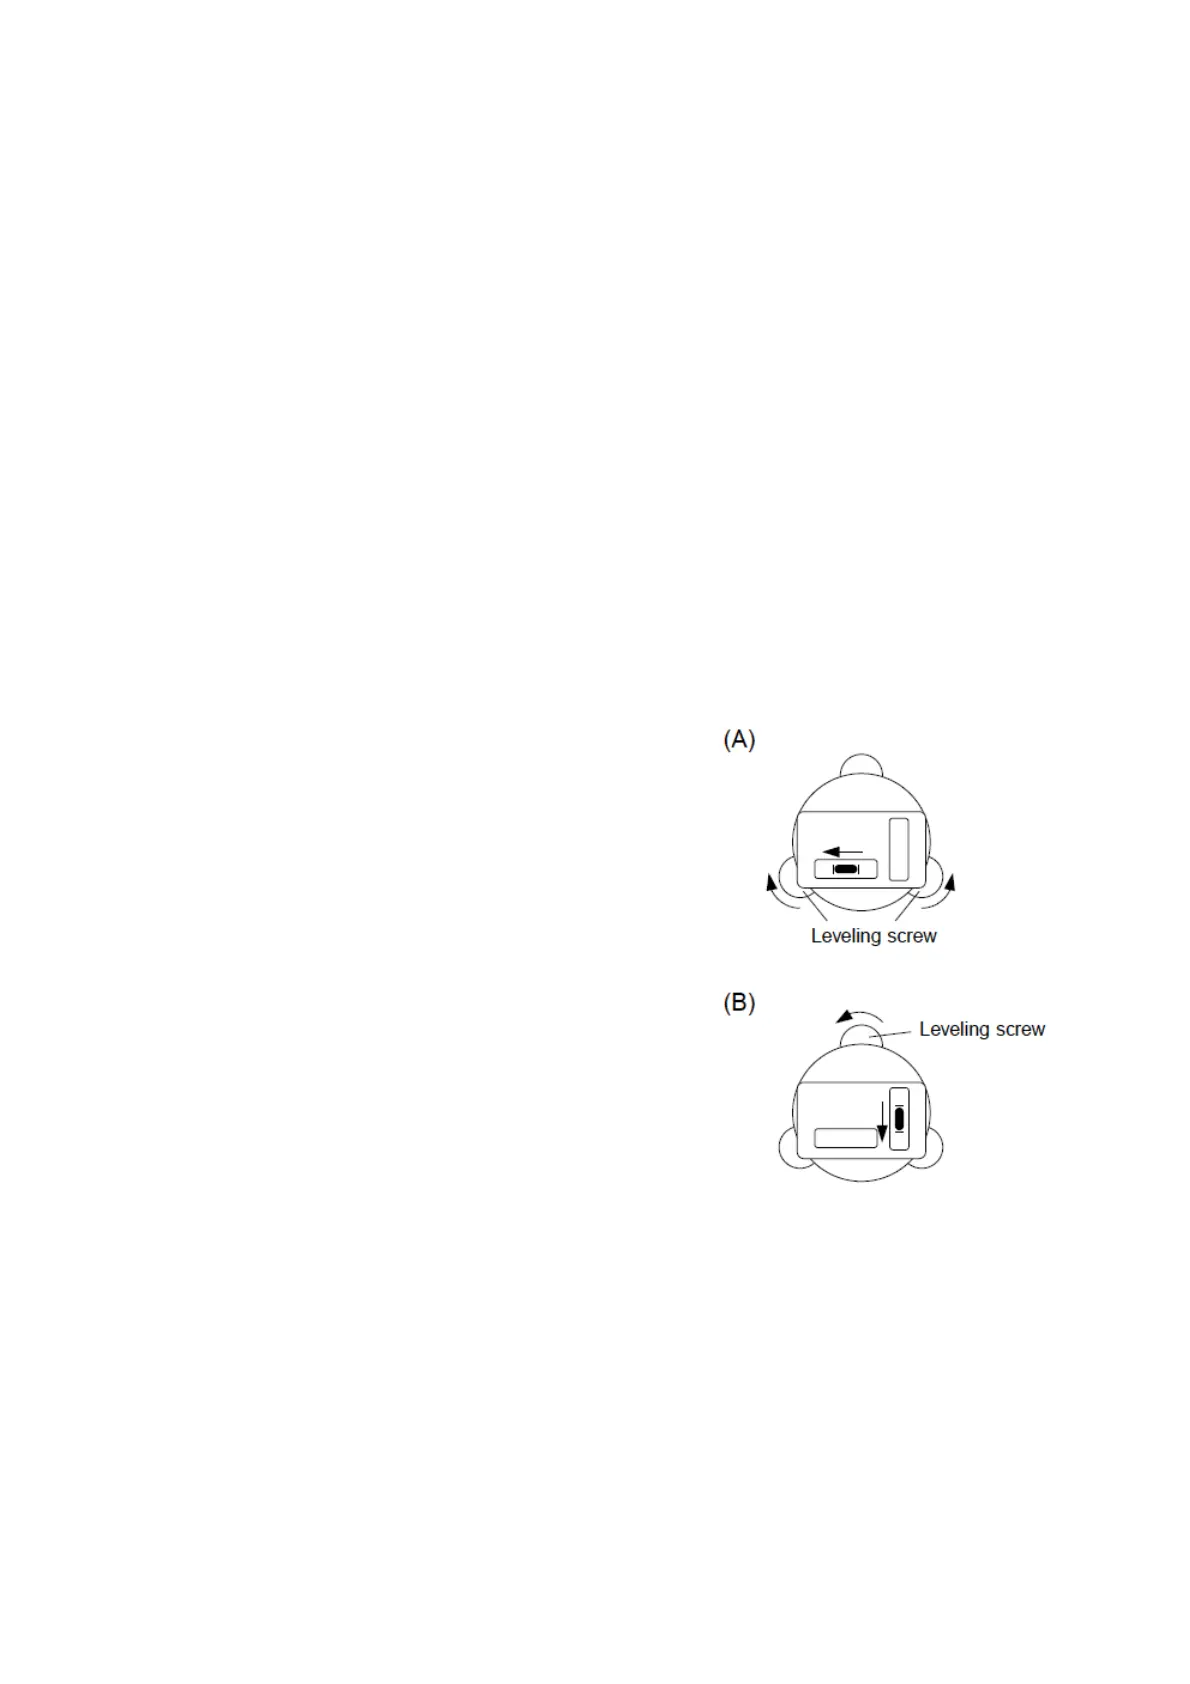
③Turn two Leveling screws arbitrarily chosen in an
opposite direction mutually and put the vial of the
horizontal Electronic vial in the center. (Figure A)
④Put the bubble of the lengthwise Electronic vial in the
center by operating the Leveling screw of one
remainder. (Figure B)
⑤The procedures are different according to the state of the Automatic inclination correction
as following.
[When using the Automatic inclination correction by 2 axes]
Please read procedure⑥because the horizontal angle and the perpendicular angle error by
a perpendicular axis are automatically corrected.
[When using the Automatic inclination correction by 1 axis]
The instrument is horizontally rotated by 180° after the bubble of the Electronic vial is
adjusted on the center at a Left circle position side and confirm that the bubble of the vial
is at the center at the right circle position.
[When using without Automatic inclination correction]
Confirm the bubble is at the center even if the instrument is rotated by each 90°.
 Loading...