23
Three type menus can be used by pressing [F5][PAGE]. Another is following menu.
The target type can be selected by pressing [F2][TARGET].
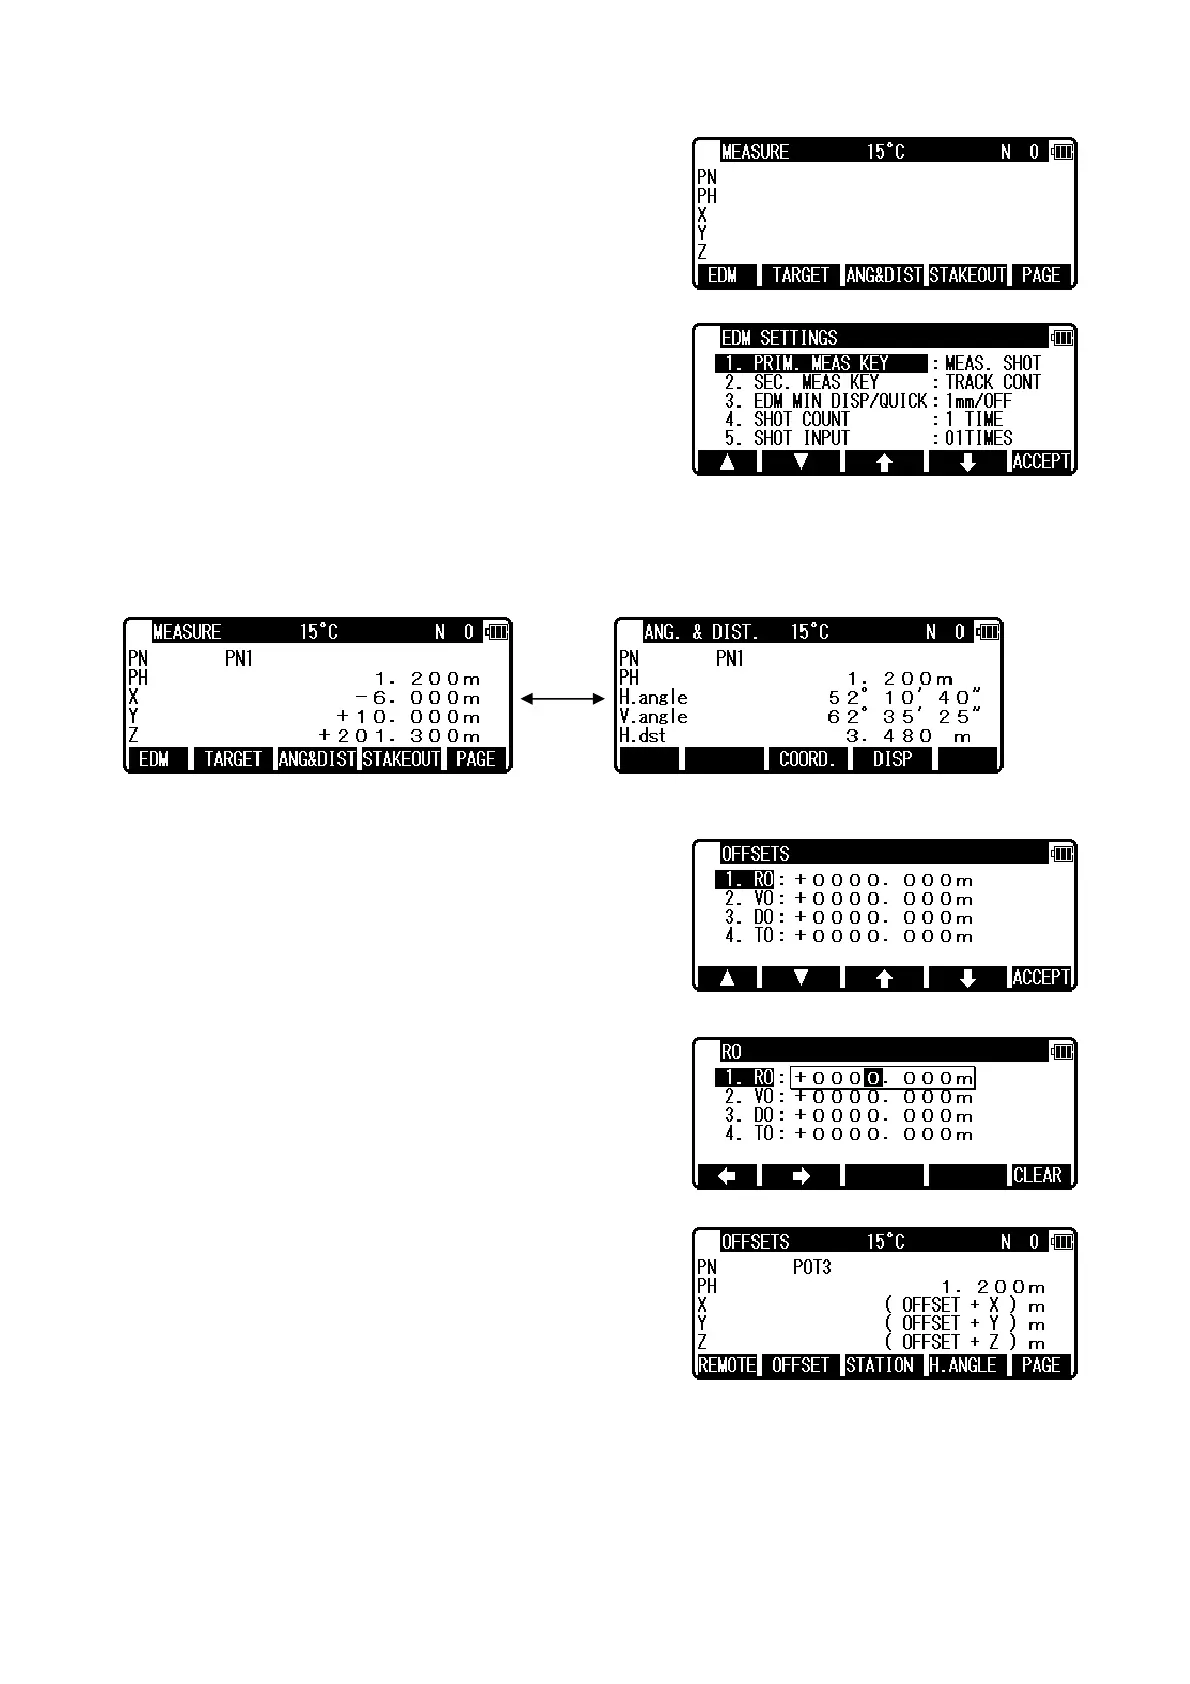
EDM settings can be selected by pressing [F1][EDM].
For example, change 1.PRIM. MEAS KEY (MEAS) to
TRACK SHOT or TRACK CONT if you want
to use tracking
measurement with primary MEAS key (MEAS).
Coordinates display and Angle & Distance display
1) Press [F5][PAGE] twice to view [F3][ANG & DIST].
2) Press [F3][ANG & DIST] to view [F3][COORD.] and Angle and Distance values.
3) Press [F3][COORD.] to view [F3][ANG&DIST] and Coordinates.
4.5.2 Offset
Press the [F2][OFFSET] to view the OFFSETS screen.
Offset enables you to work with Offsets. The following
offsets are available.
Press [ENT] to view the offset input window. Input the RO
offset value by pressing keys.
VO, DO and TO values are inputted in the same manner.
After input “TO” value, press [ENT] to view the MEASURE
screen.
(Or press [ESC] then press [ACCEPT].) The offset values
are added to X,Y and Z values.
The input value of offset is cleared when you save the surveying point and step forward to the next
surveying point.
RO: Radial Offset (RO: On the horizontal plane. Offset P: Along the line of measurement, thus
along the slope )
Offset P: Offset Point
POT3
X.XXX m
 Loading...