27
Press [ENT] after aiming back sight point.
Aim at the reference point and press [ENT] to view the
MEASURE screen.
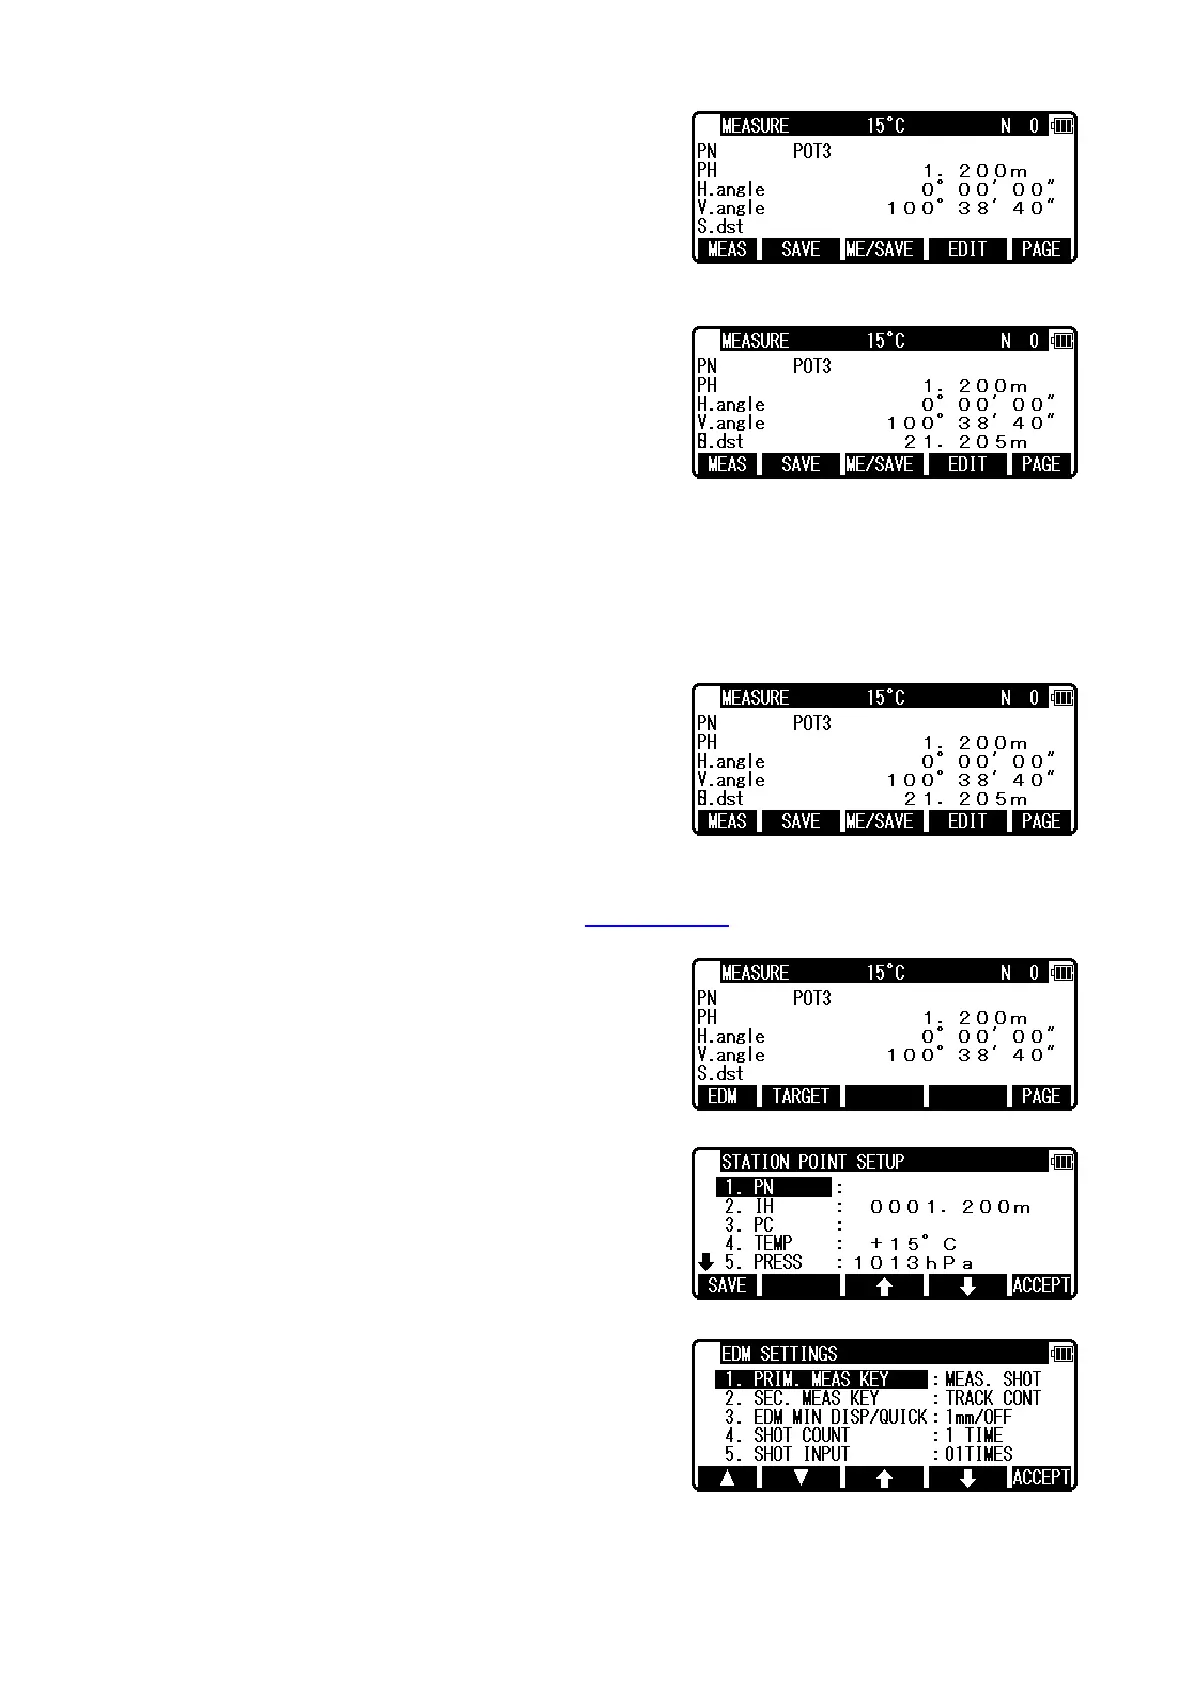
4.8 Measuring
Then, aim at the Target point and press the [F1][MEAS] to
measure the distance.
Press [F3][ME/SAVE] to measure and save the measured data.
Press [F2][SAVE] to save the measured data.
Press [F4][EDIT] to edit the PN, Point Name, PH, Prism Height and PC, Point Code. Press [ENT] to
view each input window by pressing up or down arrow key, and input your desired point name or
prism height or point code. Press [F5][ACCEPT] if the current PN, PH and PC are acceptable.
PC, Point Code:
Press [ENT] to view and input the PC, Point code, screen.
If PointCode exists, you can easily select them from the list or edit one of them after pressing the
[ENT]. For using Point Code List, please refer to “4.4. Point Code
”.
Press [F5][PAGE] to view another menu.
Station point setup can be changed by pressing
[F3][STATION].
EDM settings can be selected by pressing [F1][EDM]
For example, change 1.PRIM. MEAS KEY (MEAS) to
TRACK SHOT or TRACK CONT if you want to use tracking
measurement with primary MEAS key (MEAS).
4.9 Offset
RO: Radial Offset (RO: On the horizontal plane. Offset P: Along the line of measurement, thus
along the slope )
 Loading...