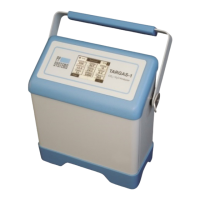
TARGAS-1 Operation Manual V. 1.02 12 support@ppsystems.com
1. Locate the power supply/charger and power cord inside the packing box.
2. Connect the AC power cord to the mains and the barrel connector into the EXT Power socket on
the back of the TARGAS-1.
3. Press the ON/OFF switch to power up the instrument. The power switch should now have an
illuminating blue ring indicating power is on.
4. Allow 10-15 minutes to achieve warm-up.
You are ready to go!
Data Storage
For convenience and ease it is very important to note that all TARGAS-1 system data is recorded and
saved directly to a USB flash drive (i.e. memory stick or thumb drive). A USB flash drive is included in the
spares kit (Part No. 43034-1) with every new system. Most commercially available flash drives are
compatible with the TARGAS-1.
THEREFORE IT IS IMPERATIVE THAT YOU HAVE A USB FLASH DRIVE WITH YOU AT ALL TIMES
IF YOU WANT TO RECORD DATA WITH YOUR TARGAS-1. OTHERWISE DATA WILL HAVE TO BE
RECORDED MANUALLY.
Technical Specification
TARGAS-1 CO
2
/H
2
O Gas Analyzer (Main Console)
Two non-dispersive infrared, configured as an absolute absorptiometer
with microprocessor control of linearization for both CO
2
and H
2
O. All
readings are automatically corrected for temperature, pressure and foreign
2
0 ‐ 10000 μmol mol
‐
1
Precision: 1 μmol mol
‐
1
2
0‐75 mb
Precision: 0.1 mb
Pressure
Compensation Range
< 1% of span concentration over the calibrated range but limited by the
accuracy of the calibration mixture.
± 1 μmol mol
‐
1
for CO
2
differential up to 50 μmol mol
‐
1

 Loading...