SECTION 05B: X3 SERIES COOLING SYSTEM
30 PA1621 Maintenance Manual All Series | January 2017
9. Also remove the CAC lateral support (3 hex
bolts).
FIGURE 39: CAC LATERAL SUPPORT BOLTS
10. From under the vehicle, unscrew the CAC
from the lower support (two hex bolts with
plastic insulating bushings).
FIGURE 40: LOWER CAC INSULATED BOLTS
11. Remove CAC (and two upper brackets) from
the vehicle.
12. If a new CAC is to be installed, transfer the
upper CAC pipe and upper brackets to the
new unit. Torque upper brackets with plastic
bushings & washers to specified torque.
TORQUE: 9 lb-ft (12 Nm)
FIGURE 41: CAC UPPER BRACKETS & PIPE
WARNING
To prevent galvanic corrosion, the CAC upper
brackets need to be electrically insulated from
the CAC body.
When reinstalling brackets, make sure the
plastic insulating bushings (two per bracket) &
washers (one per bracket) are present and in
good condition (replace as necessary).
After installation, check for proper insulation
(lack of conductivity) between brackets and
CAC body with a suitable ohmmeter or
continuity tester (buzzer).
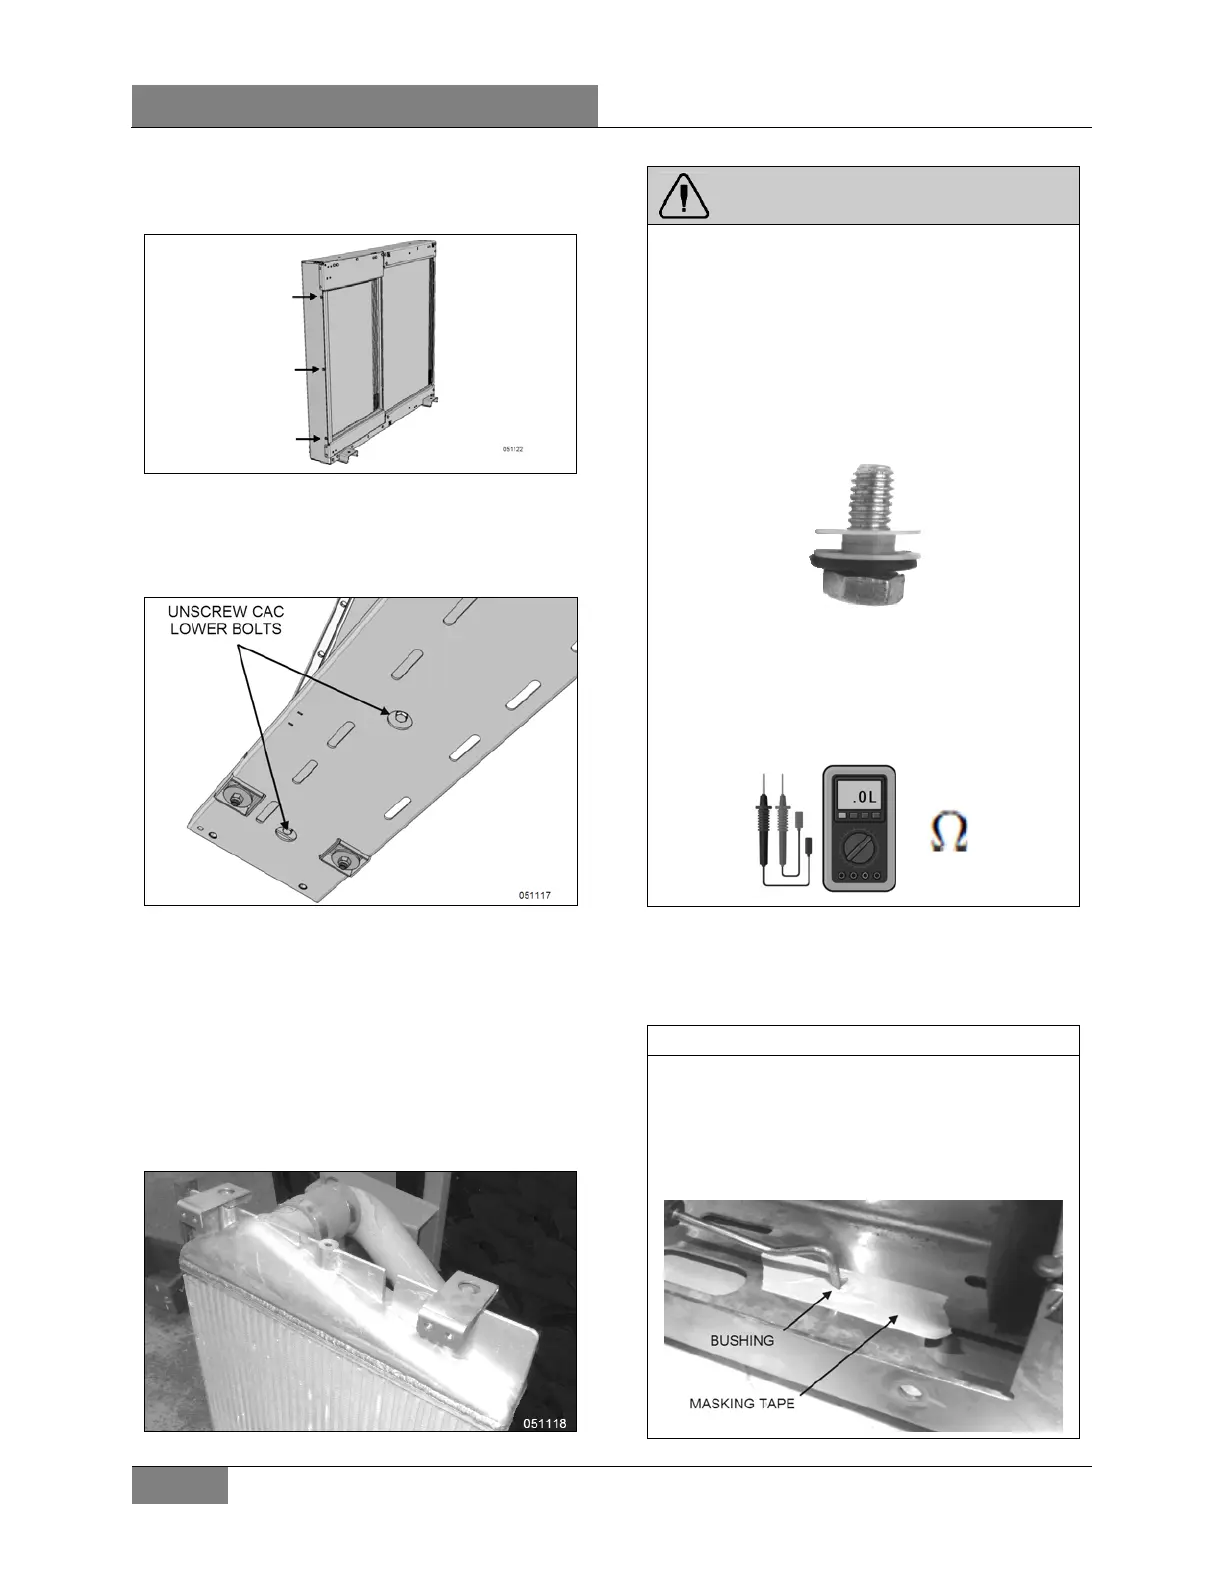
13. In preparation for reinstallation of the CAC,
install the inner insulating bushings in their
location (lower support).
NOTE
To ease installation and ensure that the
bushings will not move during reinstallation,
use common masking tape to hold the inner
bushings to the lower support.
 Loading...