SECTION 05B: X3 SERIES COOLING SYSTEM
PA1621 Maintenance Manual All Series | January 2017 31
14. Install CAC on the vehicle and secure to the
lower support using both lower hex bolts,
washers and remaining plastic insulating
bushings.
TORQUE: 9 lb-ft (12 Nm)
WARNING
To prevent galvanic corrosion, the CAC is
electrically insulated from the support by the
use of plastic insulating bushings.
When reinstalling brackets, make sure the
plastic insulating bushings (two per bracket) &
washers (one per bracket) are present and in
good condition (replace as necessary).
After installation, check for proper insulation
(lack of conductivity) between support and
CAC body with a suitable ohmmeter or
continuity tester (buzzer).
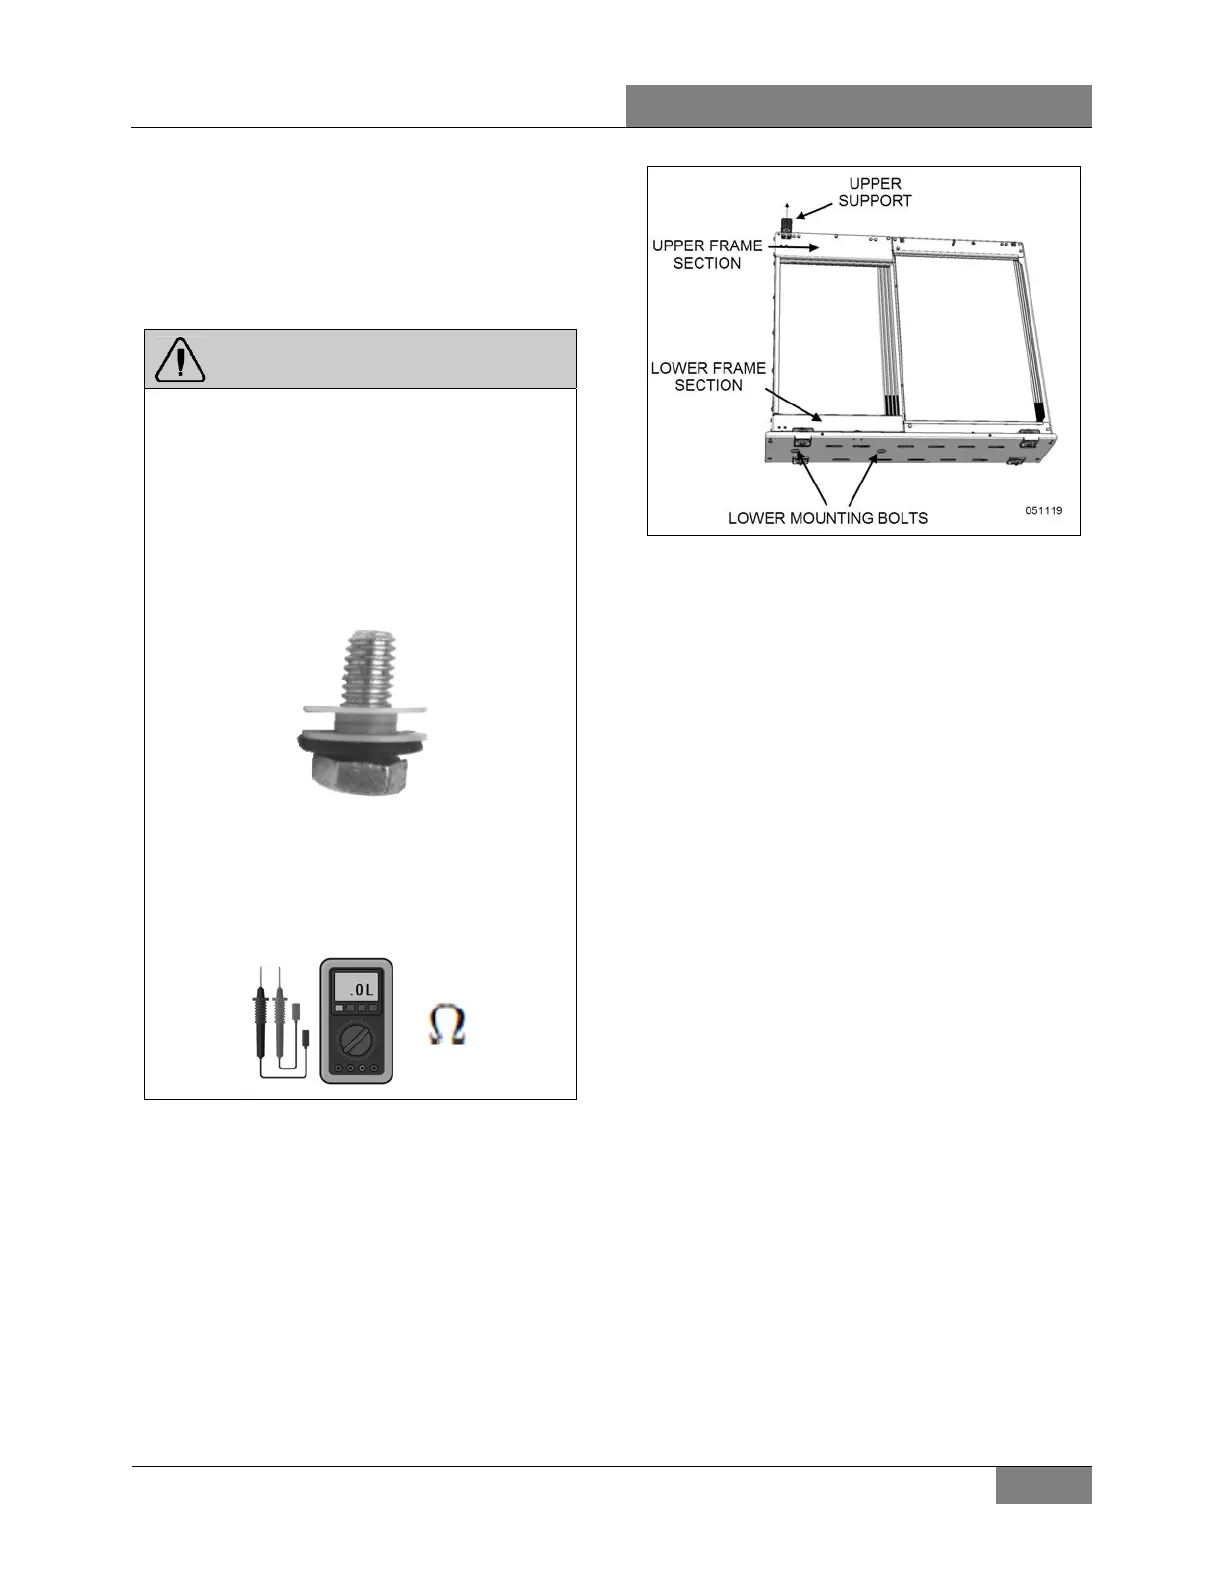
15. Reinstall both (upper and lower) front frame
sections.
TORQUE: 9 lb-ft (12 Nm)
16. Secure upper support to the vehicle
structure.
FIGURE 42: CAC IN VEHICLE
17. Double check for lack of continuity between
CAC body and vehicle structure (see note at
the beginning of paragraph 11.4 for
reference).
18. Reconnect upper CAC pipe and tighten
hose clamps at both ends.
19. Reconnect lower CAC pipe.
20. Proceed to the fan shroud reinstallation
(refer to paragraph 11.3 earlier in this
section).
21. Set starter selector switch to the ON position
and start the vehicle.
22. Check for CAC leakage at the pipe
connections.
 Loading...