RED RAVEN OPERATION GUIDE
COPYRIGHT © 2016 RED.COM, INC 955-0127_V6.3, REV-E | 133
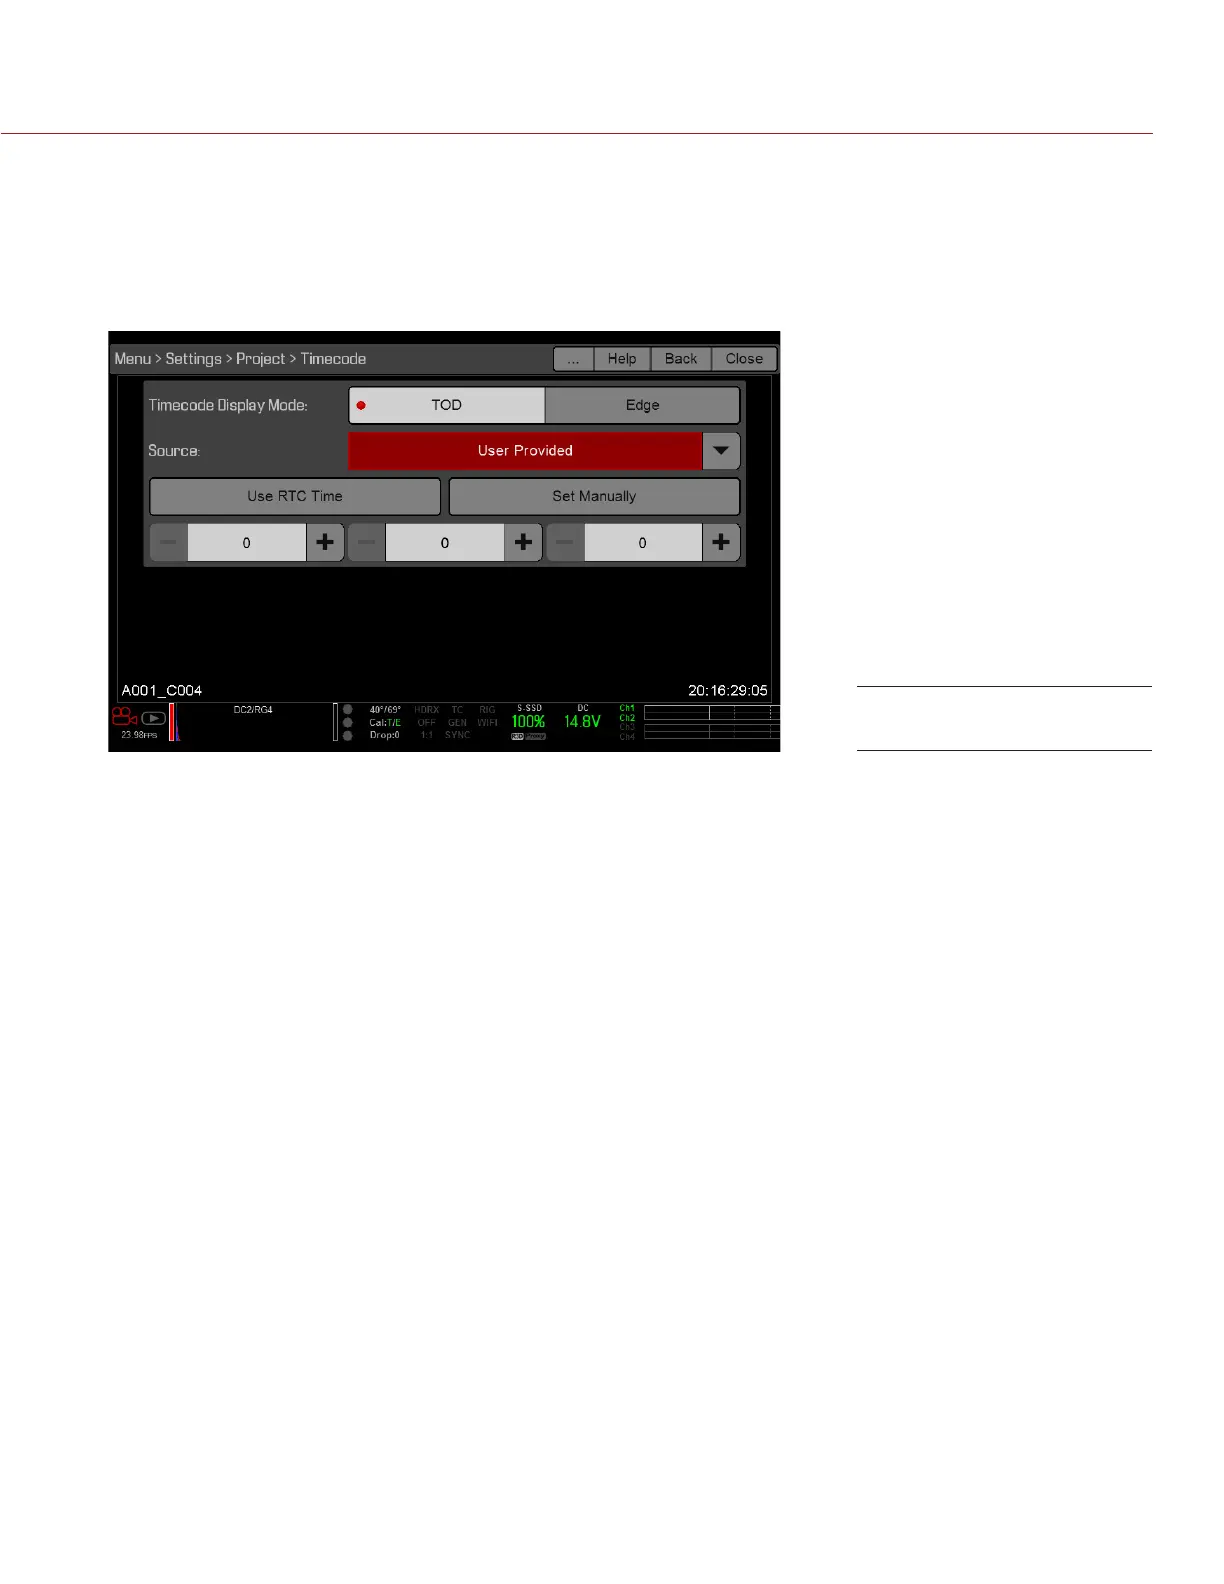
SET UP INTERNAL TIMECODE
To set up and adjust timecode generated by the camera, follow the instructions below:
1. Go to Menu > Settings > Project > Timecode.
2. Select the desired Timecode Display mode.
3. Set Source to User Provided.
4. Use the additional controls to sync TOD timecode with the RTC or set manually.
Alternatively, go to Menu > Media > Device > Format Media... to set Edge timecode manually.
The TC indicator in the Lower Status Row remains grey when internal timecode is enabled.
OUTPUT TIMECODE WITH DSMC2 REDVOLT EXPANDER
NOTE: A DSMC2 REDVOLT Expander is required to output timecode from the camera.
With the DSMC2 REDVOLT Expander, you can output a timecode signal to an external device, or to a slaved
camera.
1. Follow the instructions in “Set Up Internal Timecode” on page 133 to set up internal timecode.
2. Connect the camera to another device using the PRO I/O TIMECODE CABLE (3').
A. Connect one connector to the TIMECODE port on the DSMC2 REDVOLT Expander.
B. Connect the other connector to an external device or camera.
REQUIRED CABLE
790-0212: PRO I/O TIMECODE CABLE (3')
Source: User Provided