Common Procedures
SM 3-19 J012/J013/J014
Replacement
Adjustment
Preparation:
Remove platen or ADF. ( 3.2.4, 3.2.5)
Raise the scanner unit to full upright. ( 3.2.7)
Remove the right front cover. ( 3.2.13)
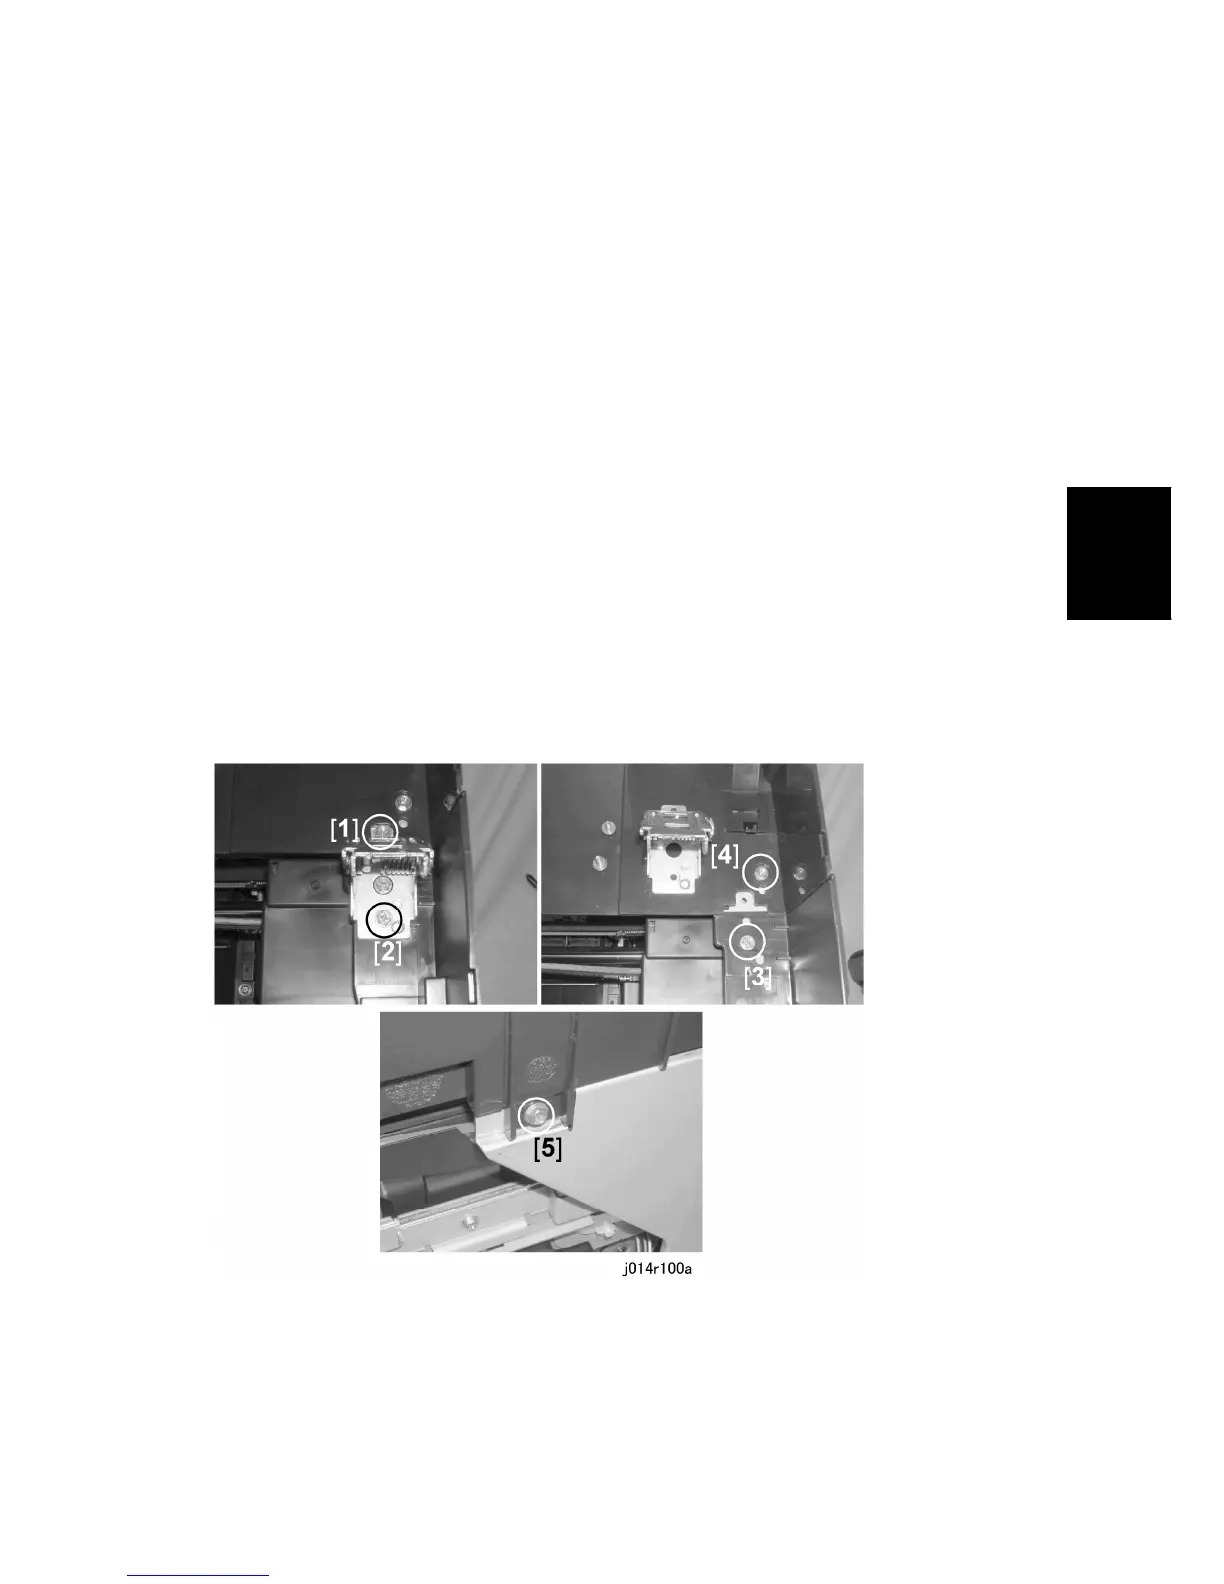
1. Remove screw [1] (x1).
2. While pulling the right tray forward gently, use the tip of a small flat-head screwdriver to
press and release tabs [2] and [3].
3. At the right, rear cover of the machine use the tip of a small flathead screwdriver to
press and release the tab [4].
4. Remove the right cover [5] carefully to avoid damaging the snap tabs on the top, bottom,
and rear edge of the cover.
3.2.11 RIGHT INNER COVER
Preparation
Remove platen or ADF. ( 3.2.4, 3.2.5)
Raise the scanner unit to full upright. ( 3.2.7)
Remove: (1) paper cassette, (2) paper output tray, (3) right front cover, (4) right cover
1. Remove screws [1] and [2] then remove the hinge.
2. Remove screw [3].
3. Loosen screw [4] (do not remove it).
4. On the right side of the machine remove screw [5].

 Loading...