42
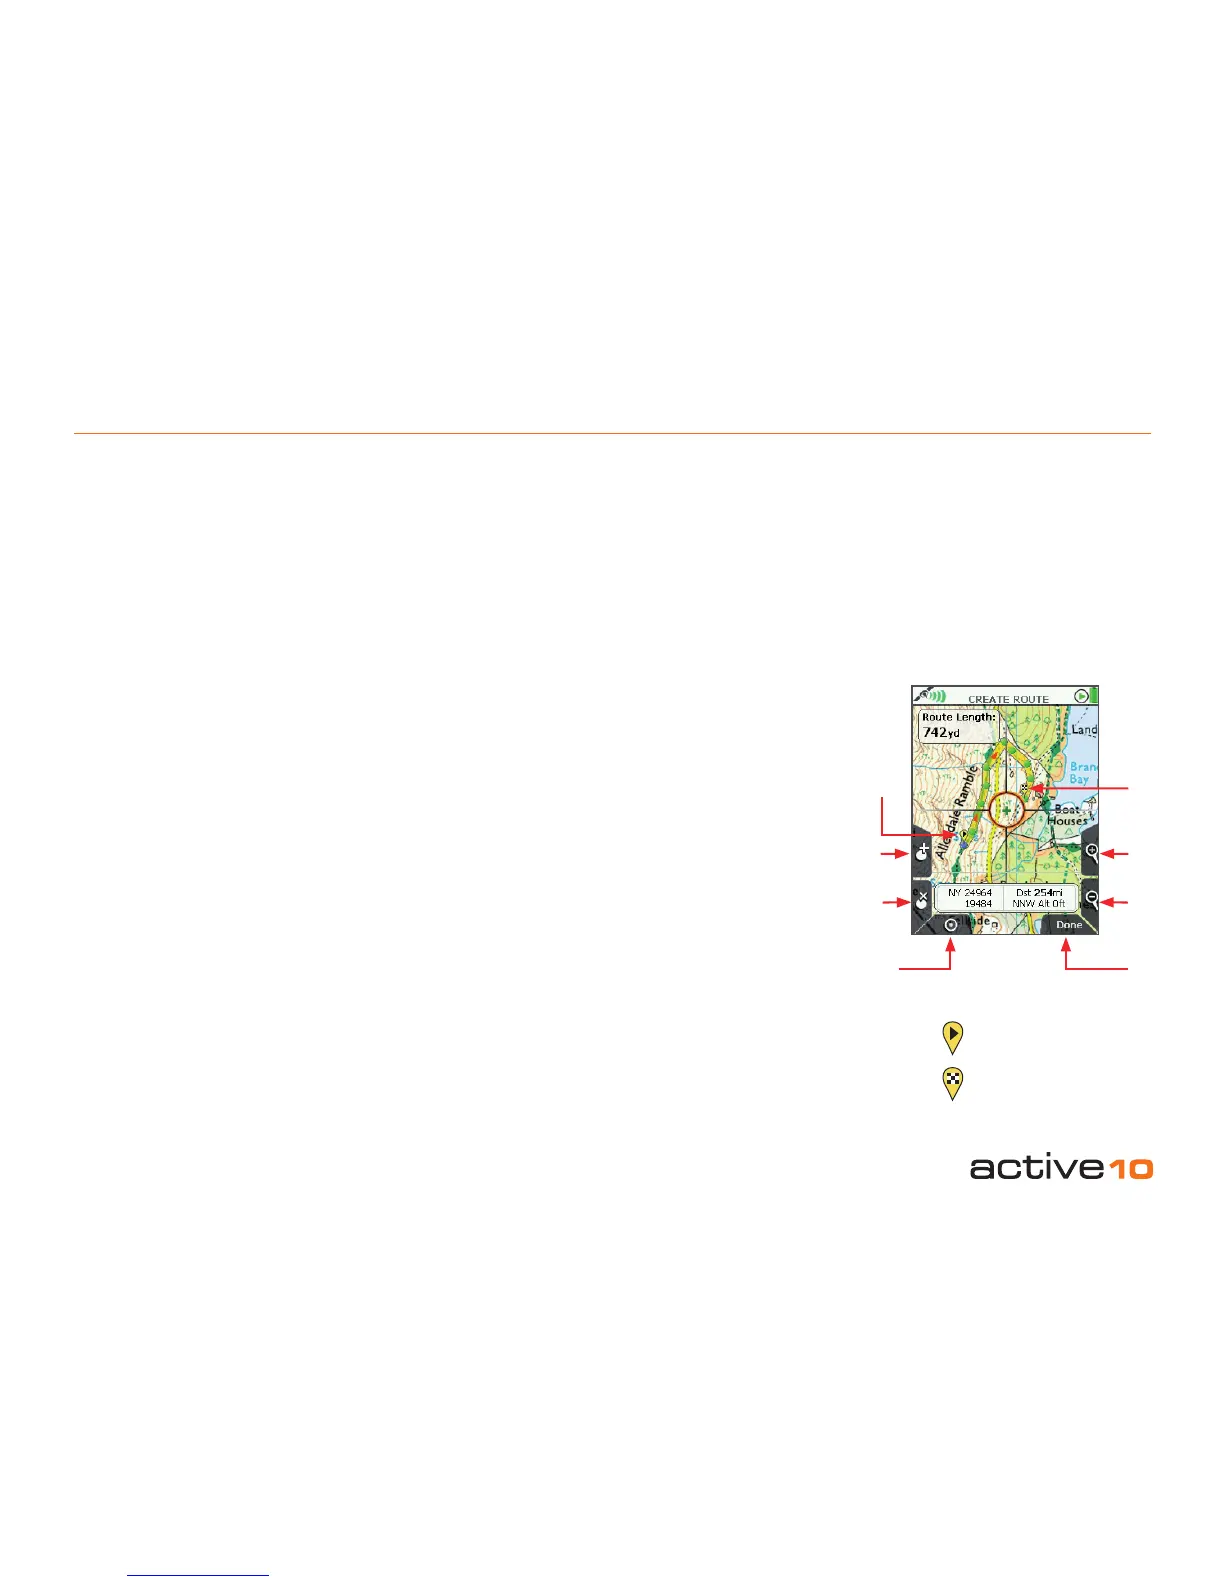
8.01 ROUTES MENU: Create New Route
8.01 Create New Route
(GPS MAP → MAIN MENU → ROUTES
MENU → Create New Route)
From the MAIN MENU, select the Routes
Menu and press Create New Route. This
takes you to the CREATE ROUTE screen
where you will be able to plot routes by laying
down a series of waypoints. Zoom in for
greater accuracy in placing waypoints.
Alternative ways to create a route:
GPS MAP → POSITION INFO via center
press → Create New Route
or
GPS MAP → PLANNING → ROUTES MENU
via lower left button → Create New Route
Buttons:
Add Waypoint*
Press the button or center press the joystick
Remove Waypoint
Press the button or center press the joystick
ROUTES MENU
Return to ROUTES MENU (section 8.00)
Zoom
Zoom in and out
Done
Press when route is nished, unless you have
‘closed’ the route.
If there is an SD card in the unit and it is not
write-protected, by default the route will go
into the SD Card folder. If there is no SD card
in the unit, by default the route will go into the
Internal Storage folder.
You can create route folders using SatSYNC
(section 8.04). To create a new route in an
existing folder, you will need to select the
folder in the Routes Menu and press Create
New Route from there.
Note: Folders are only visible if they contain a
minimum of one route or OOI.
The Add Waypoint button has 3 functions:
1. To add a waypoint.
2. To click on an existing waypoint and drag it
to another location.
3. To close the route (i.e. connect the last
waypoint to the start point) if the last
waypoint is very close to the start waypoint.
The center cross turns green inside the
orange location icon when you are on the
CREATE ROUTE screen to indicate you are
ready to add waypoints. Place waypoints
wherever your planned route changes
direction. Waypoints are shown as green
dots. As waypoints are laid down, a yellow/
blue highlighted route is created. To remove
waypoints, position the green cross over a
waypoint and press the Remove Waypoint
button.
Add
Waypoint
Remove
Waypoint
ROUTES
MENU
Figure 8.01
Zoom
In
Finish
Start
Done
Zoom
Out
Route Start
Route End
*
The start point of a route has an icon with a
forward arrowhead in a yellow bubble. The
end of a route has an icon with a chequered
ag in a yellow bubble.
Press Done or press the lower left button to
return to the ROUTES MENU.
To view the route, highlight it and press
View; a route map plus route length is shown
(section 8.03).