Protected by copyright. Copying for private or commercial purposes, in part or in whole, is not
permitted unless authorised by SEAT S.A. SEAT S.A does not guarantee or accept any liability with
respect to the correctness of information in this document. Copyright by SEAT S.A.
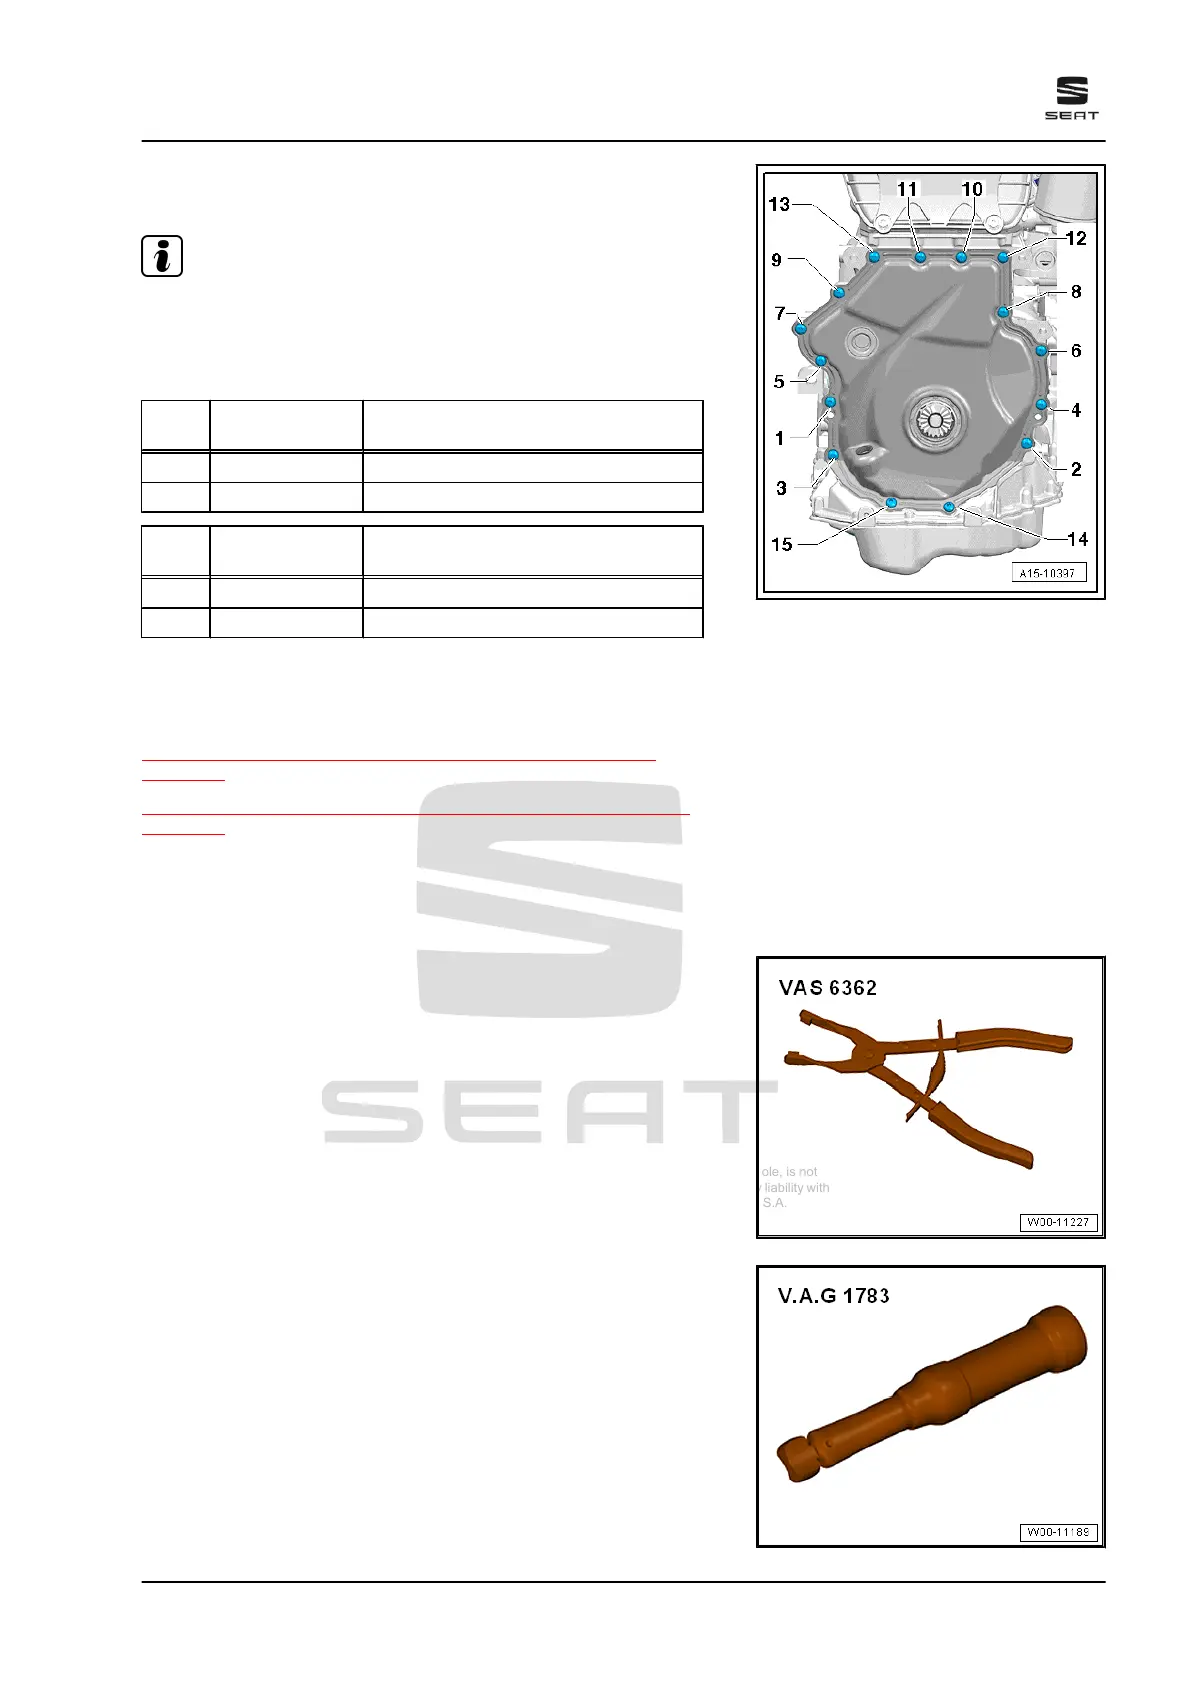
Lower timing chain cover – tightening sequence for version with
15 bolts
Note
Do not tighten bolts -3- and -6- with turning further angle until after
the vibration damper has been installed. The bolts must be un‐
screwed again for installing the vibration damper. Observe differ‐
ences in torque for steel and aluminium bolts!
Stage Steel bolts Torque specification and turning fur‐
ther angle for steel bolts
1. -1 - 15- 8 Nm
2. -1 - 15- 45°
Stage Aluminium bolts Specified torque/turning further angle
for aluminium bolts
1. -1 - 15- 4 Nm
2. -1 - 15- 45°
2.2 Removing and installing timing chain
cover
⇒ “2.2.1 Removing and installing timing chain cover (top)”,
page 121
⇒ “2.2.2 Removing and installing timing chain cover (bottom)”,
page 123
2.2.1 Removing and installing timing chain
cover (top)
Special tools and workshop equipment required
♦ Hose clip pliers - VAS 6362-
♦ Torque wrench - V.A.G 1783-
Ateca 2017 ➤ , León 2013 ➤ , León ST 2013 ➤
4 cyl. petrol engine (1.8 l and 2.0 l with direct injection, 4 V, exhaust gas turbocharger, timing chain,
EA 888 III. Gen) - Edition 10.2018
2. Timing chain cover 121