Protected by copyright. Copying for private or commercial purposes, in part or in whole, is not
permitted unless authorised by SEAT S.A. SEAT S.A does not guarantee or accept any liability with
respect to the correctness of information in this document. Copyright by SEAT S.A.
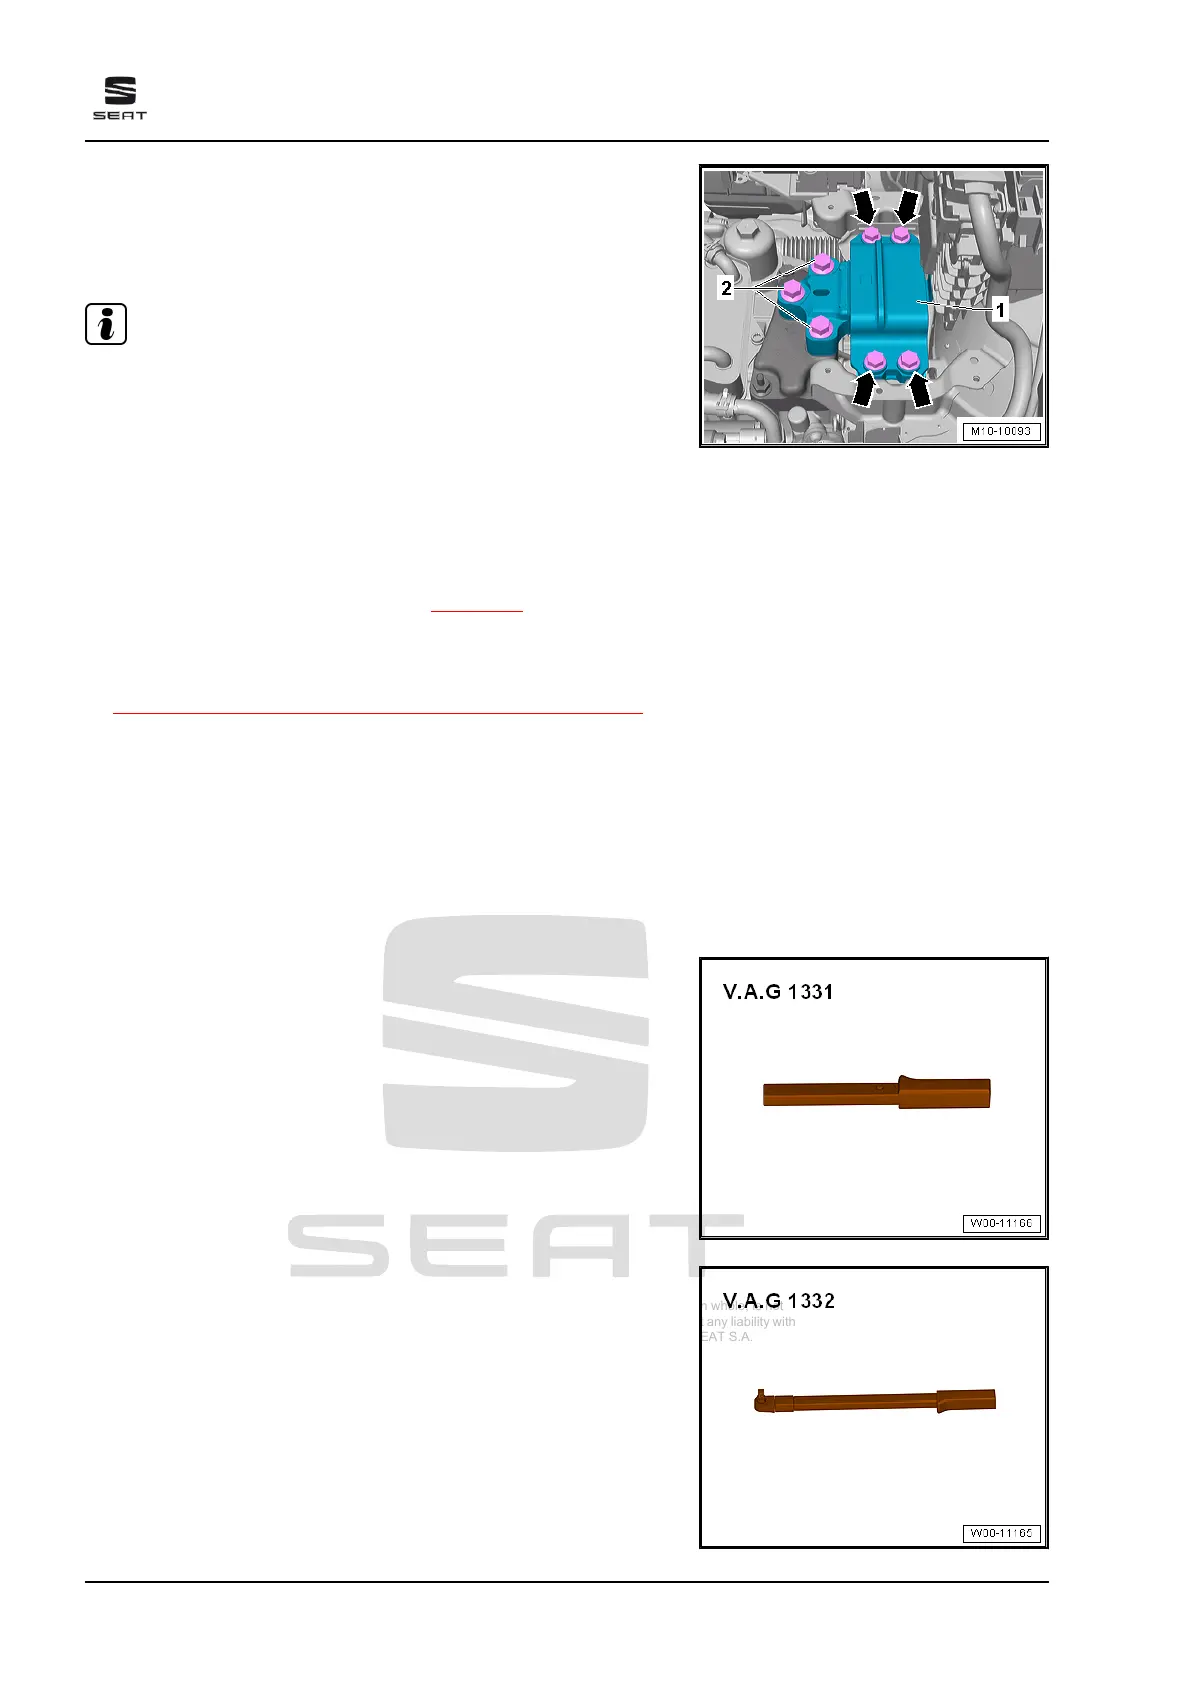
– Unscrew bolts -2-. Then unscrew bolts -arrows-, and remove
gearbox mounting -1-.
Fitting
Install in the reverse order of removal, observing the following:
Note
♦
Replace bolts that are tightened with specified tightening an‐
gle.
♦
Gearbox support and support arm of gearbox mounting must
be perfectly parallel to each other before screwing in bolts. If
necessary, lift gearbox at rear using trolley jack.
– Tighten gearbox mounting on longitudinal member.
– Pull gearbox up with spindle on support bracket until gearbox
support contacts support arm of gearbox mounting.
– Assembly mountings: check setting ⇒ page 56 .
– Remove the gearbox support - 10 - 222 A- from the engine.
Specified torques
♦ ⇒ “2.1 Installation overview - assembly mountings”, page 44
♦ ⇒ Electrical system; Rep. gr. 27 ; Battery; Assembly overview
- battery
♦ ⇒ General body repairs, exterior; Rep. gr. 50 ; Plenum cham‐
ber partition panel; remove and install plenum chamber cover
2.4 Removing and installing pendulum sup‐
port
Special tools and workshop equipment required
♦ Torque wrenches - V.A.G 1331-
♦ Torque wrenches - V.A.G 1332-
Ateca 2017 ➤ , León 2013 ➤ , León ST 2013 ➤
4 cyl. petrol engine (1.8 l and 2.0 l with direct injection, 4 V, exhaust gas turbocharger, timing chain,
EA 888 III. Gen) - Edition 10.2018
50 Rep. gr.10 - Removing and installing engine
 Loading...