Protected by copyright. Copying for private or commercial purposes, in part or in whole, is not
permitted unless authorised by SEAT S.A. SEAT S.A does not guarantee or accept any liability with
respect to the correctness of information in this document. Copyright by SEAT S.A.
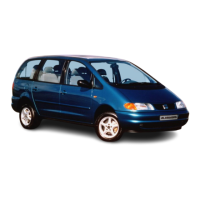
Operation process
– Screw dial gauge - VAS 6079- with universal dial gauge holder
- VW 387- onto cylinder block and set against crank web with
projection of approx. 2 mm.
– Push the crankshaft by hand against the gauge and adjust this
to “0”.
– Push crankshaft away from dial gauge and read off measured
value.
Axial clearance:
• New: 0.07 ... 0.23 mm
• Wear limit: 0.30 mm
3.6 Measure radial play for crankshaft
Special tools and workshop equipment required
♦ Plastigage
Working sequence
Note
♦
Do not interchange used bearing shells.
♦
Renew bearing shells worn down to nickel layer.
– Remove crankshaft bearing cap, and clean bearing cap and
bearing journal.
– Place a length of Plastigage corresponding to the width of the
bearing on the bearing journal or bearing shell.
• The Plastigage thread should remain in the centre of the half
bearing.
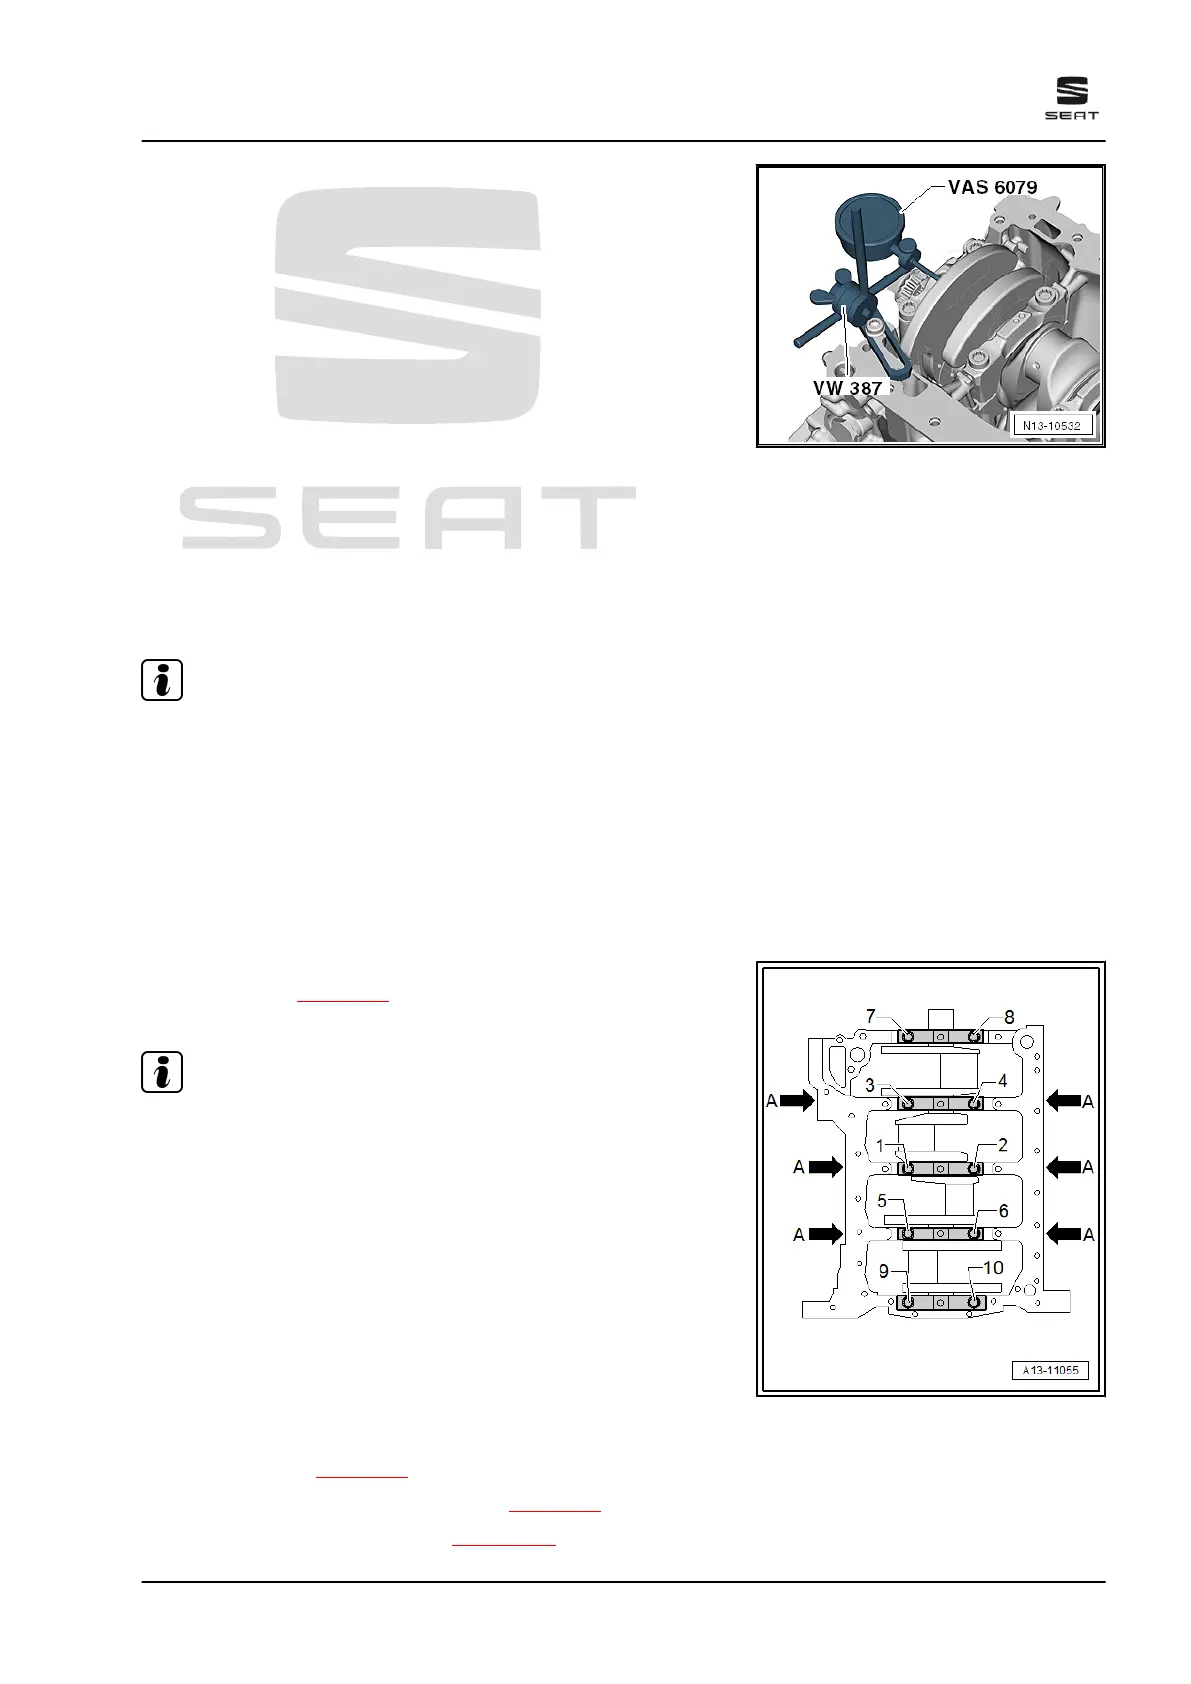
– Fit crankshaft bearing cap; and tighten it to 1 Nm using old
bolts -1 ... 10- ⇒ page 80 . Make sure not to rotate crankshaft
while tightening.
Note
Disregard bolts -arrows A-.
– Remove crankshaft bearing cap again.
– Compare width of Plastigage with measurement scale.
Radial clearance:
• New: 0.017 ... 0.037 mm
• Wear limit: 0.15 mm
3.7 Sender wheel: removing and installing
– Remove engine ⇒ page 11 .
– Remove sealing flange (gearbox end) ⇒ page 75 .
– Remove upper section of sump ⇒ page 208 .
Ateca 2017 ➤ , León 2013 ➤ , León ST 2013 ➤
4 cyl. petrol engine (1.8 l and 2.0 l with direct injection, 4 V, exhaust gas turbocharger, timing chain,
EA 888 III. Gen) - Edition 10.2018
3. Crankshaft 85

 Loading...