Protected by copyright. Copying for private or commercial purposes, in part or in whole, is not
permitted unless authorised by SEAT S.A. SEAT S.A does not guarantee or accept any liability with
respect to the correctness of information in this document. Copyright by SEAT S.A.
4 Balancing shaft
⇒ “4.1 Assembly overview - balancer shaft”, page 87
⇒ “4.2 Removing and installing balance shaft”, page 88
⇒ “4.3 Renewing oil seal for balance shaft (inlet side)”,
page 92
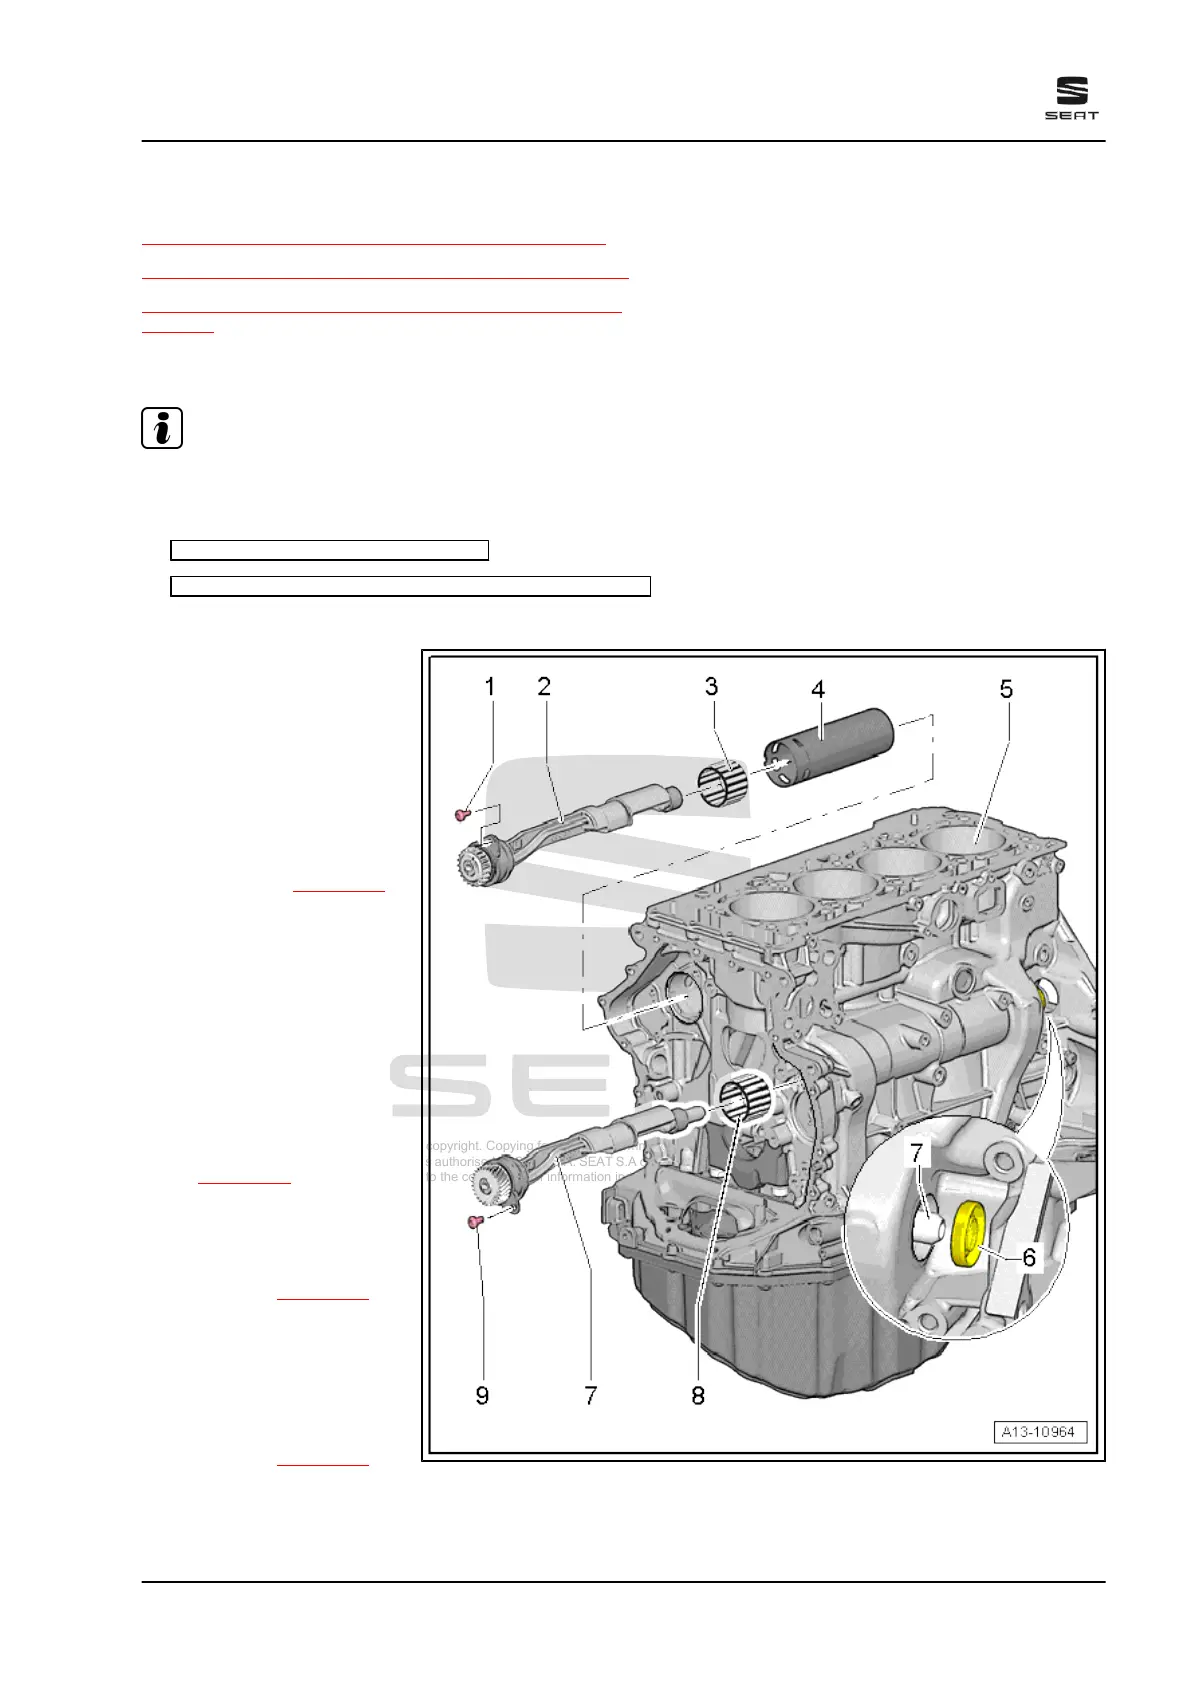
4.1 Assembly overview - balancer shaft
Note
♦
After working on the chain drive, adapt learnt values in engine
control unit. To do this, switch on ignition, and select the fol‐
lowing menu options on vehicle diagnostic tester :
♦ Engine control unit functions
♦ 0001 - Adaption of chain drive after repairs
1 - Bolt
❑ Renew after removing
❑ 4 Nm +45°
2 - Balancer shaft
❑ Exhaust side
❑ Renew only as pair.
❑ Lubricate bearing with
engine oil
❑ Renewing ⇒ page 91
3 - Gear ring for needle bearing
❑ Renew each time bal‐
ance shaft is removed.
❑ The gear ring for needle
bearing is colour coded.
A gear ring for needle
bearing with the same
colour coding must be
installed
4 - Tube for balancer shaft
❑ Installation position
⇒ page 88 .
5 - Cylinder block
6 - Oil seal for balance shaft,
inlet side
❑ Replace ⇒ page 92
7 - Balancing shaft
❑ Intake side
❑ Renew only as pair.
❑ Lubricate bearing with
engine oil
❑ Replace ⇒ page 88
8 - Gear ring for needle bearing
❑ Renew each time balance shaft is removed.
Ateca 2017 ➤ , León 2013 ➤ , León ST 2013 ➤
4 cyl. petrol engine (1.8 l and 2.0 l with direct injection, 4 V, exhaust gas turbocharger, timing chain,
EA 888 III. Gen) - Edition 10.2018
4. Balancing shaft 87