Protected by copyright. Copying for private or commercial purposes, in part or in whole, is not
permitted unless authorised by SEAT S.A. SEAT S.A does not guarantee or accept any liability with
respect to the correctness of information in this document. Copyright by SEAT S.A.
❑ The gear ring for needle bearing is colour coded. A gear ring for needle bearing with the same colour
coding must be installed
9 - Bolt
❑ Renew
❑ 4 Nm + +45° further
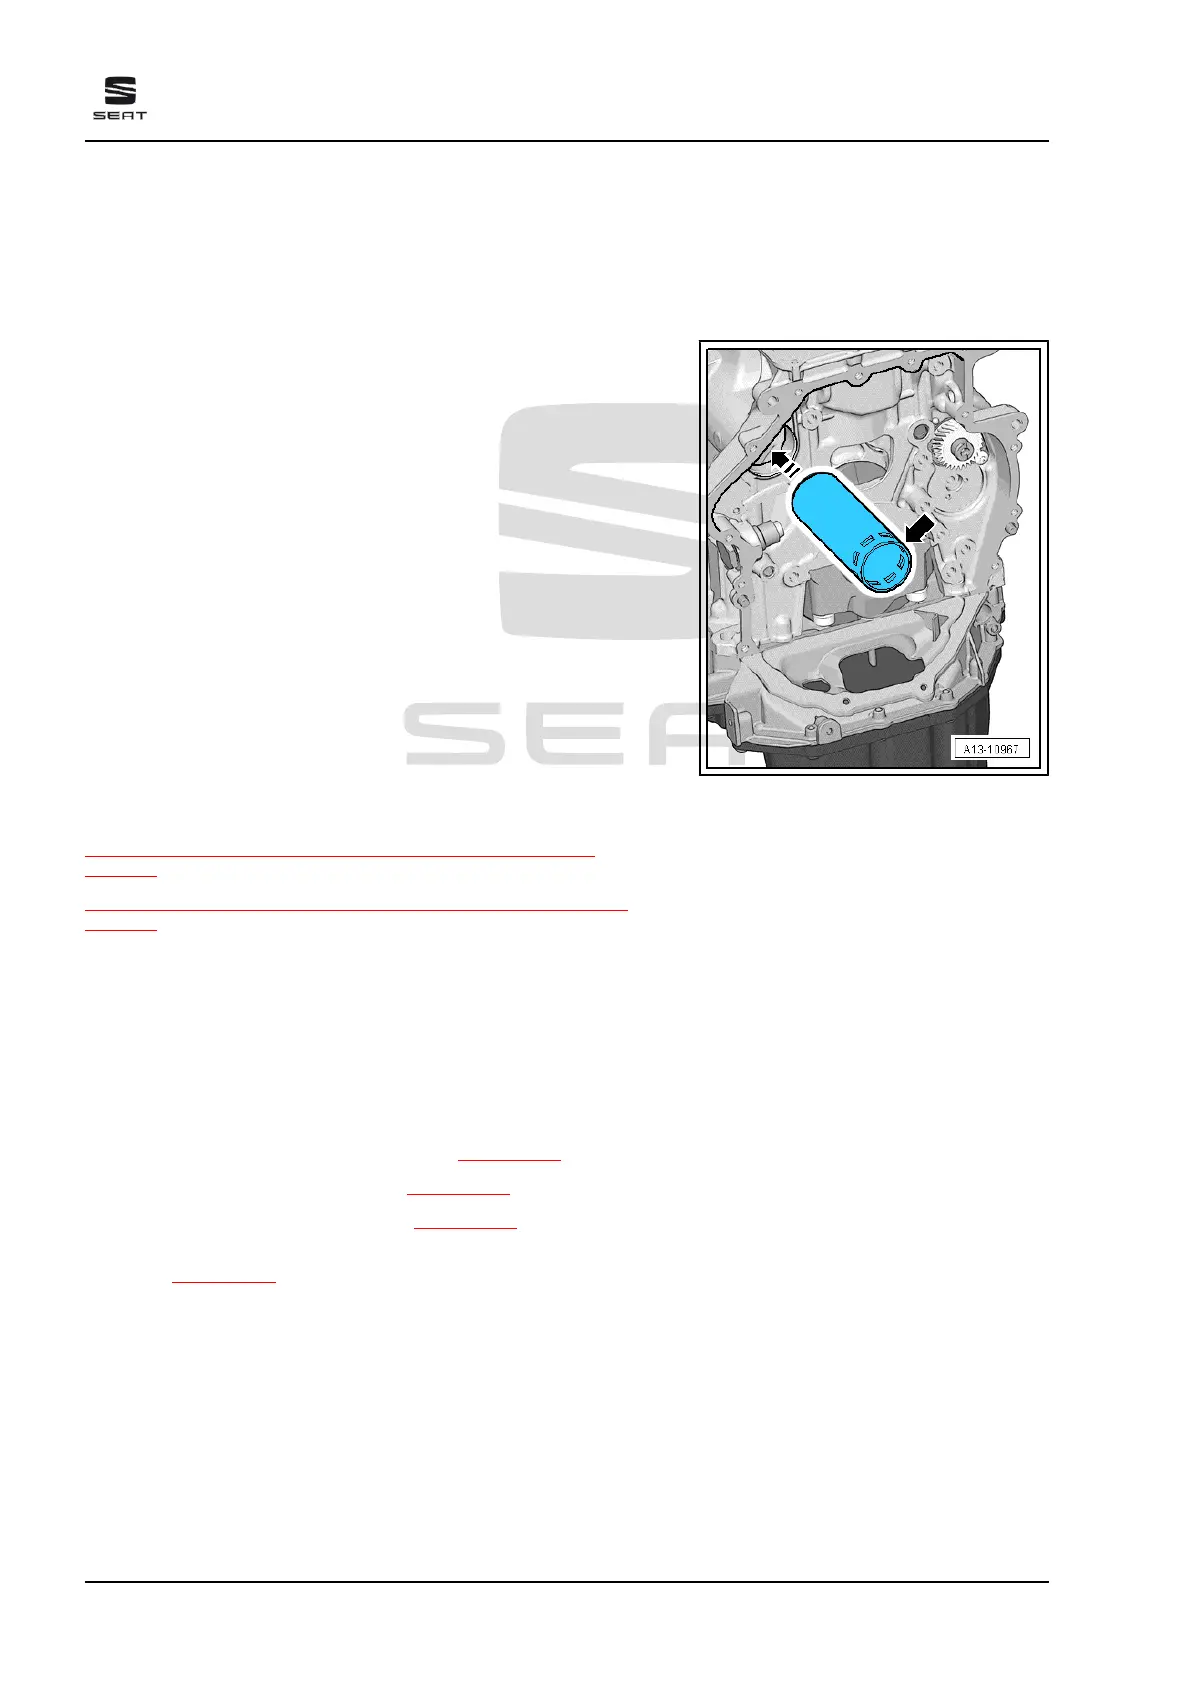
Tube for balance shaft - installation position
The openings -arrow- must face chain side.
4.2 Removing and installing balance shaft
⇒ “4.2.1 Removing and installing inlet side balance shaft”,
page 88
⇒ “4.2.2 Removing and installing exhaust side balance shaft”,
page 91
4.2.1 Removing and installing inlet side bal‐
ance shaft
Needle bearing must be renewed after each removal. Install new
needle bearing with same colour code.
Removing
• Engine is removed.
– Remove toothed belt for coolant pump ⇒ page 273 .
– Remove timing chain cover (top) ⇒ page 121 .
– Remove lower timing chain cover ⇒ page 123 .
– Remove camshaft timing chain and drive chain for balance
shafts ⇒ page 134 .
Ateca 2017 ➤ , León 2013 ➤ , León ST 2013 ➤
4 cyl. petrol engine (1.8 l and 2.0 l with direct injection, 4 V, exhaust gas turbocharger, timing chain,
EA 888 III. Gen) - Edition 10.2018
88 Rep. gr.13 - Crankshaft group