Protected by copyright. Copying for private or commercial purposes, in part or in whole, is not
permitted unless authorised by SEAT S.A. SEAT S.A does not guarantee or accept any liability with
respect to the correctness of information in this document. Copyright by SEAT S.A.
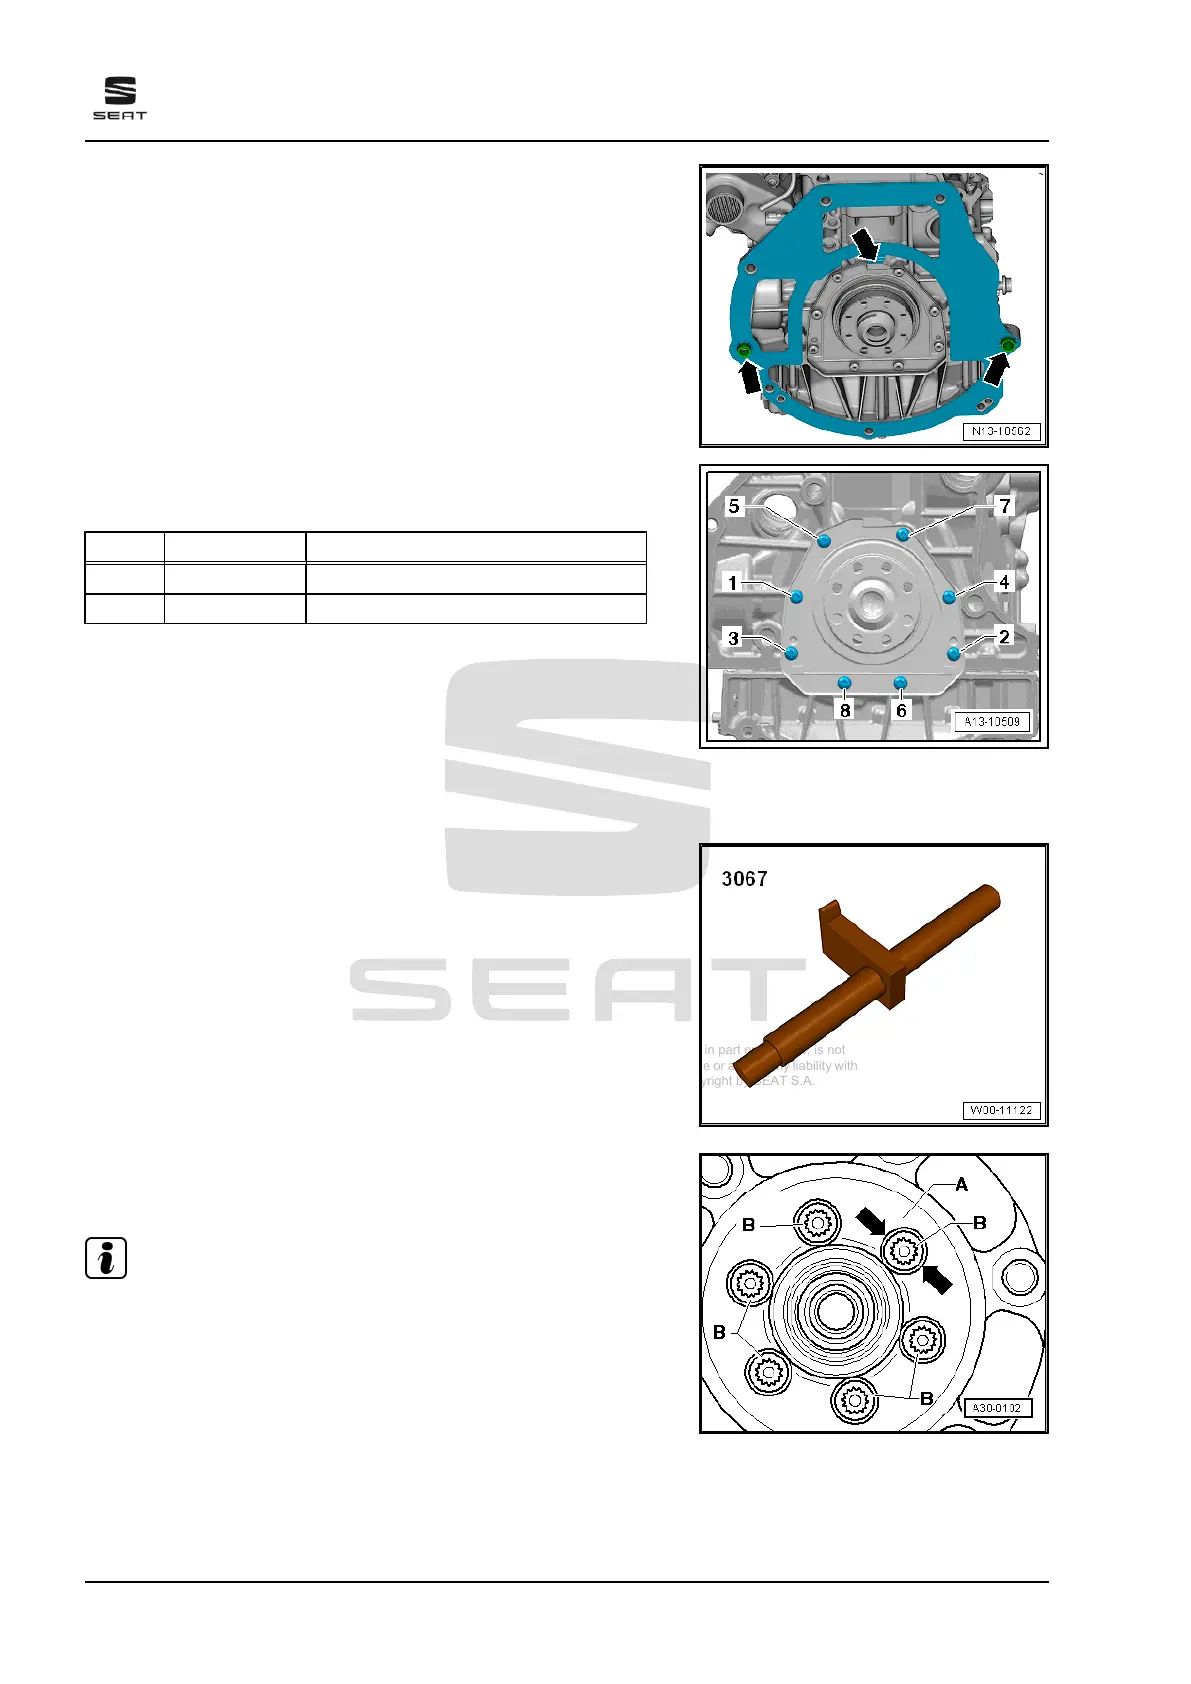
Install intermediate plate.
– Fit intermediate plate on sealing flange and push onto dowel
sleeves -arrows-.
Sealing flange at gearbox end - tightening sequence
– Tighten bolts -1 to 8- in the specified sequence.
Stage Bolts Specified torque/turning further angle
1. -1 - 8- Screw in by hand as far as stop
2. -1 - 8- 9 Nm
2.2 Removing and installing flywheel
Special tools and workshop equipment required
♦ Counterhold - 3067-
Removing
• Gearbox removed.
Note
♦
Remove bolts -B- using normal hand tools (do not use pneu‐
matic wrench or impact driver, etc.).
♦
When removing the bolts, make sure that the bolt heads do
not come into contact with the flywheel.
♦
Rotate the flywheel -A- so that the bolts -B- align centrally with
the holes -arrows-.
Ateca 2017 ➤ , León 2013 ➤ , León ST 2013 ➤
4 cyl. petrol engine (1.8 l and 2.0 l with direct injection, 4 V, exhaust gas turbocharger, timing chain,
EA 888 III. Gen) - Edition 10.2018
74 Rep. gr.13 - Crankshaft group