Protected by copyright. Copying for private or commercial purposes, in part or in whole, is not
permitted unless authorised by SEAT S.A. SEAT S.A does not guarantee or accept any liability with
respect to the correctness of information in this document. Copyright by SEAT S.A.
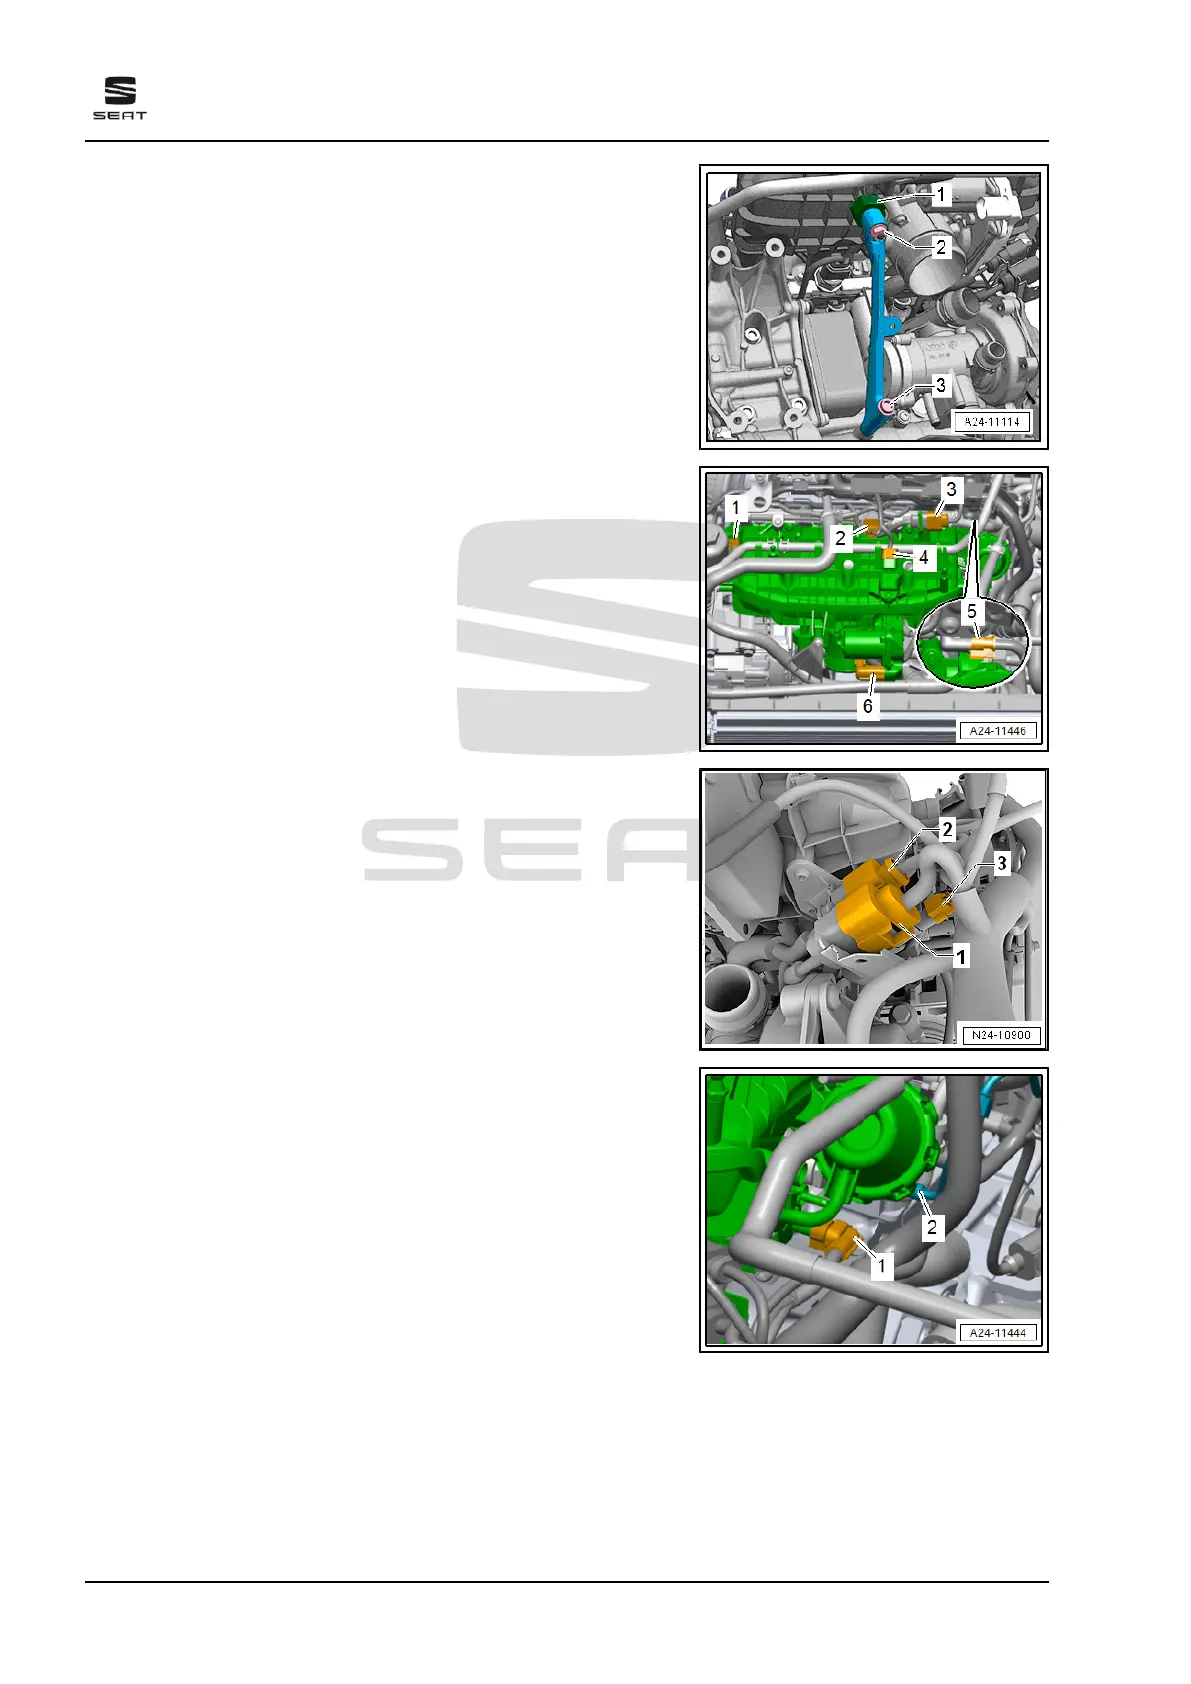
– Remove intake manifold support. To do this, unscrew nut -2-
and bolt -3-.
– Remove rubber bush -1- for intake manifold support.
– Unplug electrical connectors and move wiring clear:
1 - For intake manifold flap potentiometer - G336-
2 - For fuel pressure sender for low pressure - G410-
3 - Central connector for injectors (intake manifold)
4 - for intake manifold sender - GX9-
5 - For Hall sender - G40-
6 - for throttle valve control unit - J338-
– Disconnect electrical connectors -1, 2, and 3- underneath in‐
take manifold.
– Disconnect connector -1- at intake manifold flap valve - N316- .
– Disconnect vacuum hose -2-.
Ateca 2017 ➤ , León 2013 ➤ , León ST 2013 ➤
4 cyl. petrol engine (1.8 l and 2.0 l with direct injection, 4 V, exhaust gas turbocharger, timing chain,
EA 888 III. Gen) - Edition 10.2018
362 Rep. gr.24 - Mixture preparation - injection



 To Next Page