Operating Instructions Chapter
CLV65x Bar Code Scanner
Figures and Tables
8011980/0000/2009-04-21 © SICK AG · Division Auto Ident · Germany · All rights reserved 7
Figures
Fig. 2-1: Outlet opening of the laser radiation at the reading window
(shown here: Ethernet version) ....................................................................... 15
Fig. 2-2: Laser warning sign attached to the bar code scanner at delivery ................ 16
Fig. 3-1: Quickstart register tab of SOPAS-ET configuration software ........................ 20
Fig. 3-2: Quickstart register tab in Single Device Mode ............................................... 21
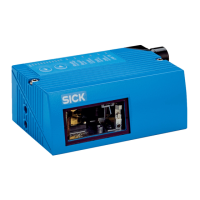
Fig. 4-1: Housing types of the CLV65x bar code scanner............................................. 23
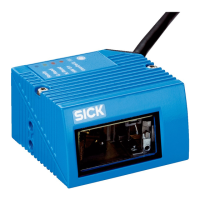
Fig. 4-2: Device view of the CLV65x bar code scanner
(shown here: Ethernet-Version)........................................................................ 24
Fig. 4-3: Bar code scanner's methods of operation
in a conveyor system (schematic) ................................................................... 29
Fig. 4-4: Optimization of the depth of field for the object ............................................ 31
Fig. 4-5: Switching the focus for CLV65x: Division of the entire reading area
in distance configurations ............................................................................... 32
Fig. 4-6: Oscillating mirror CLV65x: Example of focal position control in search run,
here with 6 focus positions ............................................................................. 33
Fig. 4-7: Reading operation mode for the CLV65x bar code scanner
in stand-alone operation ................................................................................. 35
Fig. 4-8: Micro SD memory card for storing the parameter set.................................... 42
Fig. 5-1: Example: Fixing the bar code scanner with the bracket no. 2042800 ........ 44
Fig. 5-2: Exchanging the laser warning sign ................................................................. 45
Fig. 5-3: Allocation of the scanning line(s) for the bar code and conveyor system ... 46
Fig. 5-4: Definition of the reading distance a and the aperture angle α .................... 46
Fig. 5-5: Line scanner: Reading angles that occur between the scanning line
and bar code .................................................................................................... 47
Fig. 5-6: Avoiding surface reflection using the line scanner as an example:
Angle between emitting light and bar code
(tilted away from the plumb line) .................................................................... 48
Fig. 5-7: Counting direction of the reading angle RA within the scanning line
and of the code angle CW with oscillating mirror .......................................... 49
Fig. 5-8: Line scanner: Installation example for positioning the external reading
pulse sensor ..................................................................................................... 51
Fig. 6-1: Standard version: Electrical connections at the bar code scanner
with connection cable....................................................................................... 54
Fig. 6-2: Ethernet version: Electrical connections at the bar code scanner
with connector unit ........................................................................................... 54
Fig. 6-3: Direction of rotation of the connector unit ..................................................... 58
Fig. 6-4: Wiring the serial host data interfaces (RS-232 or RS-422)
on the 15-pole D-Sub-HD plug ........................................................................ 60
Fig. 6-5: Function of the Ethernet interface .................................................................. 61
Fig. 6-6: Wiring the “Sensor 1“ switching input on the 15-pole D-Sub-HD plug ......... 62
Fig. 6-7: Wiring the “Sensor 2“ switching input on the 15-pole D-Sub-HD plug ......... 62
Fig. 6-8: Possible wiring of the "Result 1" switching output on the 15-pole
D-Sub-HD plug .................................................................................................. 63
Fig. 7-1: Configuration with SOPAS-ET and storage the parameter set....................... 70
Fig. 8-1: Cleaning the reading window .......................................................................... 77
Fig. 8-2: Cleaning of the external optical sensors (reading pulse generator) ............ 77

 Loading...