Installing/Mounting
4.3 Connecting a CU240S DP or CU240S DP-F via PROFIBUS DP
Control Units CU240S
Operating Instructions, 11/2006, A5E00766042B AA
4-11
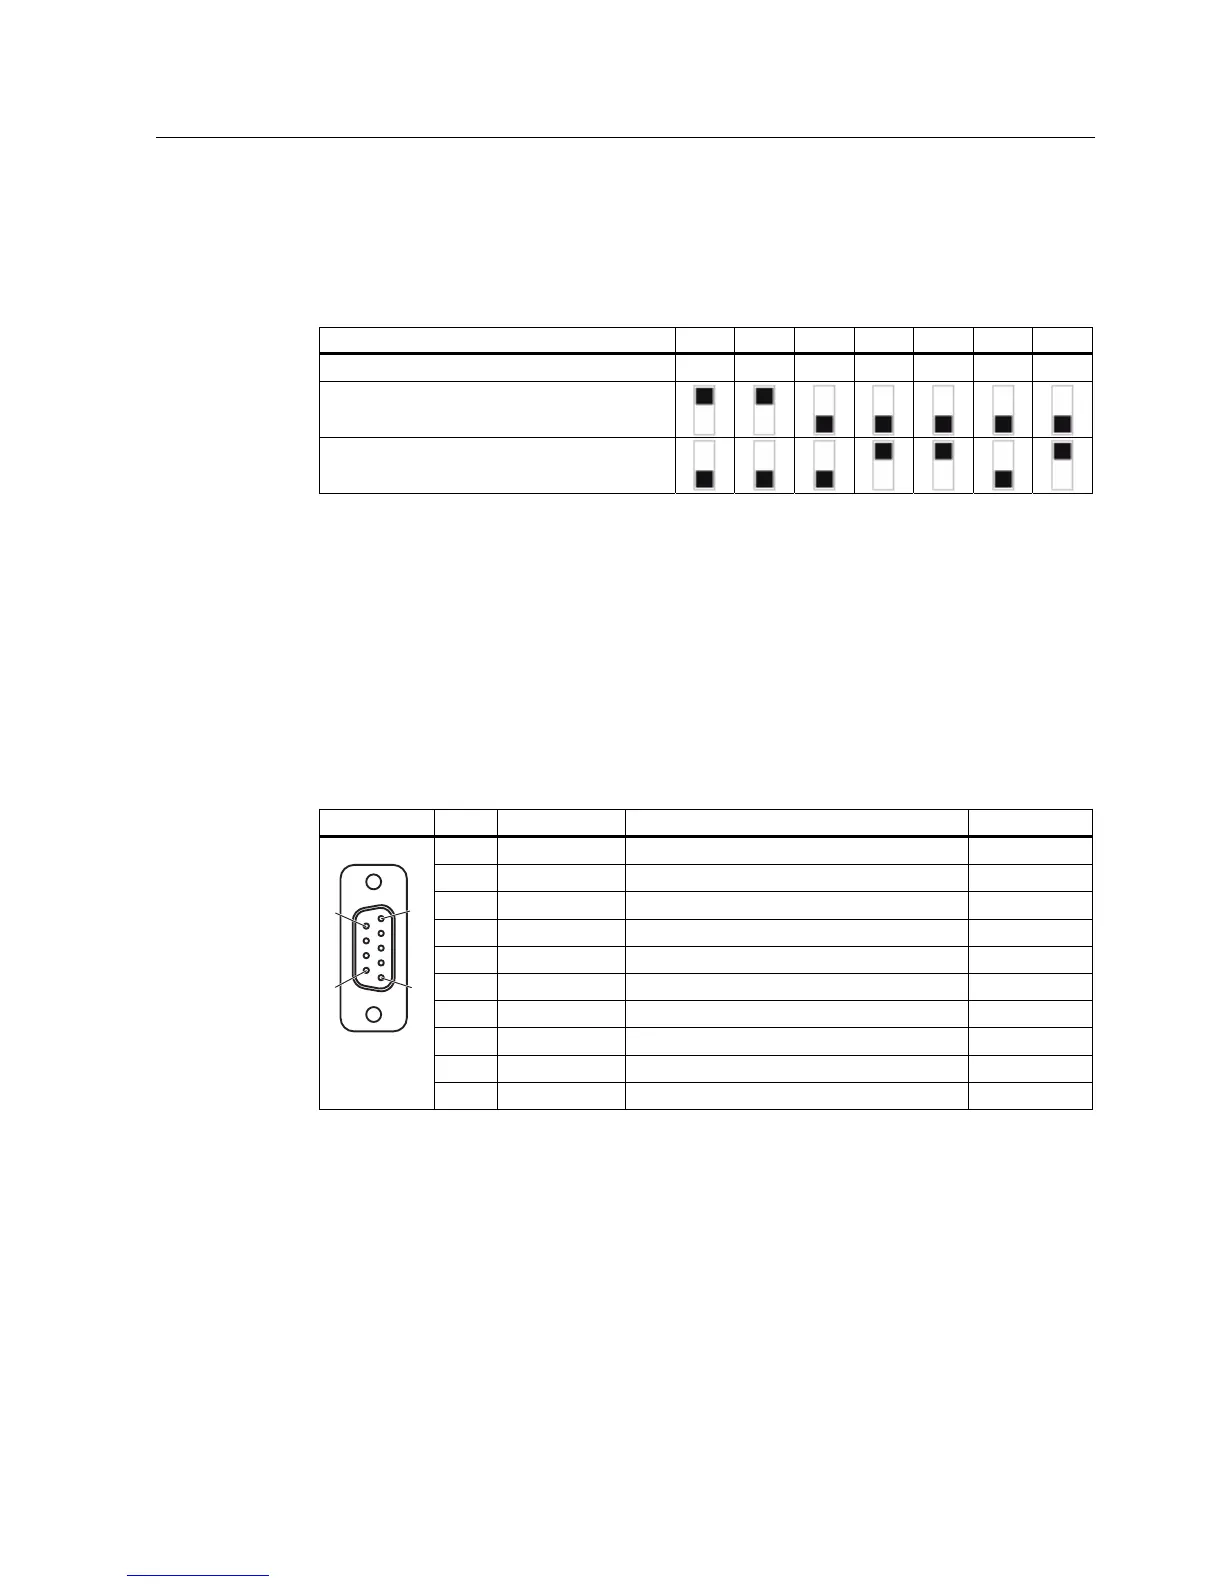
Setting the PROFIBUS DP address via DIP switches
The PROFIBUS DP address can be set via DIP switch, as shown in the table below.
Table 4-1 Example address for the PROFIBUS DP interface
DIP switch 1 2 3 4 5 6 7
Add to address 1 2 4 8 16 32 64
Example 1: Address = 3 = 1 + 2
Example 2: Address = 88 = 8 + 16 + 64
4.3.2 Connecting the PROFIBUS DP
Connecting the Inverter to the PROFIBUS DP network
The inverter is to be connected to the PROFIBUS DP network via a sub-D socket on the
CU240S DP or CU240S DP-F. The pins of the socket are short-circuit-proof and isolated.
Table 4-2 PIN assignment of the 9-pin sub-D socket
Pin Designation Meaning Range
1 Shield Ground connection
2 U0V Isolated and user supply reference
3 RxD/TxD-P Receive/send data P (B/B') RS485
4 CNTR-P Control Signal TTL
5 DGND PROFIBUS data reference potential (C/C')
6 VP Supply voltage positive 5 V ± 10 %
7 U24V Isolated user supply +24 V @ 100 mA
8 RxD/TxD-N Receive/send data N (A/A') RS485
9 - Not assigned
Case Cable shield Cable shield
External 24 V supply
If the PROFIBUS DP interface is required to communicate with the Control Unit when the
Power Module mains power is not present, a 24 V supply must be connected to the Control
Unit terminals 31 (+ 24 V I
n
) and 32 (0 V I
n
).
 Loading...