Core statement
1. Select the project folder in the tree view.
2. Select the shortcut menu command Insert New Object > Preconfigured Station ... >
Preconfigured Station.
The "PCS 7 'Expand Project' wizard", step 1 "Which CPU are you using in your project?"
dialog box opens.
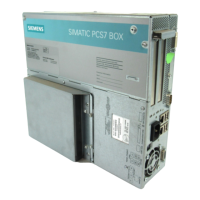
3. Select the entry "PCS7 BOX (...)" from the "CPU" drop-down list and then select the entry
"AS RTX ..." from the "Bundle" list.
4. Click "Next".
The "PCS 7 'Expand Project' wizard", step 2 "Which objects are you still using?" dialog box
opens.
5. Click "Next".
The "PCS 7 'Expand Project' wizard", step 3 "Where do you want to store the multiproject?"
dialog box opens.
6. Click "Finish".
A SIMATIC PC station with a WinLC RTX is created in the project.
7. In the tree view, select the newly created SIMATIC PC station with the SIMATIC PCS 7 AS
RTX.
8. Select the shortcut menu command Rename.
9. Enter a descriptive name.
Recommendation: Select the name of the SIMATIC PC station under Start > Settings >
Control Panel > System > "Computer Name" tab > "Computer name".
10.Go to the "SIMATIC PC Station > CP Industrial Ethernet" folder in the hardware catalog.
Select the "IE General" object.
11.Drag the selected CP to the "Index 3" slot in the station window.
12.Click "OK".
13.Enter the network addresses of the SIMATIC PCS 7 AS RTX.
The default network address for Network connection 1 of the SIMATIC PCS 7 AS RTX is
192.168.100.1.
14.Click "OK".
15.Save and compile your changes.
16.Close HW Config.
Example
The configuration of the SIMATIC PCS 7 AS RTX in HW Config is shown in the following table:
Index/slot Name Type
1
2 WinLC RTX WinLC RTX
IF1
CP 5611 CP 5611
IF2
IF3
Differences between SIMATIC PCS 7 AS RTX and SIMATIC PCS 7 AS mEC RTX
10.2 How to expand your PCS 7 project to include a SIMATIC PCS 7 AS RTX
BOX (V8.1)
Function Manual, 03/2015, A5E32711362-AC 123
 Loading...

