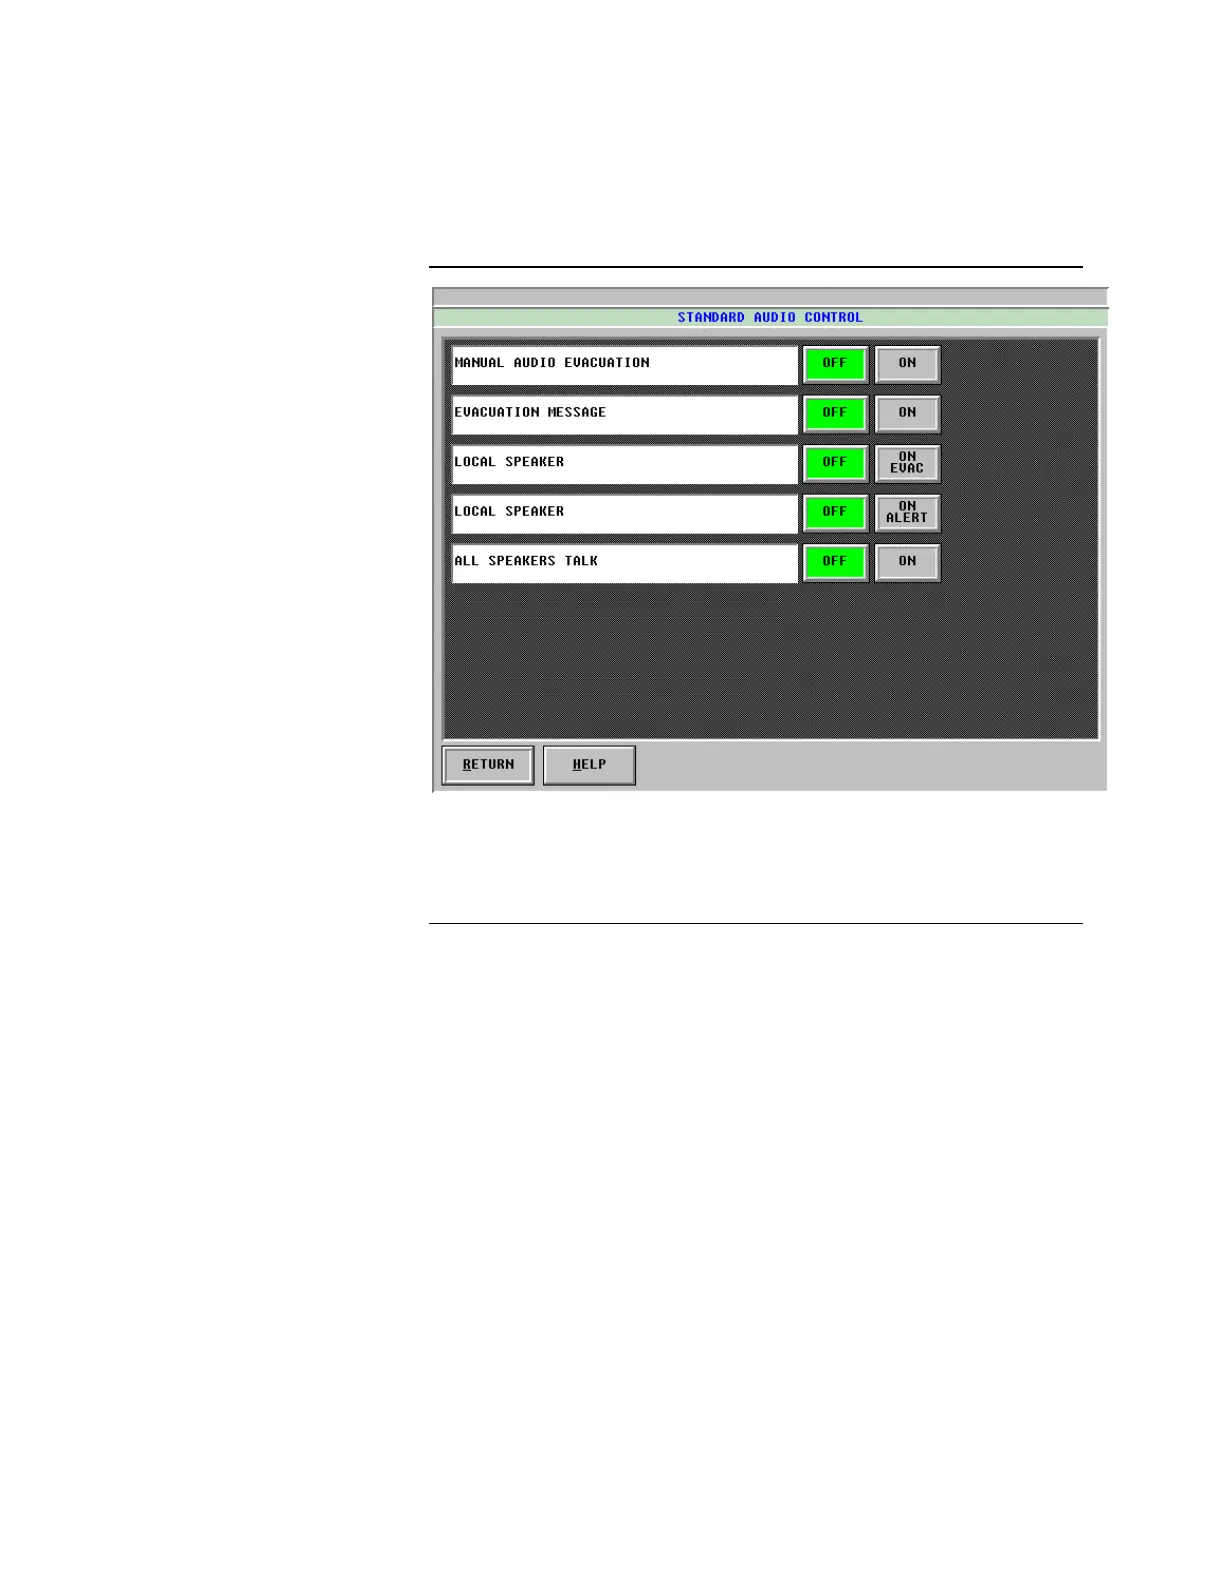
Home
Simplex
Network Hardware
4120
Simplex 4120 User Manual
5
of 1
of 1 rating
88 pages
Give review
Manual
Specs
To Next Page
To Next Page
To Previous Page
To Previous Page
Loading...
3-47
Figure 3-53. The Standa
rd A
udio Control Window
3.
From the Standard Audio Control Window or the Auxiliary
Audio Control
Window
, you can t
urn th
e audio ON or OF
F as desired.
Controll
ing A
udio Functions,
Continued
Standard A
udio Control and
A
uxiliary A
udio Control
(Continued)
firealarmresources.com
68
70
Table of Contents
default chapter
3
Table of Contents
3
Chapter 1 Overview
9
Introduction
9
In this Chapter
9
Figure 1-1. NPU with Voice Capability
9
Refer to the Following Table for Information on a Specific Topic
9
Requirements for Operation
10
Programming
10
Software Key
10
Logging on to the System
11
Procedure
11
Figure 1-2. Main Menu (Showing the Log on Icon)
11
Figure 1-3. Log on Services Window
12
Logging off
13
Procedure
13
Chapter 2 Operating the Front Panel
15
Introduction
15
In this Chapter
15
Membrane Switches and Leds
16
Introduction
16
Figure 2-1. NPU Front Panel Membrane Switches and Leds
16
Description of Membrane Switches and Leds
17
Controlling the Audio Functions
19
Introduction
19
To Page All Areas
19
To Select Speakers/Audio Control
19
Figure 2-2. Audio Control Panel and Phone Control Panel
19
Controlling the Phone Functions
21
Introduction
21
To Answer/Call Selected Areas
21
To Answer an Incoming Call
21
To Place a Call on Hold
21
To Silence an Incoming Call Tone
21
Responding to Events
22
Introduction
22
Chapter 3 Operating the Touchscreen
23
Introduction
23
In this Chapter
23
Main Menu
24
Introduction
24
Using the Touchscreen to Activate Options
24
Figure 3-1. Main Menu (Available Options Displayed)
24
Viewing Active Lists
25
Introduction
25
Procedure
25
Figure 3-2. the Active Lists Button
25
Figure 3-3. the Active List Menu
25
Figure 3-4. Typical Active List Screen
26
Returning to the Main Menu
27
Silencing Alarms
27
Resetting the System
27
Figure 3-5. Alarm Silence Window
27
Disabling/Enabling Points
28
Figure 3-6. System Reset Window
28
Figure 3-7. Active List Screen Changed to Allow Enabling or Disabling a Point
29
Figure 3-8. Point Enable Operation Window
29
Figure 3-9. Enable Operation Window with Count down Timer
30
Figure 3-10. Enable Operation Completed Information Window
30
Viewing Action Messages
31
Figure 3-11. Point Disable Operation Window
31
Figure 3-12. Action Message Window
31
Setting the Time and Date
32
Introduction
32
Procedure
32
Figure 3-13. Time and Date Button
32
Figure 3-14. Time and Date Window
33
Viewing the Historical Log
34
Introduction
34
Procedure
34
Figure 3-15. Historical Log Button
34
Changing the View
35
Figure 3-16. Historical Log Window
35
Volume Operations
36
Deleting a Volume
36
Figure 3-17. Historical Log Volume /View Selection Window
36
Closing the Active Volume
37
Figure 3-18. Historical Log Volume Operations Window
37
Figure 3-19. the Close Active Volume Window
38
Servicing the System
39
Introduction
39
Procedure
39
Figure 3-20. Service Button
39
Figure 3-21. Service Menu
39
Returning to the Main Menu
40
Exiting from the NPU
40
Selecting a New Job
40
Restarting the Unit
40
Running Network Diagnostics
40
Figure 3-22. Job Selection Window
41
Figure 3-23. Network Selection Window
42
Figure 3-24. Unit Restart Operation Window
42
Viewing Network Attendance
43
Figure 3-25. Network Topology Report Window
43
Viewing Information about the Nodes
44
Figure 3-26. Network Attendance Report Window
44
Using Host Diagnostics
45
Calibrating the Touchscreen
45
Figure 3-27. Network Diagnostics Window
45
Figure 3-28. Touchscreen Calibration Warning Window
46
Figure 3-29. Touchscreen Window
46
Figure 3-30. Calibration Directions Window
47
Figure 3-31. Check Calibration Window
48
Viewing the Status of Points and Controlling Point Operations
49
Introduction
49
Accessing the Status and Control Functions
49
Figure 3-32. Status & Control Button
49
Viewing the Point Status
50
Figure 3-33. Status and Control Menu
50
Initiating Control Operations
51
Figure 3-34. Point Status Display Window
51
Viewing Action Messages
52
Figure 3-35. Point Status Display Window (Control Selected)
52
Returning to the Main Menu
53
Figure 3-36. Point Status Display Window (Action Messages Selected)
53
Changing the Points to be Viewed
54
Figure 3-37. Change Point View Window
55
Viewing and Printing Reports
56
Introduction
56
Accessing the Report Viewing and Printing Functions
56
Returning to the Main Menu
56
Figure 3-38. Reports/Printer Button
56
Generating Reports
57
Figure 3-39. Report Status and Control Window
57
Figure 3-40. Report Selection Dialog Window
58
Figure 3-41. Historical Log Volume/View Selection Window
58
Canceling the Generation of a Report
59
Selecting a Destination for the Report
59
Figure 3-42. Report Target Dialog Window
59
Terminating Reports
60
Viewing Reports
60
Figure 3-43. File Mode Dialog Window
60
Controlling the Printer
61
Figure 3-44. View Report Dialog Window
61
Figure 3-45 Flush Print Buffer Window
62
Working with Graphics Screens
63
Introduction
63
Accessing the Graphics Screens
63
Figure 3-46. Graphics Button
63
Acknowledging Points
64
Programmed Control
64
Viewing the Status of a Point
64
Figure 3-47. Choose Screen Window
64
Utility Control
65
Introduction
65
Accessing the Utility Control Functions
65
Figure 3-48. Utility Control Button
65
Figure 3-49. Utility Control Menu
65
Figure 3-50. Utility Control Window
66
Controlling Audio Functions
67
Introduction
67
Accessing the Audio Control Functions
67
Figure 3-51. Audio Control Button
67
Standard Audio Control and Auxiliary Audio Control
68
Figure 3-52. Selective Speaker Control Window
68
Figure 3-53. the Standard Audio Control Window
69
Controlling Phone Functions
70
Introduction
70
Accessing the Phone Control Functions
70
Figure 3-54. Phone Control Button
70
Figure 3-55. Incoming Phone Call Queue
70
Answering All Connected Phones at Once
71
Calling All Disconnected Phones
71
Viewing Site Information
72
Introduction
72
Viewing the Site Information Screen
72
Figure 3-56. Site Information Button
72
Figure 3-57. a Text Based Site Information Screen
72
Header Menu Operations
74
Introduction
74
Figure 3-58. Menu Names and Commands
74
Printing the Current Screen
75
Viewing Operator Help
75
Viewing Site Information
75
Viewing the Symbol Legend
76
Viewing Information about this Node
76
Operating the Simulator
77
Introduction
77
Activating the Simulator
77
Figure 3-59. Simulator Main Menu
77
Figure 3-60. Select Network Loop Window
78
Other manuals for Simplex 4120
Installing
2 pages
Installation Instructions
20 pages
5
Based on 1 rating
Ask a question
Give review
Questions and Answers:
Need help?
Do you have a question about the Simplex 4120 and is the answer not in the manual?
Ask a question
Simplex 4120 Specifications
General
Brand
Simplex
Model
4120
Category
Network Hardware
Language
English