User Manual |
85
Laser Engraving and Cutting - 03 How to Laser Engrave and Cut
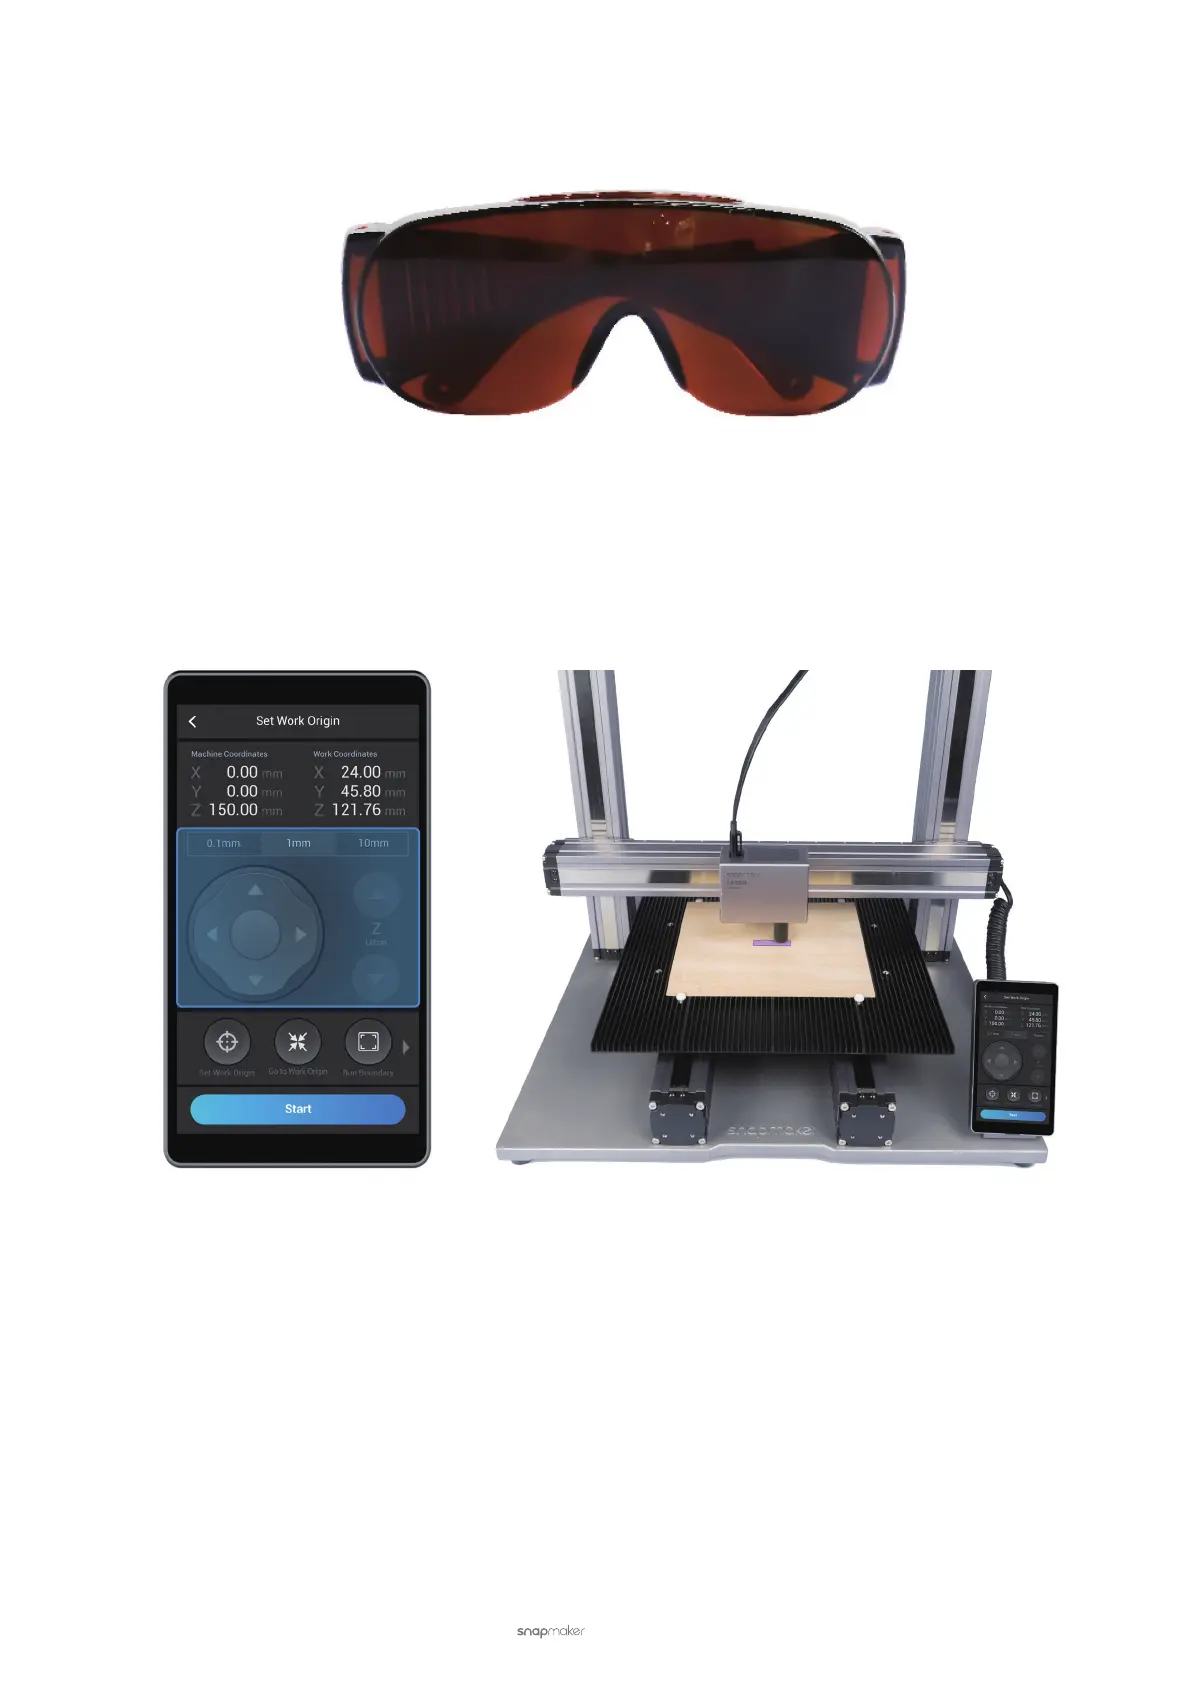
(6) Put on the Laser Safety Goggles and tap Next.
(7) Tap Set Work Origin, and then tap Run Boundary. As the Laser Module moves, the laser dot will be traveling
along the path of a small rectangle on the material surface, which represents the area to be engraved. Ensure
this work area on the material is blank. If not, tap X-, X+, Y-, or Y+ to reset the work origin and run boundary
again. After setting the work area, tap Next.
(8) Read the Auto Focus instruction on the Touchscreen. Tap Start, and the machine will keep adjusting the height
of the Laser Module to engrave a series of lines on the material. Then, the built-in camera will identify the best
engraved line.