Appendix B: Replacing and Adding System
Components
NOTE
If you are permanently disassembling the installation or part of it, make sure to use the disposal
methods dictated by local regulations.
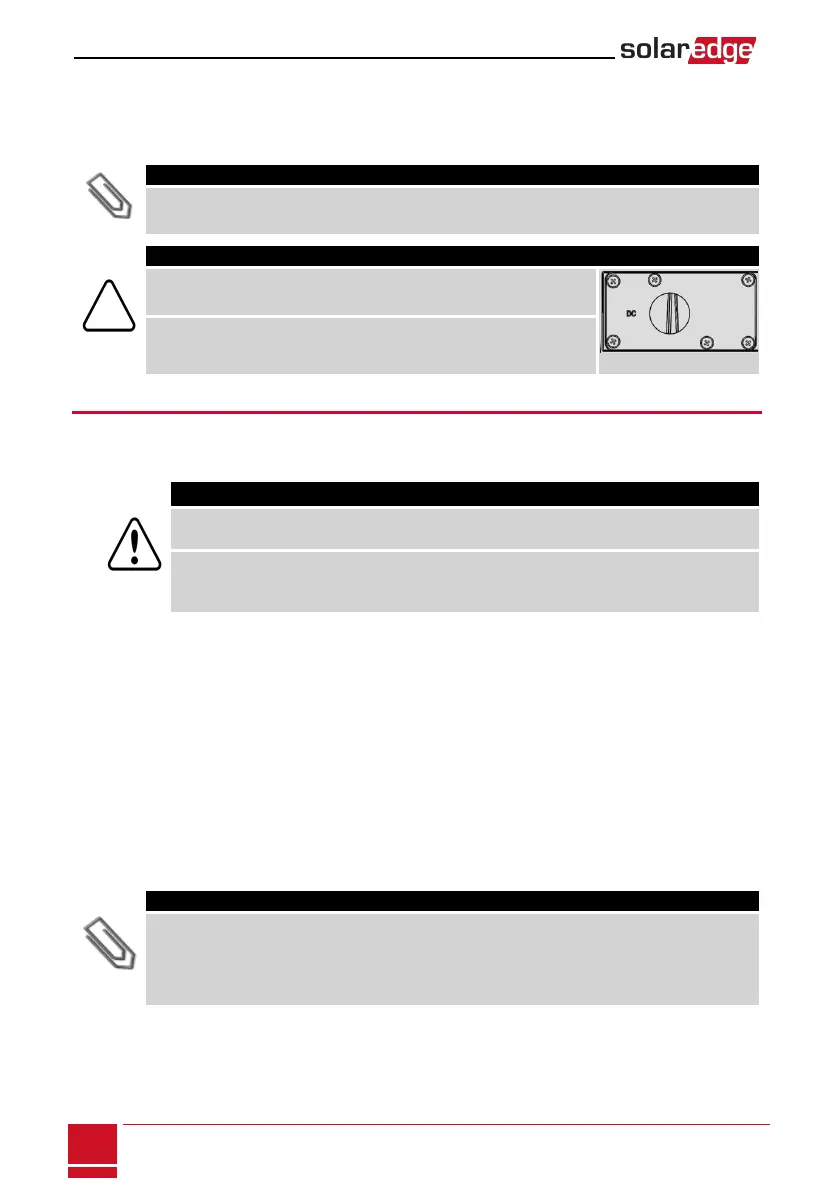
CAUTION!
Do not remove the six screws on the DC conduit metal panel as it may
harm the inverter sealing and void the warranty.
Ces vis ne doivent pas être retirées. Les enlever est susceptible
d’endommager l’étanchéité de l’onduleur et annuler la validité de la
garantie.
Replacing an Inverter
1. TurnOFFtheinverterON/OFFswitch,andwaituntiltheLCDindicatesthattheDCvoltageissafe
(<50V),orwaitfiveminutesbeforecontinuingtothenextstep.
WARNING!
If you cannot see the inverter panel, or if a malfunction is indicated on the LCD panel, wait five
minutes for the input capacitors of the inverter to discharge.
Si vous ne pouvez pas voir l'écran de l'onduleur ou si un dysfonctionnement est indiqué sur
l'écran LCD, attendez cinq minutes pour que les condensateurs d'entrée de l'onduleur soient
déchargés.
2. TurnOFFtheStorEdgeConnectionUnit.
3. OpentheStorEdgeConnectionUnitcover.
4. TurntheBypassswitchinsidetheStorEdgeConnectionUnittoposition2,inordertomaintainpower
tothebacked-uploads.
5. OpentheinvertercoverasdescribedinRemovingtheInverterCoveronpage39.
6. DisconnecttheDCandACwiresfromtheinverter.OpentheDCandACwiresferritebeadsandset
themaside.
7. DisconnectthecableconnectingtheinverterdigitalboardtotheStorEdgeConnectionUnit.
8. UnscrewthetwoconduitnutsintheinvertersecuringtheStorEdgeConnectionUnittotheinverter.
9. Removethescrewssecuringtheinvertertothemountingbracketandremovetheinverterfromthe
mountingbracket.
NOTE
If you remove the old inverter and do not immediately install a new one, then:
o
Lock the StorEdge Connection Unit in the OFF position using a lock on the switch.
o
Use insulation tape to isolate each of the AC and DC wires.
o
Seal the open conduits using duct tape.
10. Placethenewinverteronthemountingbracket;insertthescrewssecuringtheinvertertothe
mountingbracket.
11. ScrewthetwoconduitnutsintheinvertersecuringtheStorEdgeConnectionUnittotheinverter.
12. ConnecttheDCandACwirestotheinverter.
SolarEdge-StorEdge Installation Guide MAN-01-00262-1.0
90
Appendix B: Replacing and Adding System Components
 Loading...


