Mounting the Auto-transformer
1.
Determinethemountinglocation,onawall,studframingorpole.Toallowproperheatdissipation
andcableentry,maintainthefollowingminimumclearanceareasbetweentheauto-transformerand
otherobjects:
l 8in/200mmtothetopandbottomoftheauto-transformer;ifconduitentrytotheauto-
transformerwillbefromthebottom,leavesufficientclearancefortheconduitsaswell.
l 4in/100mmtotherightandleftoftheauto-transformer.
2. Installthebracketwiththeflatsidefacingdown.Verifythatthebracketisfirmlyattachedtothe
mountingsurface.
3. Hangtheauto-transformeronthebracket:Lifttheauto-transformerfromthesides,orholditatthe
topandbottomtolifttheunitintoplace.
4.
Insertthetwosuppliedscrewsthroughtheouterheatsinkfinonbothsidesoftheauto-transformer
andintothebracket.Tightenthescrewswithatorqueof4.0N*m/2.9lb.*ft.
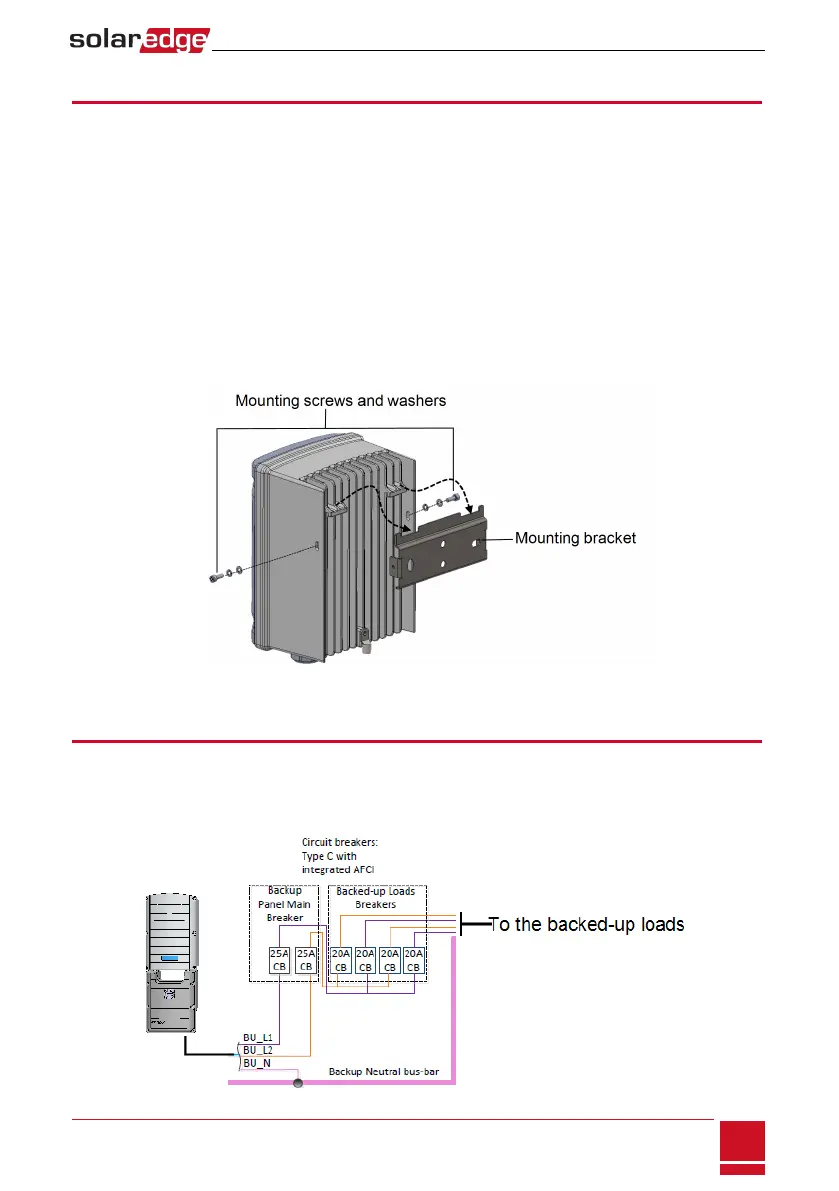
Figure 14: Installing the auto-transformer
Installing the Backed-up Loads Panel
InstallasecondaryACpanelforbacked-uploads(notsuppliedbySolarEdge).Rewirethebacked-uploads
throughthispanel.
Installtwopoles25AmaincircuitbreakerwithintegratedAFCIonthispanel,toensurethe25Aphase
imbalancelimitismaintainedatalltimes.
Figure 15: Backed-up Loads Panel
Chapter 4: Auto-transformer and Backed-up Loads Panel Installation (for Backup Only)
SolarEdge-StorEdge Installation Guide MAN-01-00262-1.0
25
 Loading...


