EasyManuals Logo

SolaX Power X3-IES Series User Manual

SolaX Power X3-IES Series
228 pages
To Next Page IconTo Next Page
To Previous Page IconTo Previous Page
Page #98 background imageLoading...
Page #98 background image
90
Electrical Connection
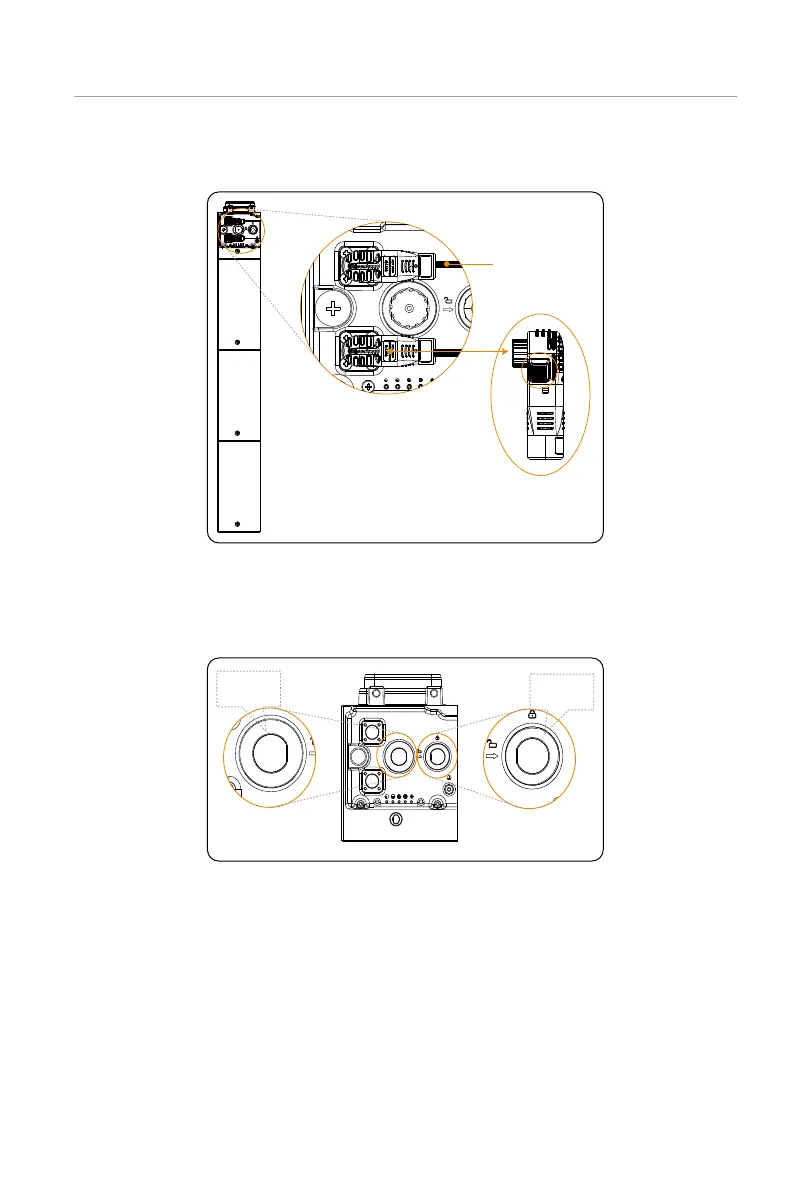
Step 1: Before conducting wiring between the BMS and series box, press and hold the
lock button to unplug the short power cable.
HEAT
HEAT
Short power cable
Lock
button
B+
B-
Figure 7-6 Removing short power cable
Step 2: Rotate the waterproof cap anti-clockwise to remove it. And rotate the short-
circuit plug anti-clockwise. When the arrow on the rotating ring is aligned with
the arrow on the panel, the short-circuit plug can be removed.
Waterproof
cap
B+
B-
HEATCOM
B+
B-
HEATCOM
B+
B-
HEATCOM
short-circuit
plug
Figure 7-7 Removing waterproof cap

Table of Contents

Questions and Answers:

Question and Answer IconNeed help?

Do you have a question about the SolaX Power X3-IES Series and is the answer not in the manual?

SolaX Power X3-IES Series Specifications

General IconGeneral
BrandSolaX Power
ModelX3-IES Series
CategoryInverter
LanguageEnglish

Related product manuals