85
Mechanical Installation
6.5 X3-Matebox G2 Mounting
NOTICE!
• "Matebox" refers to X3-Matebox G2.
• The horizonal distance between X3-IES and X3-Matebox G2 should be no more than
100 cm.
• For the height of X3-Matebox G2, the bottom of the ports of X3-Matebox G2 should
be a little bit higher than the outlet of the inverter.
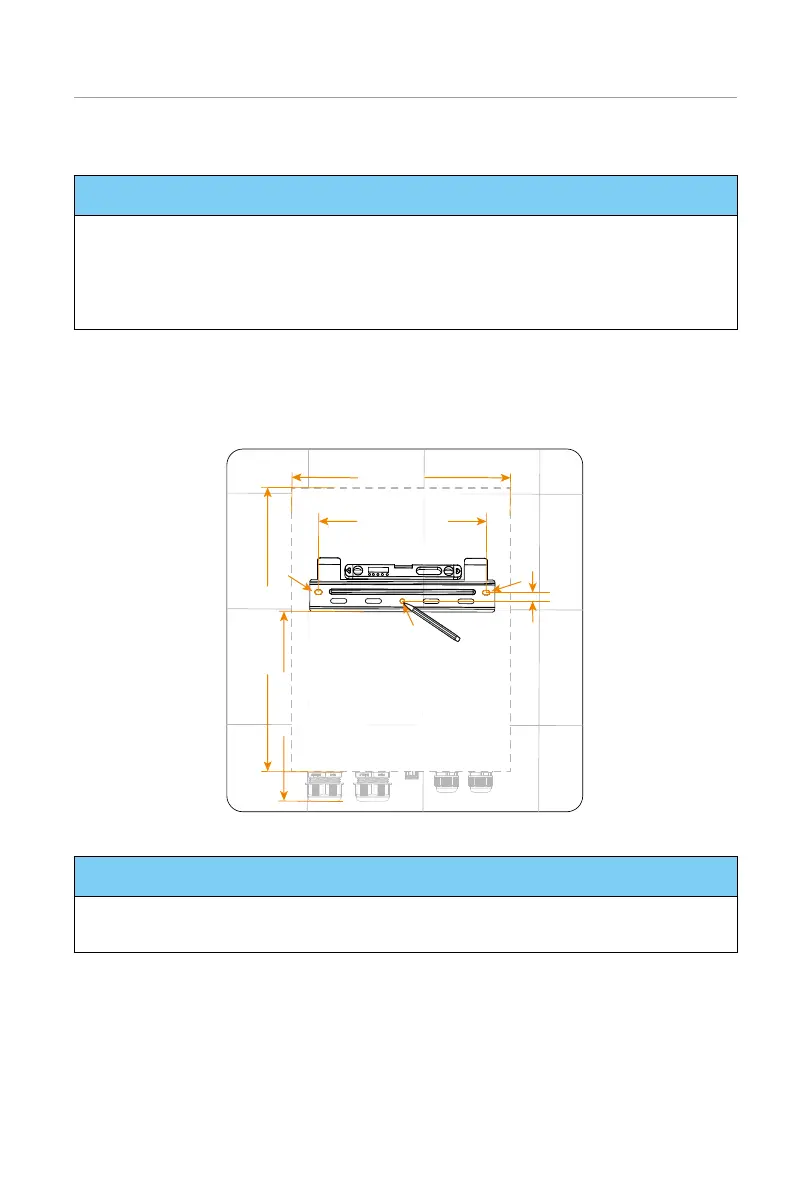
Step 1: Position the bracket: ensure that the horizontal distance between X3-Matebox
G2 and the inverter should be no more than 100 cm. For a convenient cable
connection between the two devices, make the bottom of the device be a little
bit higher than the outlet of the inverter. Take out the wall-mounting bracket
from the carton. Put the bracket on the wall and mark the position of the bracket.
360 mm
290 mm
15 mm
441.2 mm
595 mm
Figure 6-54 Positioning the matebox bracket
NOTICE!
• Observe the bubble of spirit level and adjust the mounting bracket until the bubble
stays in the middle.
Step 2: Remove the wall-mounting bracket from the wall. Drill the three holes at the
depth of more than 60 mm with a Ø10 drill bit.

 Loading...


